The following example demonstrates the procedure for creating connected systems by dragging a system from the Toolbox and dropping it onto a compatible system in the Project Schematic.
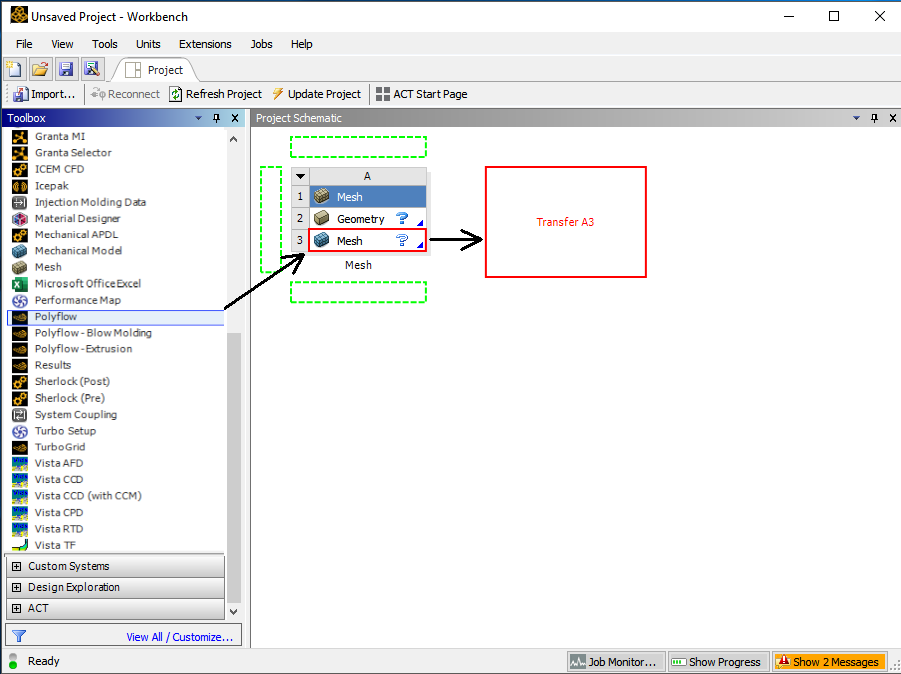
Starting from a project with an up-to-date Geometry and Mesh component system, select the Polyflow-based component system from the Toolbox; the compatible drop targets are highlighted in green.
Drag the system over the Project Schematic and pause over the Mesh cell of the Mesh component system; the Mesh cell target is highlighted in red and a message informs you that selecting that target will transfer the data from cell
A3to the new system.Drop the system on the drop target and a transfer data connection is created between the Mesh cell
A3and the Setup cellB2.Note that Mesh cell
A3becomes Update Required, this is because the input data for the new system has not yet been generated by the ANSYS Meshing application.Right-click Mesh cell
A3and select Update.Double-click Setup cell
B2; Polydata launches and loads the mesh from cellA3.
In the previous example, a transfer data connection was created. Shared data connections can also be creating by dragging a system from the Toolbox and dropping it onto a compatible system in the Project Schematic. The type of connection that Workbench creates depends on which drop target you select. The red preview messages in the Project Schematic inform you of the type of connection(s) that will result from your action.
Figure 2.4: Applying the Mesh Settings to a New Polyflow-Based Component System by Dragging and Dropping Systems