


The Project overview dialog box shows all the nodes of a project with the modifiable properties and their assignments to placeholder registrations. Values can be edited directly.
To open this dialog box, from the menu bar select > .
Project Placeholders
For more details, see Placeholders.
File Path Options (Automatic Relocation)
This feature allows you to move optiSLang projects to other locations. When moved, file paths referenced in the project may not be locatable. These file paths can be automatically changed to the new locations.
To see this section of the dialog box, click .
Requirements:
File must have exact same name as missing file.
Missing file must be located in one of the following places:
A sub-folder of the project base directory (except sub-folders in the .opd folder).
A location specified by an external file source.
How it Works:
Specify external file sources in the External file sources list.
File sources can be XML files, PLMTXT files, or directories.
Files extracted from these sources are provided as replacement suggestions for path placeholders.
Suggestions with the same file extension as the given file are shown at the top of the list.
You can use extracted files to automatically replace missing files. The missing file can be replaced by an external file with the same name.
Path types are color coded:
Green: file/path exists
Yellow: no path specified yet
Red: file/path does not exist
How to Use:
If the external file source you want to scan is a folder, set the depth (D) and height (H) values.
Folder scans are affected by the given search depth and height.
Depth sets the number of levels that the search can go downwards from the given directory.
Height sets how many levels go upwards from the given directory, before the scan is started.
The default value for scanning height is 0. The default scanning depth is based on the project's default settings.
Depth=1, height=0 scans the specified folder plus all sub-folders; sub-subfolders are ignored.
Depth=0, height=1 scans the folder, which contains the given directory.
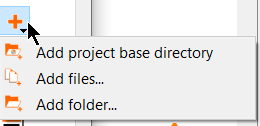
Click the add file source button and select from the following options:
(the directory containing the .opf file)
(can be .xml or .plmtxt, multiple files can be selected)
(scans the selected folder for files)
Files from the top source in the list are selected for automatic relocation first. To change the file source prioritization, drag and drop list entries or select an entry and click the up (
 ) and/or down (
 )
buttons.
)
buttons.To remove sources from the list, select them and click
 .
.Click .
Project Parameters
For more details, see Parameter tab.
Project Criteria
For more details, see Criteria tab.
Project Result designs
For more details, see Result Designs tab.