This tutorial allows you to create graphical programming using the calculator node in optiSLang.
This tutorial demonstrates how to do the following:
Generate a calculator node
Define a mathematical operation
Generate input and output nodes
Connect nodes with the calculator
Perform a mathematical evaluation
To set up and run the tutorial, perform the following steps:
Start optiSLang.
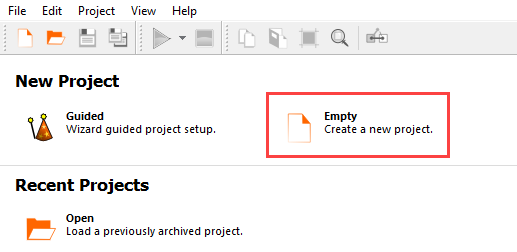
Create a new empty project.
This tutorial provides instructions for manually connecting input and output slots. To display the slots in the node flyouts, from the menu bar select > > .
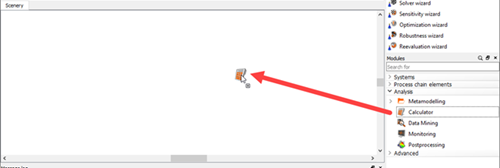
Under Modules, expand .
Drag a Calculator node onto the Scenery pane and let it drop.
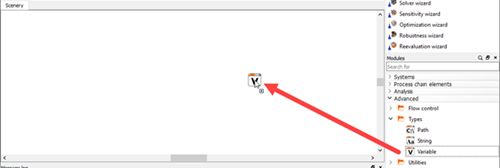
Under Modules, expand and .
Drag a Variable node onto the Scenery pane and let it drop.
Right-click the Variable node and select from the context menu.
Type
Aand press Enter.Repeat steps 2-4, renaming the node as
B.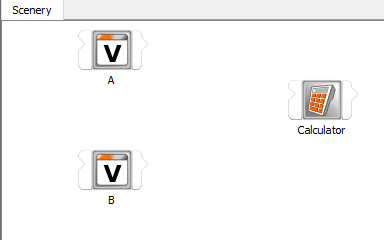
Hover over the right side of the A node.
Click OVar and drag it onto New slot on the left side of the Calculator node.
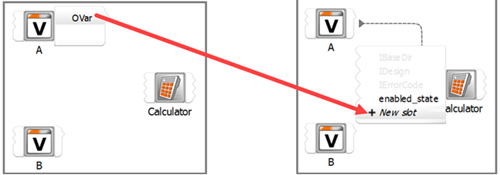
Hover over the left side of the Calculator node.
Right-click OVar and select from the context menu.
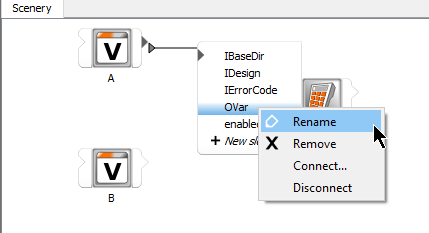
Type
Aand press Enter.Repeat steps 6-10, connecting the OVar input slot of node B to the calculator, and renaming the slot as
B.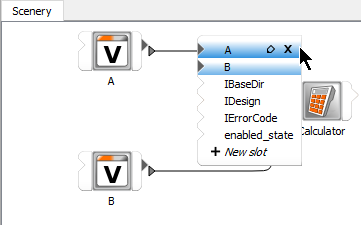
Double-click the A node.
From the Data kind list, select .
Double-click the row 1 cell.
Type
2and press Enter.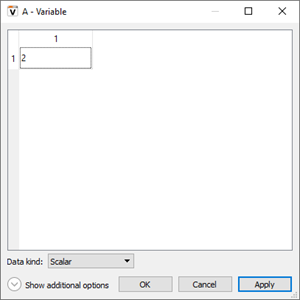
To close the dialog box, click .
Double-click the B node.
From the Data kind list, select .
In the Entries field, type
3.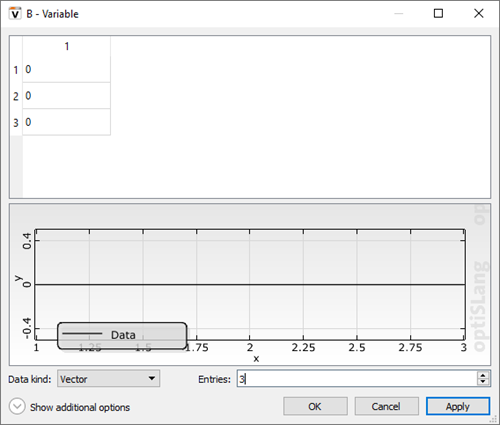
Double-click the row 1 cell.
Type
2and press Enter.Double-click the row 2 cell.
Type
1and press Enter.Double-click the row 3 cell.
Type
3and press Enter.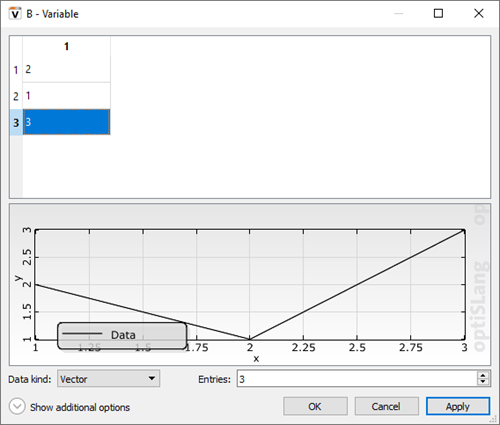
To close the dialog box, click .
Double-click the Calculator node.
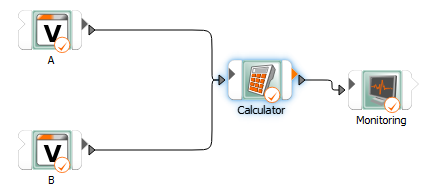
Verify that nodes A and B appear as input slots.
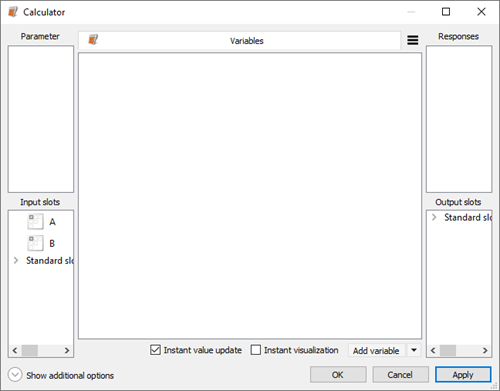
Click .
Double-click the ID cell for the new variable, type
result1, and press Enter.Double-click the Expression cell, type
A+B, and press Enter.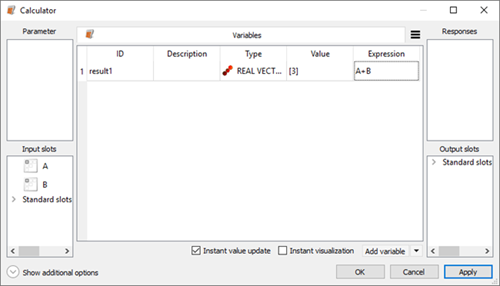
Repeat steps 3-5, naming the new variable
result2and giving it the expressionA*B.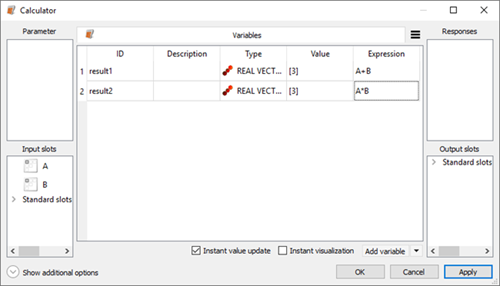
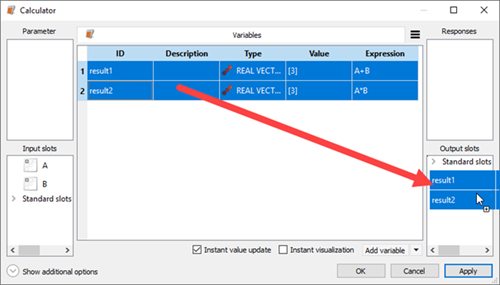
Select both variables and drag them to the Output slots pane.
To close the dialog box, click .
Drag a Monitoring node onto the Scenery pane and let it drop.
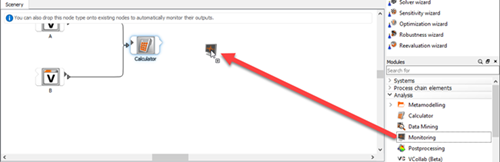
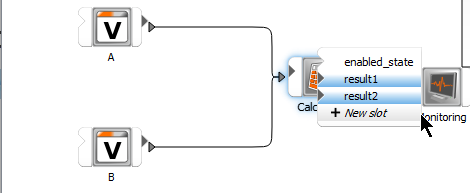
Hover over the right side of the Calculator node.
Click result1 and drag it onto New slot on the left side of the Monitoring node.

Repeat steps 2 and 3 for the result2 output slot.
The new slots appear as inputs slots of the Monitoring node.
To save the project, click
 .
.Browse to the location to save the project and type a project name in the File name field.
Click .
To run the project, click
 .
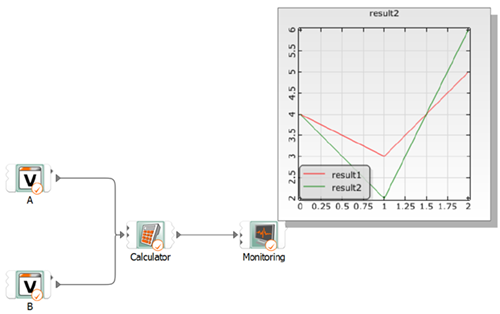
.The flow is executed and the calculation is performed. The results are displayed in the Message log pane
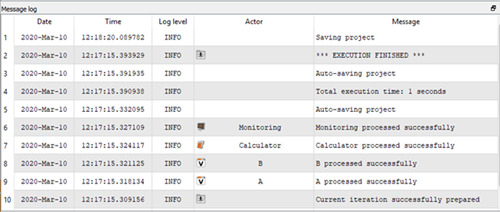
All nodes should be successfully executed.
Right-click the Monitoring node and select from the context menu.
Both results vectors are shown in a diagram.