Files required:
5_4_2_App_MF.zip: Download
Unit System:
mm-second-tonne-Newton
Summary:
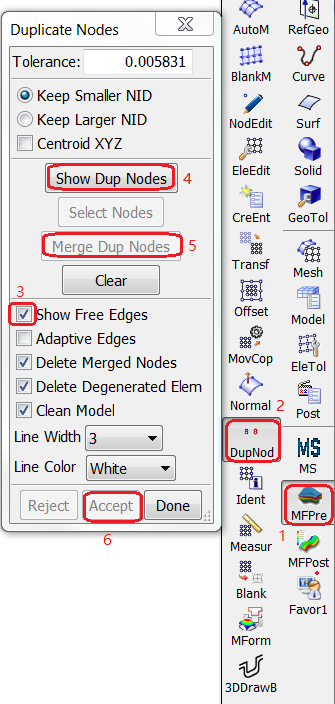
Check and merge duplicate nodes, tolerance 0.05mm - good for most cases.
Check for normal consistency - all tooling mesh normal should be consistent.
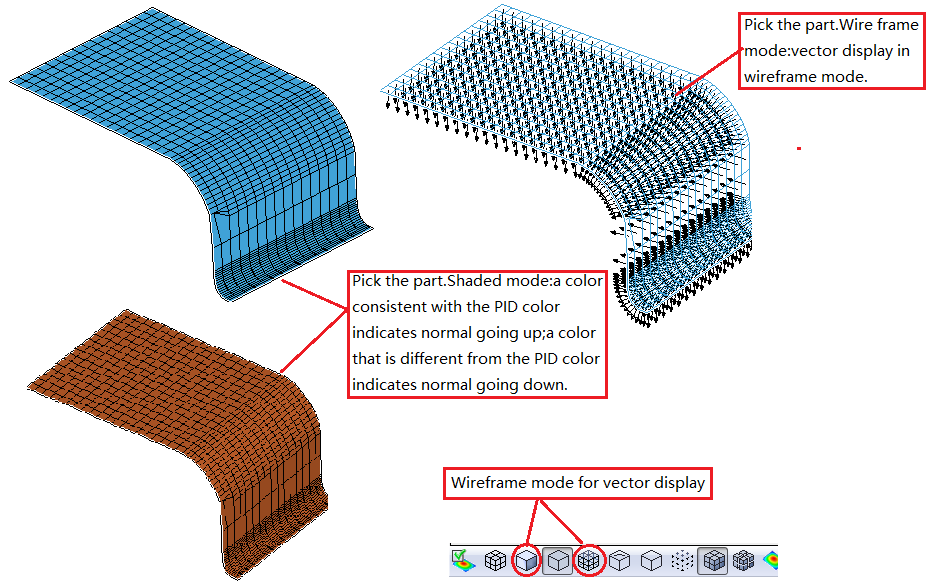
Normal orientation: blank normal up, upper tools normal down, lower tools normal up.
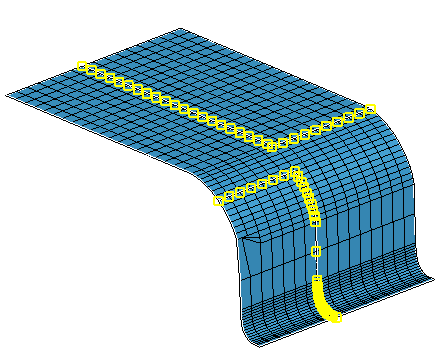
Free edge - use ElEdit to check for free edges. Small gaps mostly okay, big overlaps will be a problem.
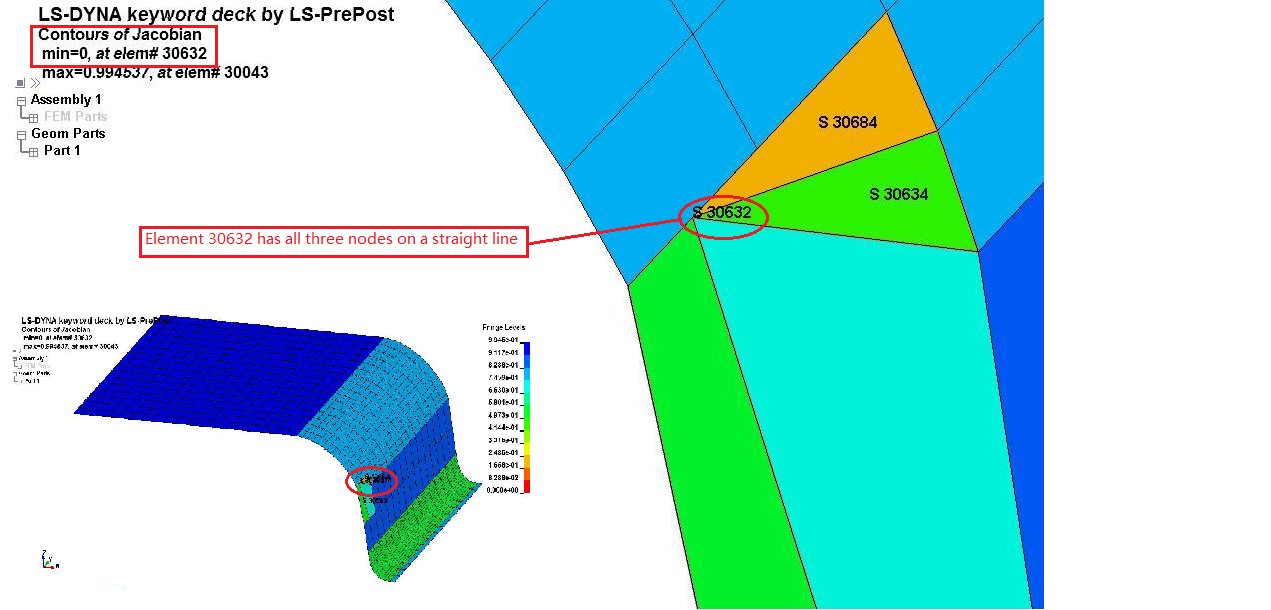
Check zero or very small Jocabian for collapsed elements. This messes up the normal determinations for contact. Use 'model check'.
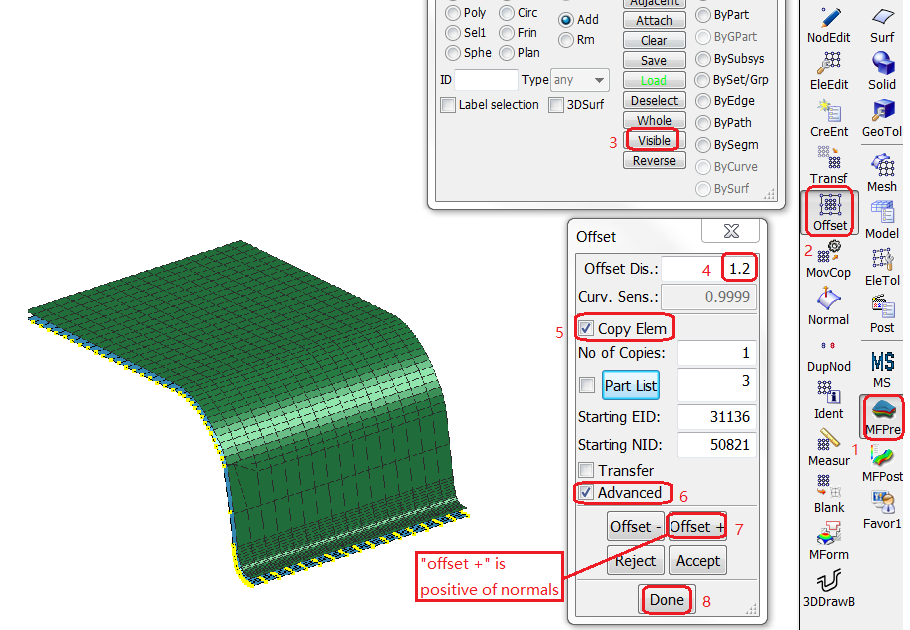
Least amount of work needed for tool mesh if LS-PrePost tool mesher is used.
Click in the right toolbar.
Click in the MFPre toolbar to open the Duplicate Nodes dialog.
Activate the Show Free Edges check box.
Click .
Click .
Click .
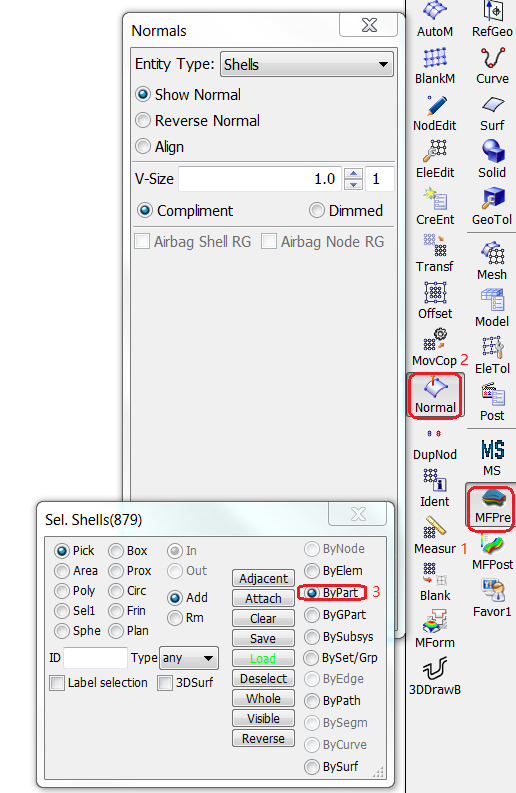
Normal orientations: blank normal up, upper tools normal down, lower tools normal up.
Click in the right toolbar.
Click in the MFPre toolbar to open the Normals dialog.
In the Select Shells dialog, select ByPart.
In the Graphics Window, pick the part.
In the bottom toolbar, click the wireframe display button to show vectors.
Click in the right toolbar.
Click in the MFPre toolbar to open the Normals dialog.
In the Normals dialog, select Reverse Normal.
In the Select Shells dialog, select ByPart.
In the Graphics Window, pick any element on the part.
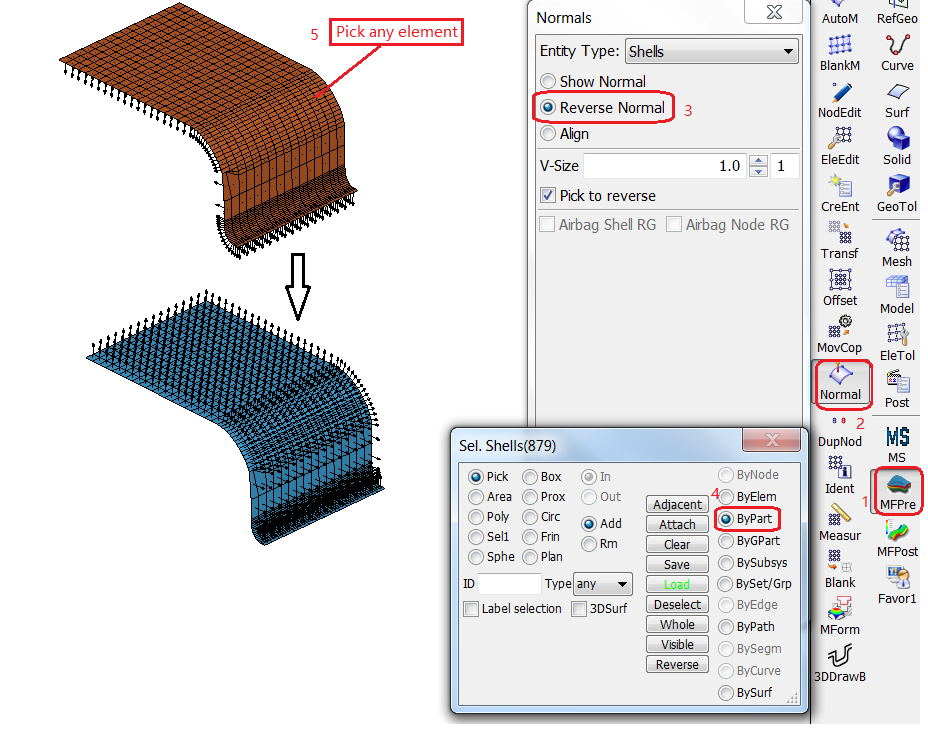
Reverse a part normal based on one seed element normal.
Auto reverse works within one part boundary.
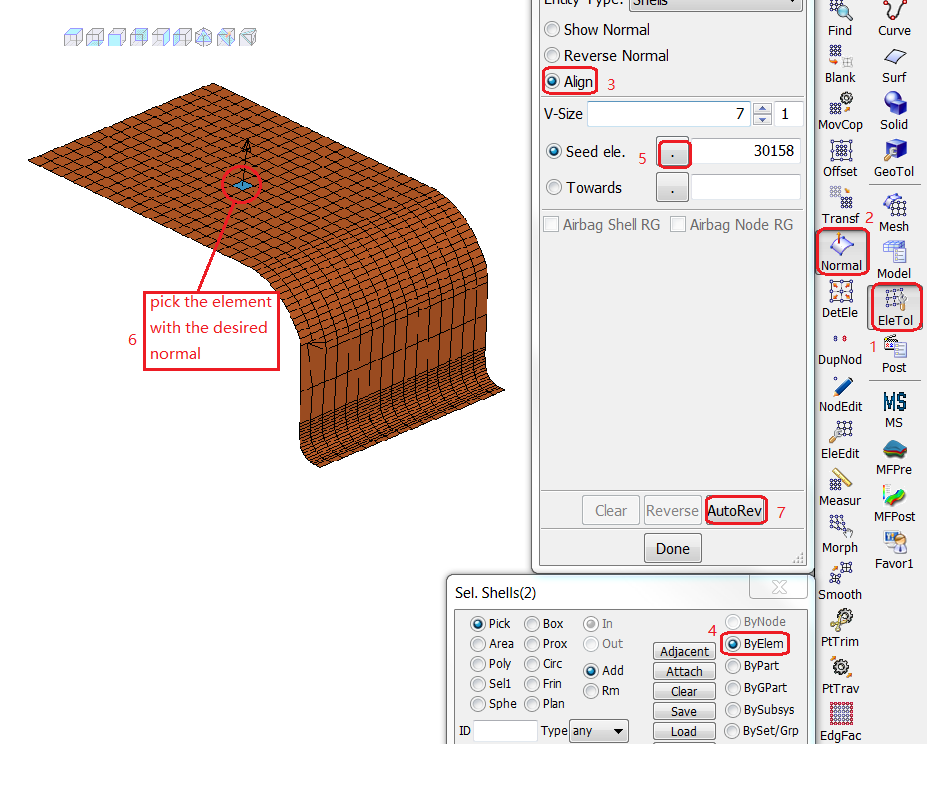
Click in the right toolbar.
Click in the element toolbar.
In the dialog, select Align.
In the Select Shells dialog, select ByElem.
Click the button next to Seed elem..
In the Graphics Window, pick an element that has the Normal you want to reverse.
Click .
.
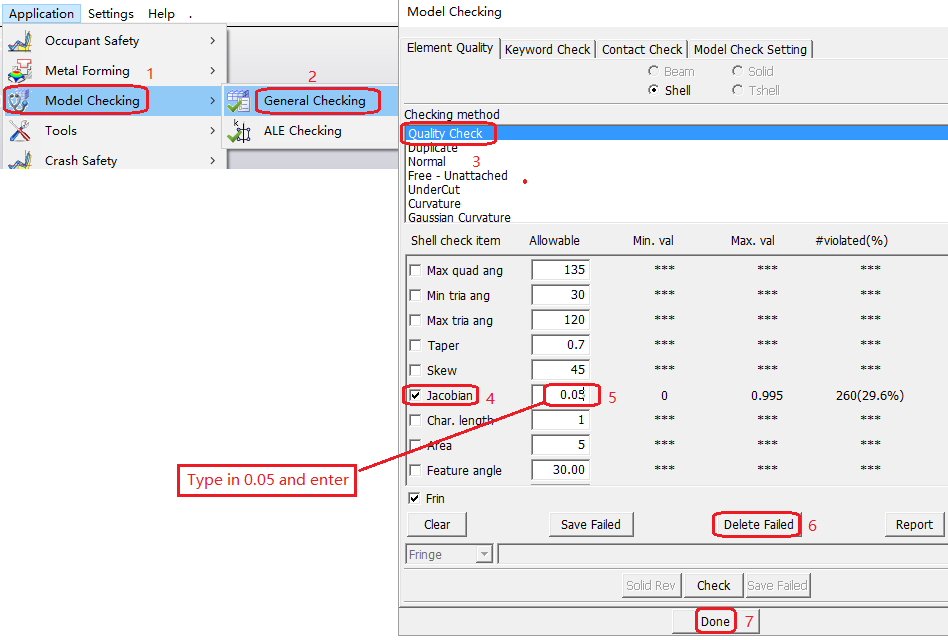
Check for zero or very small Jacobian, and delete failed.
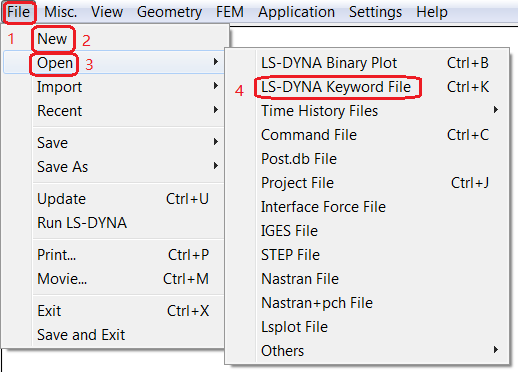
Open the > menu.
Choose > > .
In the Model Checking dialog, select the Quality Check Checking Method.
Activate Jacobian.
Set Allowable =
0.05.Click .
Click .
.