This tutorial is divided into the following sections:
This tutorial demonstrates how to use the Fluent GPU Solver to simulate a turbulent flow around a sedan.
This tutorial describes how to perform the following:
Start the Fluent GPU Solver from the Fluent Launcher.
Read a Fluent case file into the GPU Solver.
Define models and settings for the simulation.
Initialize and calculate the solution.
This tutorial is written with the assumption that you have completed the introductory tutorials found in this manual and that you are familiar with the Ansys Fluent outline view and ribbon structure. Some steps in the setup and solution procedure will not be shown explicitly.
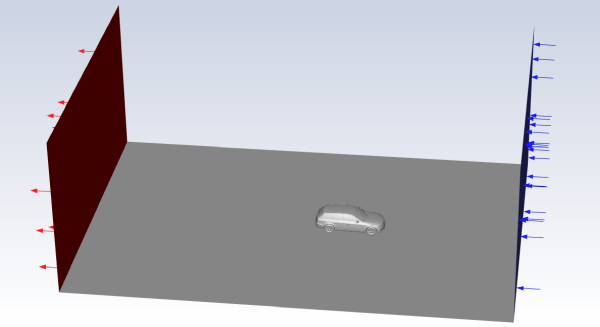
The problem considers the turbulent flow of air around a sedan at a free stream velocity
of 30 m/s. The sedan modeled here is shown in Figure 33.7: Problem Schematic.
The following sections describe the setup and solution steps for this tutorial:
To prepare for running this tutorial:
Download the
sedan_2m.zipfile here .Unzip
sedan_2m.zipto your working directory.The file,
sedan_2m.cas.h5, can be found in the folder.Use the Fluent Launcher to start the Fluent GPU Solver.
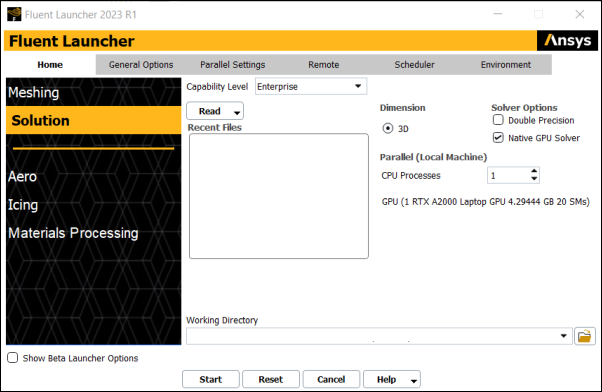
Select Solution in the top-left selection list.
On the Fluent Launcher, set the Capability Level to Enterprise, then enable Native GPU Solver under Options.
After enabling Native GPU Solver, the GPUs available on your machine will be listed under CPU Processes
(optional) To use the GPU solver with multiple GPUs, enable the GPUs you would like to use under CPU Processes.
Click Start.
The graphical user interface (GUI) of the Fluent GPU Solver is nearly identical to Fluent Solution Mode, with the only difference being that some unsupported features are hidden within the GPU Solver GUI.
Read the Fluent case file
sedan_2m.cas.h5. File → Read →
Case...
File → Read →
Case...
As the GPU Solver reads the case file, information about the mesh will be reported in the console and converted settings will be reported as follows:
GPU solver defaults are activated for the following unsupported settings (2)
================================================================
Area    Settings          From               To
----------------------------------------------------------------
solver  rhie chow         distance-weighted  momentum-weighted
solver  residual scaling  global             local
For this tutorial, the converted settings are satisfactory.
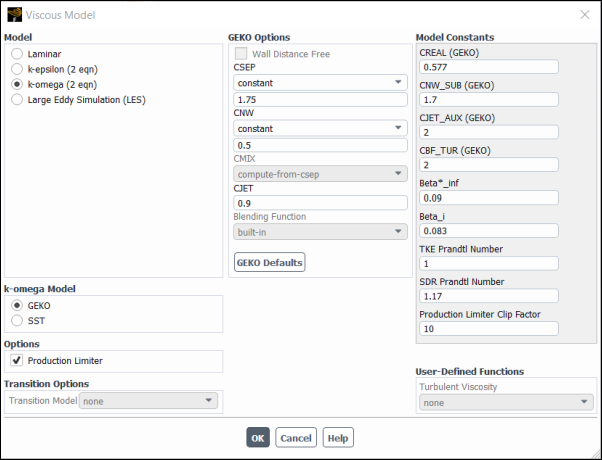
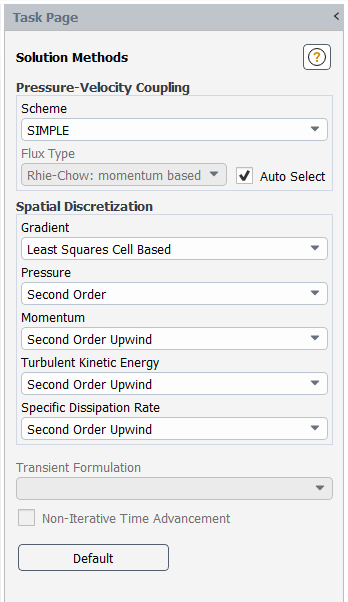
Review the Solution Methods.
Solution → Solution
→ Methods...Retain the default settings.
Initialize the solution using standard initialization.
Solution
→ Initialization →
Options...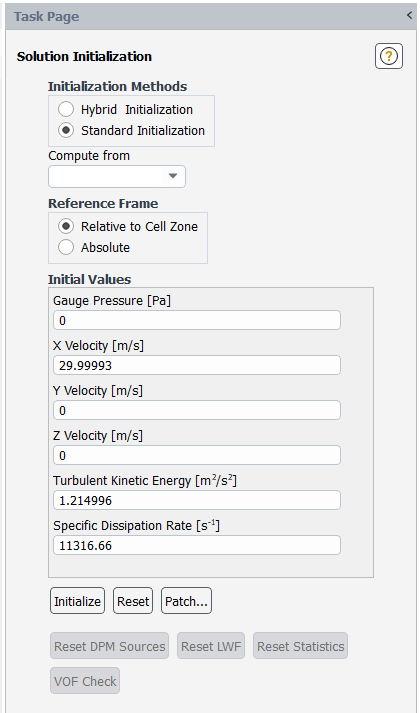
In the Solution Initialization task page, ensure that Standard Initialization is enabled.
From the Compute From drop-down list, select velocity-inlet-10.
Click the button to initialize the solution.
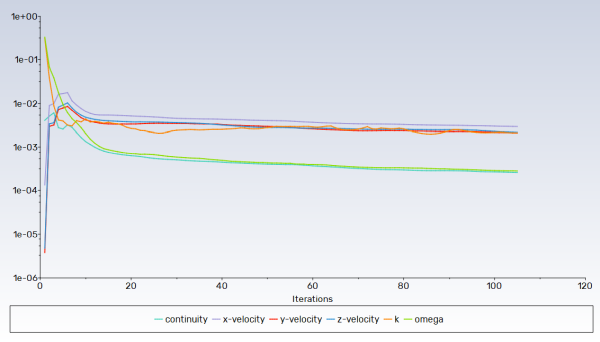
Run the calculation for
5iterations. Solution → Calculation
→ Run Calculation...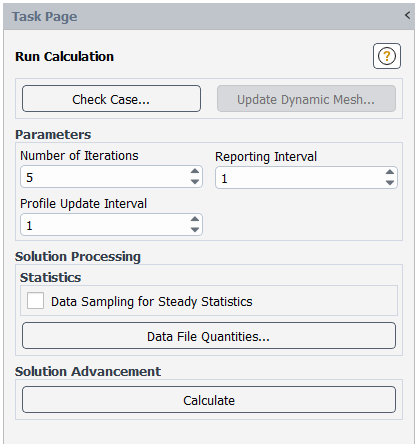
In the Run Calculation task page, enter
5for Number of Iterations.Click Calculate to start the calculation.
Reset the GPU performance meter.
Parallel → Timer
→ ResetRerun the calculation for
100iterations. Solution → Calculation
→ Run Calculation...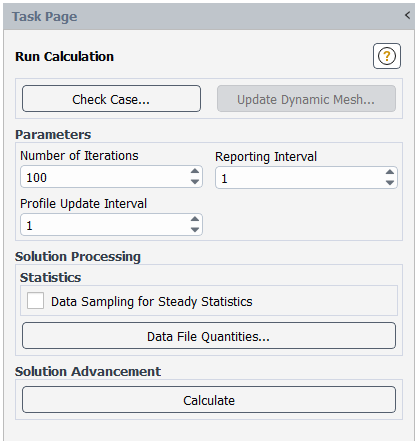
Enter
100for Number of Iterations, then click the button to start the calculation.