


Automated sequences can be easily created and configured, and look very similar to the CHT3D runs created in CHT3D - 3D Conjugate Heat Transfer.
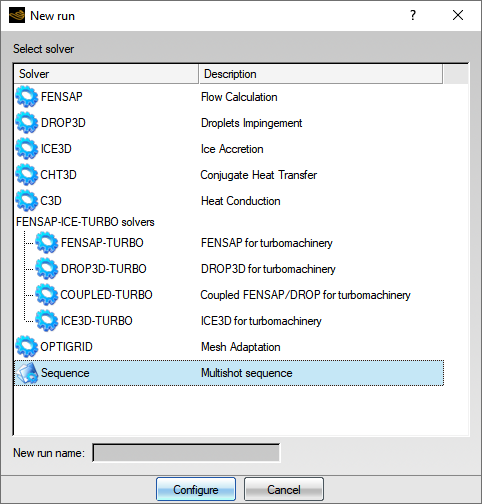
A multishot run is created by selecting the Sequence run type in the New run dialog window, as shown in The Run Manager, followed by clicking the button:
A new window will appear showing a listing of the available sequence types. Select the desired type and provide a label in the New run name box:
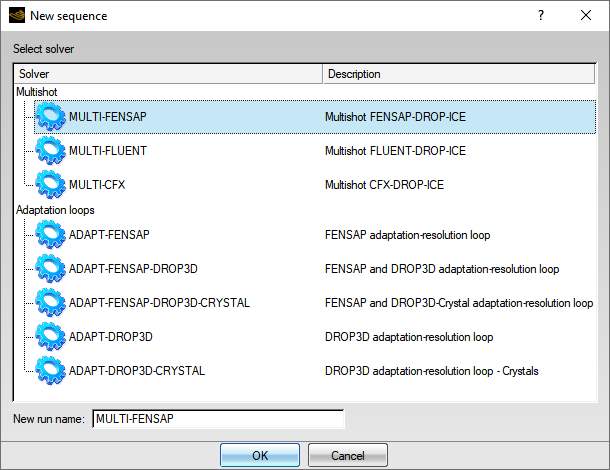
The available multishot types are:
Table 10.1: Multishot Types
| MULTI-FENSAP | A multishot sequence executing FENSAP, DROP3D and ICE3D to simulate the total icing time subdivided into shorter portions (shots), while updating the grid between shots to account for the ice growth. |
| MULTI-FLUENT |
Similar to MULTI-FENSAP, but using Fluent for the flow solution instead of FENSAP. |
| MULTI-CFX |
Similar to MULTI-FENSAP, but using CFX for the flow solution instead of FENSAP. |
| ADAPT-FENSAP | Execution of FENSAP and OptiGrid in a closed loop. |
| ADAPT-FENSAP-DROP3D | Execution of FENSAP+DROP3D and OptiGrid in a closed loop to adapt the grid using both air and droplet flow solution variables. |
| ADAPT-DROP3D | Execution of DROP3D and OptiGrid in a closed loop. |
| ADAPT-DROP3D-CRYSTAL | Execution of DROP3D and OptiGrid, with the Particle type set to Crystal |
Once FENSAP is configured, you can drag-and-drop the FENSAP config icon onto the DROP3D configuration icon and similarly, from DROP3D onto ICE3D. This operation will copy the shared parameters. Remaining non-shared parameters will need to be edited after dragging-and-dropping.
In a multishot sequence, all the solvers must share the same initial grid. Therefore, the first step in the configuration is the selection of the initial grid. The initial grid can be defined in many ways.
Drag-and-drop a grid file onto the grid icon from an existing run in the same project.
Double-click the grid icon to open the file browser.
Right-click the icon and select in the menu.
Open the main configuration file and select the grid file with the file browser.
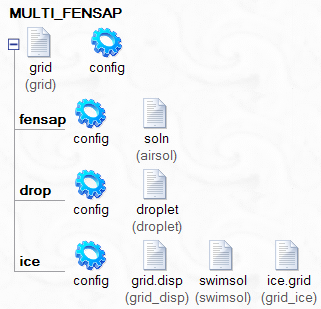
Once the grid file has been defined, all the configuration icons will turn blue.
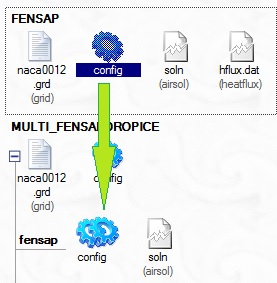
The solver modules can be configured from scratch, or by dragging-and-dropping from other runs in the same project.
Double-click a config icon to configure its corresponding run;
Drag-and-drop the config icon of the source run onto the corresponding icon of the target solver;
Copy (Ctrl+C) and paste (Ctrl+V) the configuration icon from another run.
Note: The grid of the source configuration run does not need to be the same as the grid in the main config file; however for a perfect copy of the settings, the boundary condition list must be identical. If this is not the case, review the boundary conditions to ensure their correctness.
The input and output files of the run will not be changed by this operation.
Once FENSAP is configured, you can drag-and-drop the FENSAP config icon onto the DROP3D configuration and similarly, from DROP3D onto ICE3D. This operation will copy the shared parameters. Other, non-shared, parameters will need to be edited.
In multishot configurations, there is no need to specify any setting for the input and output file names; the file names are automatically defined by FENSAP-ICE. For example, in DROP3D:
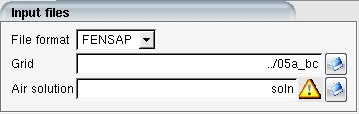
FENSAP-ICE is warning that an input airflow solution file is required but does not exist; the solution file will be created at runtime by FENSAP and managed automatically. This warning can be ignored, it is not necessary to specify this file name or to modify the automatic configuration.
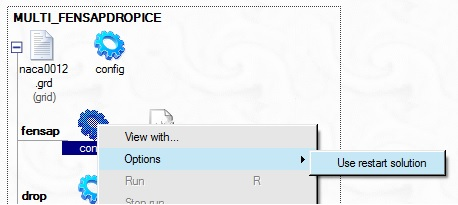
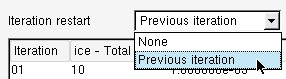
Multishot can be launched with no initial solutions, but in order to speed-up the first cycle, it is possible to specify restart solutions for each solver in the loop. This restart solution will be used for the first cycle of the multishot iteration.
Right-click the config icon of each solver and enable the restart solution for the selected solver:
Alternatively, the restart can be set up in the Initial solution configuration panel:

Double-clicking the main config icon opens the configuration window:
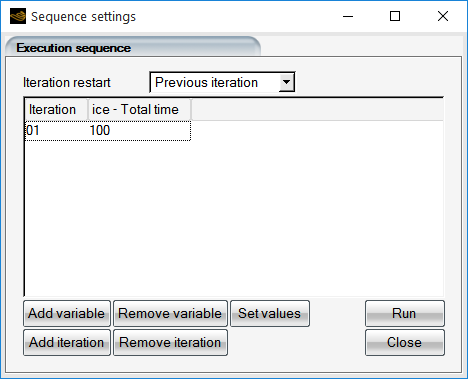
The default setup of the multishot run is a single iteration. Each iteration is a full sequence of solvers (FENSAP-DROP3D-ICE3D, for example).
It is possible to add more iterations and define specific values for some of the configuration parameters at each iteration with the and buttons:
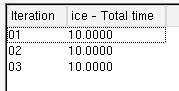
The button will copy the Total time set it in ICE3D as the iteration duration. To simplify the process, set the time value to the desired shot length in ICE3D prior to adding new iterations.
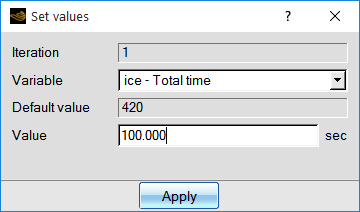
Double-clicking one of the iterations in the list opens a window that allows the assignment of specific values:
The button will permit the definition of additional variables for each iteration.
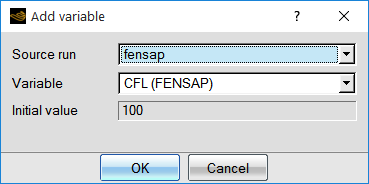
Additional variables will appear in new columns.
Launch the execution using the button in the configuration dialog, or the Run menu in the project window.
Once launched, the execution window will present a log and a convergence graph for each of the solver iterations:
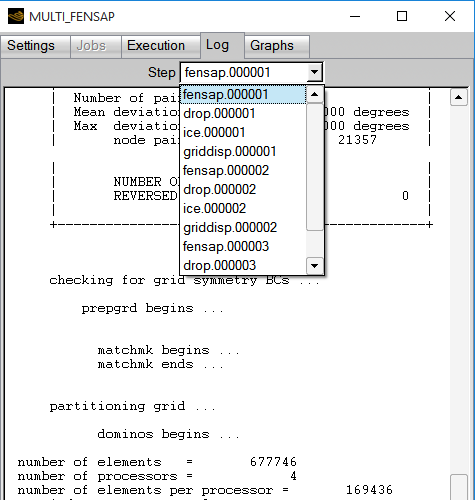
The button allows the selection of a specific output file and iteration to display. Depending on the type of multi-shot sequence, the files available for viewing are the new grids, air/droplet/icing solutions, etc. The results can be viewed using Viewmerical or CFD-Post, based on the selection made in the menu of the project main window.