


The user defined tool icon should be displayed by default. If it is not, it can be turned ON by right-clicking on the Feature Icon Bar and selecting Customize Feature Toolbar... To access the user-defined tools, click the icon to bring up the dialog and make a selection from the dialog by double clicking.
Click the User Tools icon.

The User Defined Tools Window appears.
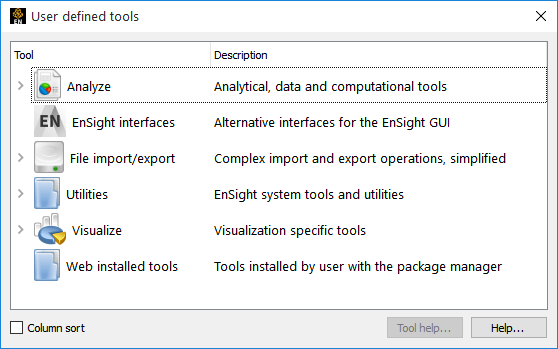
The EnSight QuickTools are a collection of common operations that would normally take many steps to complete in EnSight, packaged in a simpler form. There are six folders, each with a collection of related tools:
Analyze - Tools designed to perform multi-step Engineering Analysis.
EnSight interfaces - Tools that demonstrate alternative EnSight Front-end.
File import/export - Import or Export data to/from the EnSight client in various formats.
Utilities - Support, development, raw core object access, development tools and Python documentation.
Visualize - Tools that animate, move, enhance visualization, or create visualization entities.
Web installed tools - Customized tools installed by EnSight’s package manager from external sources.
Expand the Analyze tree.
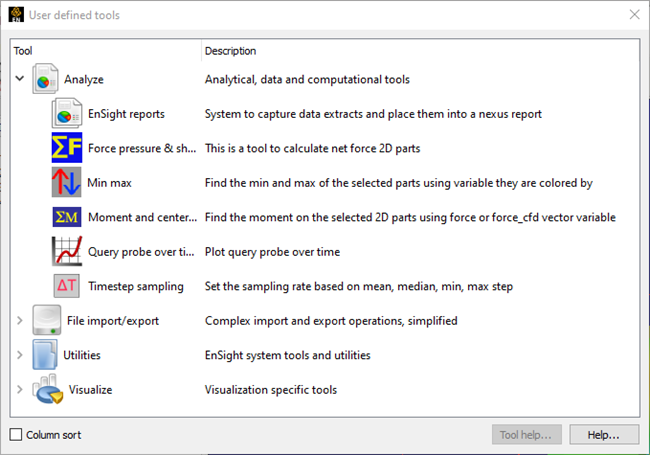
EnSight reports. EnSight can interface with an ADR database.
Force pressure and shear tool. Sum the force (either part by part or total) from pressure, force vectors, or shear. All variables are stored in a Force folder in the variables area. Optionally a .csv spreadsheet file can written out which contains the net components, force coefficients, etc. per part.
Min max tool. Find the min/max of the pans of the colored variable.
Moment and center pressure. Using the Force variables calculated in the Force tool above, calculate the moment about a single point entered by the user.
Query probe over time. Create a query (and optionally plot it) from probes over time. This will pass through time once and create a query for each probe.
Timestep sampling. Resample transient data to a uniform timestep.
EnSight Interfaces is currently empty.

File import/export
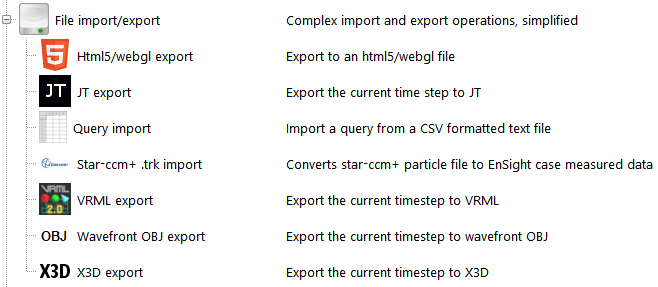
HTML5/webgl export - HTML5 export
JT Export - Exports to OpenJT format
Query import - Import a CSV text file as an EnSight Query
Star ccm+ .trk - converts particle file to measured data.
Wavefront OBJ export - exports 2D and 3D part surfaces to Wavefront OBJ. *
X3D export - X3D is an open-source XML 3D format which is a successor to VRML which is designed to export an X3D file for third-party viewers. See Web3D Consortium for more details.
Note: JT Export, OBJ and X3D all only export visible surfaces at the current timestep.
Utilities - EnSight Advanced and Python programmer tools. For example, there is a support tool, a graphics window resize tool, a stereo tool, a graphics performance testing tool, and an EnSight Python Developer subfolder.
Visualize
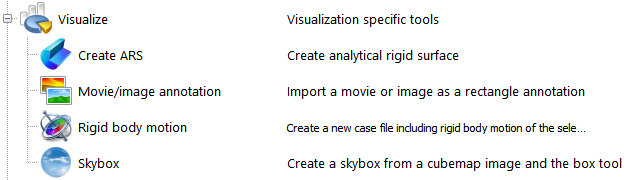
Create ARS. Create Analytical Rigid surfaces by automatically extruding or rotating line parts read in from ABAQUS ODB data. You must check the box in the format options of the ABAQUS ODB data reader dialog to read in this type of part in order to then use this tool to make these parts.
Movie/image annotation. This will import a movie as a texture that is placed on a rectangular annotation box. The movie will interpolate with the transient steps of your data, so if the beginning and ending times are the same, the playback will roughly synch.
Rigid body motion. This was intended to be a demonstration of the Rigid Body Motion capability of EnSight. Read in an EnSight Case Gold file, select the parts of interest, then run this tool and choose the rigid body rotation parameters and it will create a case gold file containing those parts with the appropriate transient rigid body files
See EnSight Rigid Body File Format and Euler Parameter File Format.
Skybox. Using a specially formatted image, called a cubemap image (which is a panoramic background scene containing the five interior sides of a cube) a background skybox is automatically created using the box tool for placement.