


This walkthrough loads a simple, sample Ansys Workbench analysis (creating the analysis is beyond the scope of this document) and then adds the Ansys EnSight extension and attaches the mechanical and fluid analysis workflow to EnSight and then opens the solutions using EnSight.
This example uses the EnSight FLUENT Direct Reader to load the Fluent fluid flow analysis and the EnSight Ansys Reader to load the Ansys Mechanical analysis results, in order to demonstrate, step by step, an EnSight Workbench workflow using multiple, simultaneous, heterogeneous solutions.
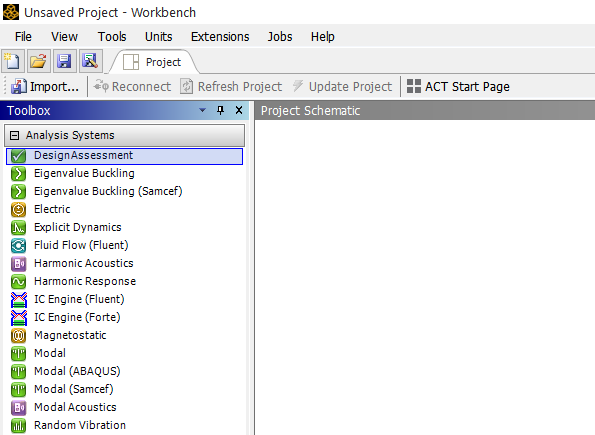
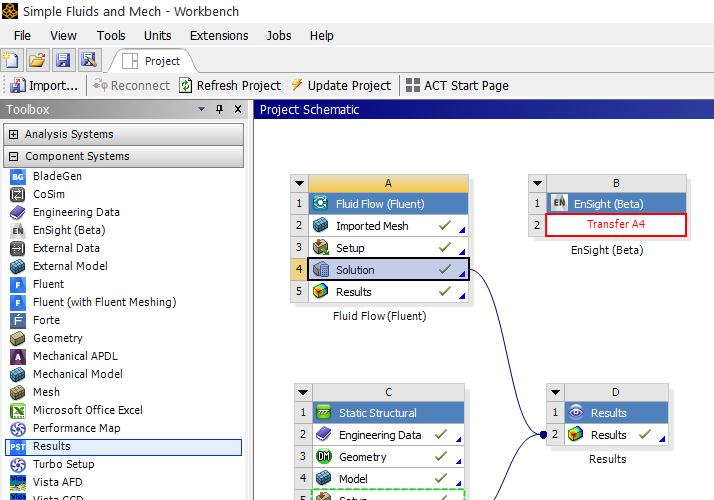
Now, Launch WorkBench, then open a project containing both fluid and structural solutions.
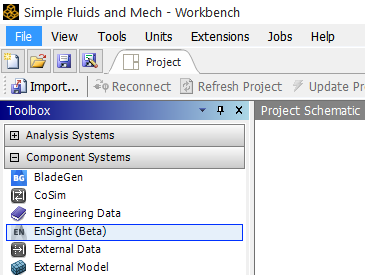
If you have not already done this, Activating EnSight as a WorkBench Extension must be done here so that you can see EnSight in the Toolbox. Then, restart Workbench.
Upon restarting Workbench, you should see the EnSight extension under the Component Systems pulldown in the Toolbox Workspace on the left side.
Load the Workbench project using File → Open. Now drag the EnSight extension from the Component Systems list onto the Project Schematic. A red, square landing pad will appear in the Workbench Project Schematic space to give you guidance.
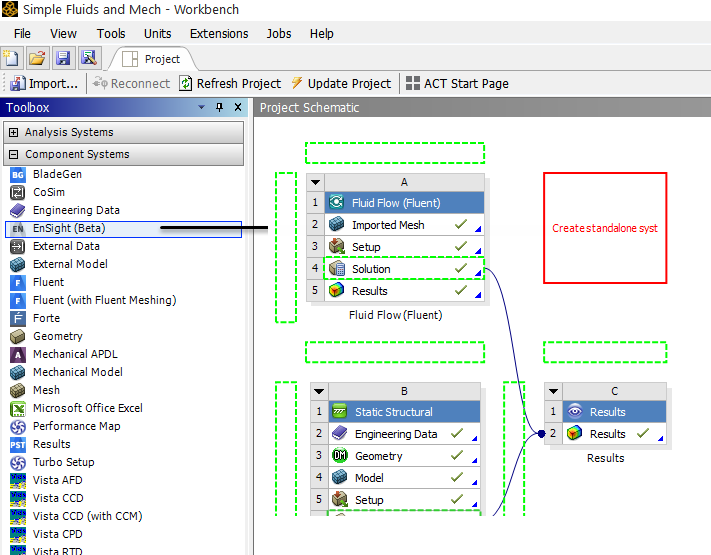
Now an EnSight system is established in your Project Schematic and ready to be linked up.
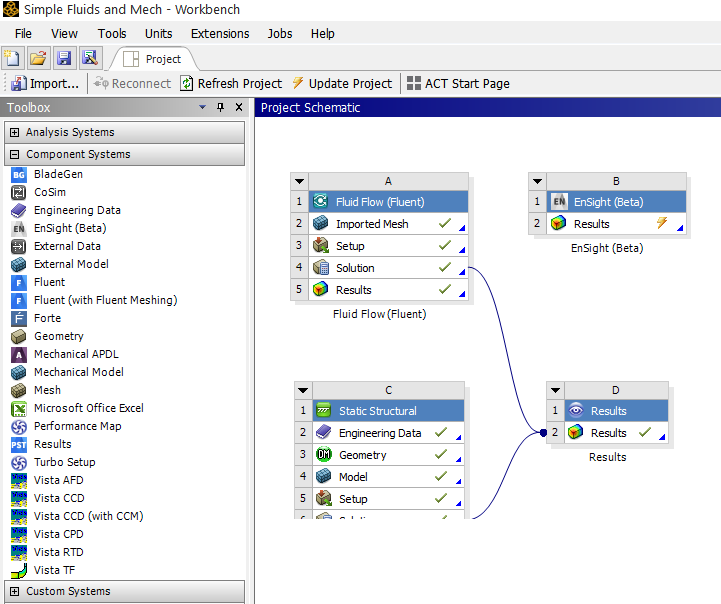
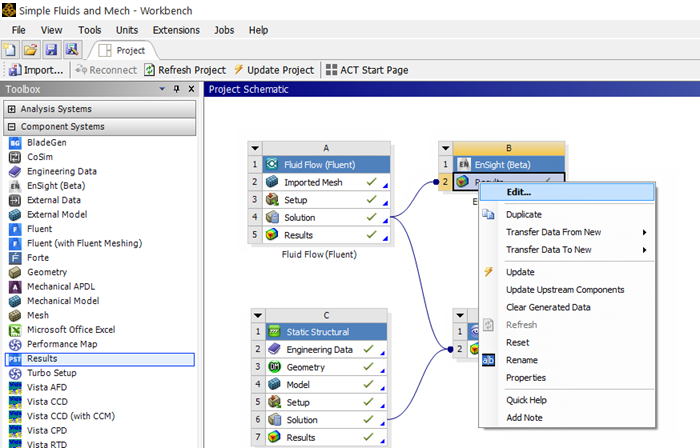
Now drag the Fluid Flow Solution on to the Results under EnSight to link the Solver output to EnSight's input.
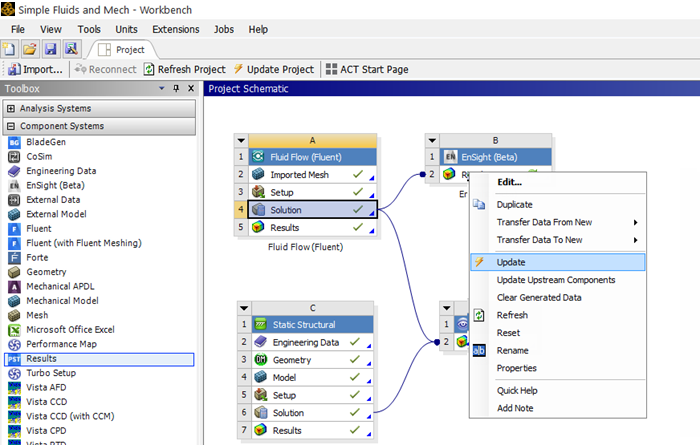
Now, EnSight is linked to the solution. Right-click the green arrows in the EnSight Results to update the link.
Important: Any time your result has the double arrows, then it must be updated. A check box means your results are current. Updating EnSight Results prepares the data to be loaded.
The EnSight results will show a check box when they are properly updated. Now double-click the EnSight Results or right-click Edit... which will startup EnSight and load the Solver Solution for interactive use.
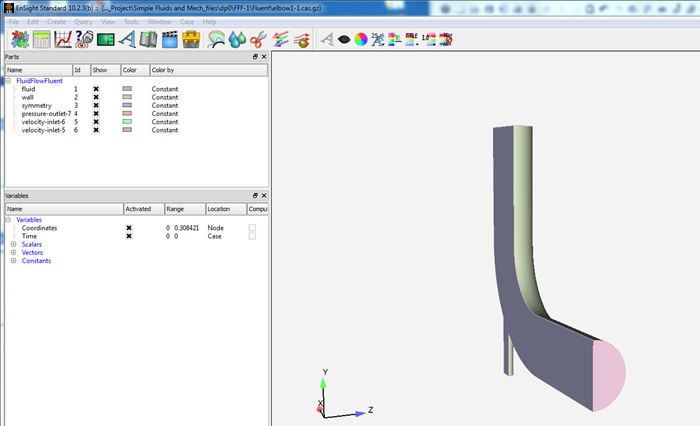
The EnSight session will start up with only the Fluent solution loaded as shown below.
Note: Only the Fluent results were linked up to EnSight, so only the Fluent results are loaded. This portion of the manual assumes that you know how to use EnSight from here. If not, from the top menu of EnSight, Help→ Getting Started Manual.
Within EnSight's menu, File → Quit to exit EnSight. Now, back in the Workbench environment, in the Project Schematic area, let's also add the structural solution to the EnSight process. Drag the structural solution onto the EnSight results section as shown below.
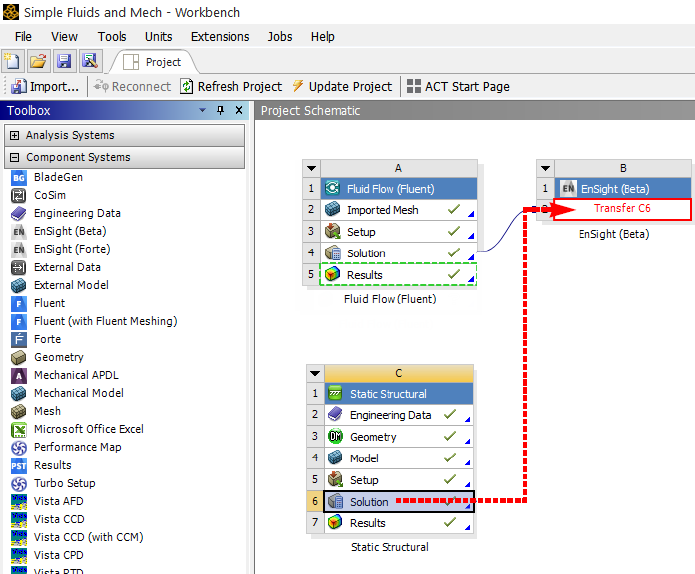
You now have two links into the EnSight results section, as shown below but EnSight's Results show the double arrow indicating they need to be updated.
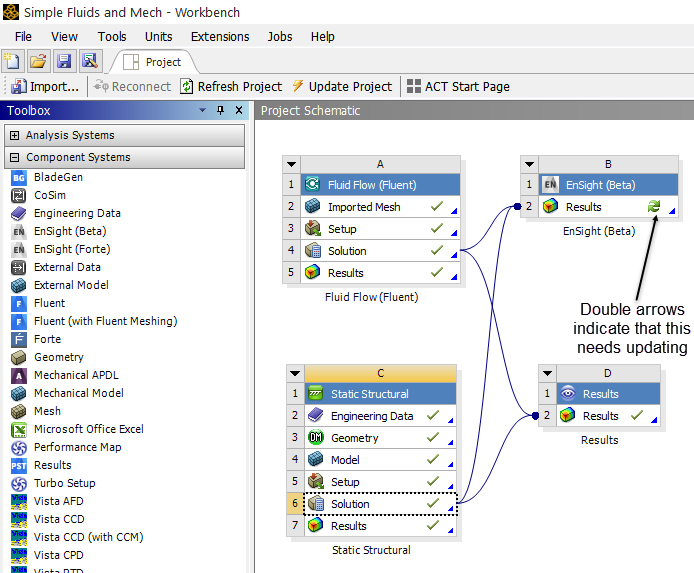
Now, with the new link, again, notice that there is no longer a check box on the EnSight results. We need to update the EnSight results. On the EnSight Results,right-click Update.

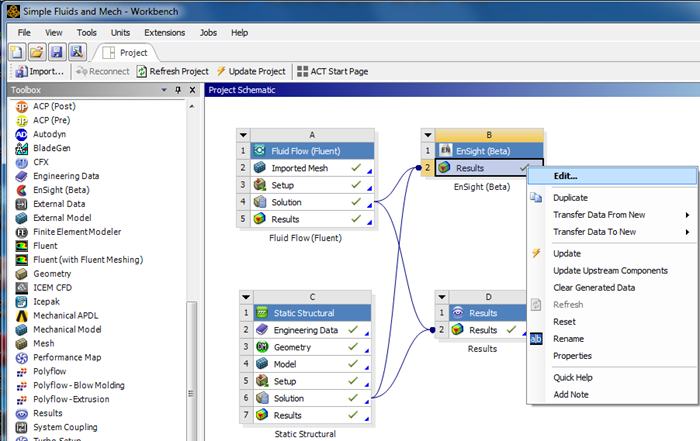
Now let's open EnSight and load the Fluid Solution and the Structural Solution. right-click Edit or double-click the EnSight Results section as shown below to start up EnSight and load the solution data:
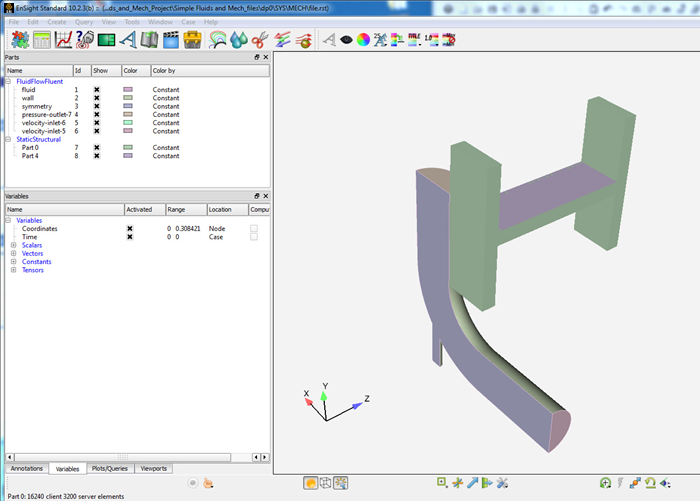
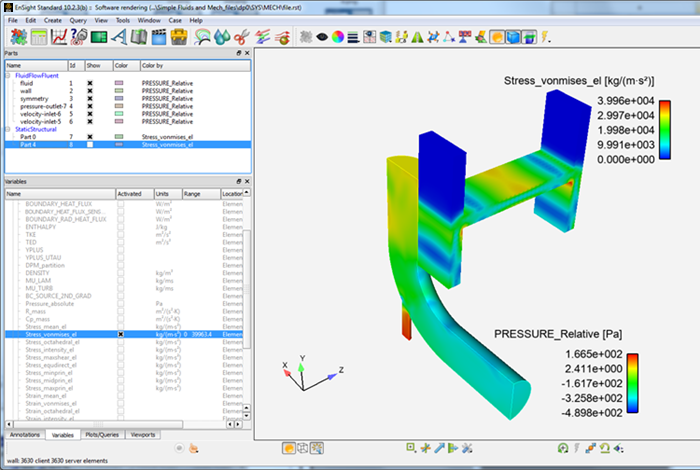
EnSight now opens with both Fluid and Structural solution results (see Load Multiple Datasets (Cases)).
Now, set the EnSight properties in the Workbench Properties View to enable the Beta feature in EnSight to see Units (units are labels only, more details are discussed later in the Properties View). To adjust EnSight properties, select the EnSight Results (click on the EnSight Results) and in the top menu, View → Properties. Toggle on Advanced EnSight Features; now adjust the EnSight Advanced properties (shown below) as described. Close the properties view by right-clicking the Title Bar, and choosing . If EnSight is running, quit EnSight and then double-click on the EnSight Results to reload the Solution with EnSight using the Beta features that you have toggled on.
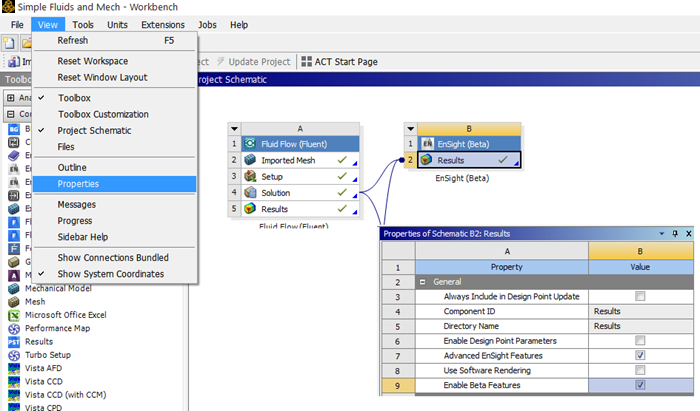
Select EnSight Results.
From the top menu, →
Toggle on Advanced EnSight Features to expose other toggles. Toggle on Enable Beta Features.
Color by variables from each of the two solutions simultaneously. This is the view below (with units shown in the legend titles), that you will see if you have enabled Beta features. If you don't see units in the legend bar, go back to step 15 and then make sure you have quit and restarted EnSight after you enable the Beta features.
Quit EnSight when you are done with your simultaneous post-processing of the two solutions.
Consider saving your updated Workbench project, and then exit Workbench.
Important: Saving a Workbench project enables you to re-open the project on the machine that originally created it. To make the project available on another machine, you need to use File → Archive to create a project archive. To open the project on a different machine, run File → Restore Archive on that machine.