


Modifying Subdivision Surfaces
| Subdivide | Use the Subdivide tool to add more faces to a selected body without changing its shape. Specify the Cut count (1-3) or use the slider to set the value indicating the number of subdivisions. For a cut count n, every edge is subdivided into e = 2n edges. Every four-sided face is subdivided into e2 faces. For example, for a cut count of 1, every edge will be subdivided into 21 = 2 edges. Four-sided faces will be subdivided into 22 = 4 faces. 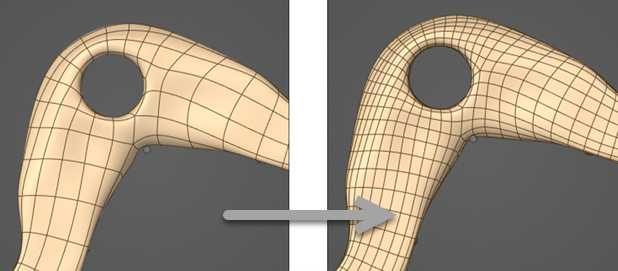 |
| Bridge | Use the Bridge tool to connect two selected regions. You can select faces or edges. When selecting edges, select a pair of edges to connect. 
You can also create holes using the Bridge tool if the connection between the faces is already filled with material. Ensure there is enough topology around to allow the hole. You may need to use the Subdivide tool first. 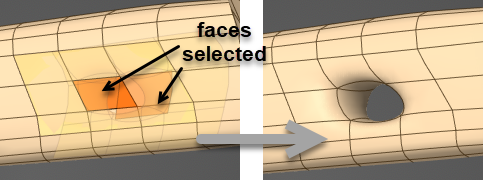 |
| Split | Use the Split tool to split the selected edge and create four-sided patches (in the normal direction to the edge). 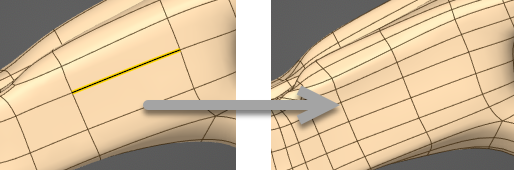 |
| Crease | Use the Crease tool to create a crease around selected edges or vertices. Specify an appropriate value for the Crease factor. Use the
Sharpen 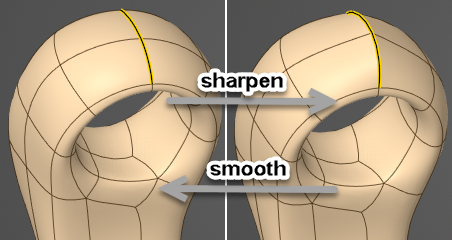 |
| Snap | Use the Snap tool to snap the subdivided surface to the faceted body. This tool is useful if you convert from a faceted body to a subdivision surface and it deviates from the original body. Select the subdivision surface body and then select the faceted body, plane, or secondary selection to snap to. 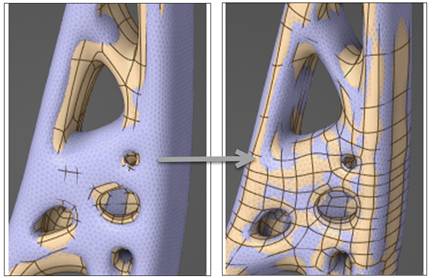 |
| Smooth |
Use the Smooth tool to smooth the subdivision surface body to the faceted body selected. Select the subdivision surface body and then select the faceted body to smooth the subdivision surface. |
 option to make edges sharper. Use the
 option to smooth sharp edges.