Snippets are existing lines of code that you can quickly and easily insert in the command line, saving you from repetitive typing. As you use the console, you can insert any of the snippets that Ansys supplies for ACT-specific commands. Additionally, you can begin building your own library of snippets to either supplement or replace supplied snippets.
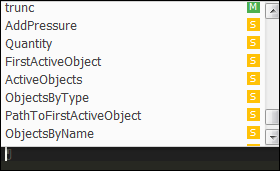
Descriptions follow for the supplied entries in the Snippets panel:
The snippet ExtAPI inserts
ExtAPI.in the command line, providing you with immediate access to the API. From the autocomplete options in the tooltip, you can then begin selecting additional attributes to build your command.The snippet Snippet Template provides sample code for swapping two variables. The comments explain how a snippet can contain editable fields, which are automatically selected for modification when the snippet is inserted. When a field is selected, you can type a new value to override the default value or let the default value remain. Pressing the key moves the cursor to the next editable field.
Viewing and Inserting Available Snippets
When nothing is entered in the command line, pressing Ctrl + space opens a list of suggestions displaying all available variables and snippets. When you scroll down to the snippets, you can see those predefined for standard Python commands and those that appear in the Snippets panel.
If you know the name of a snippet, you can begin typing the name to find it in the list of suggestions. The supplied Snippet Template provides code for swapping two variables.

When a snippet selected, you can easily see all editable fields in the command line.
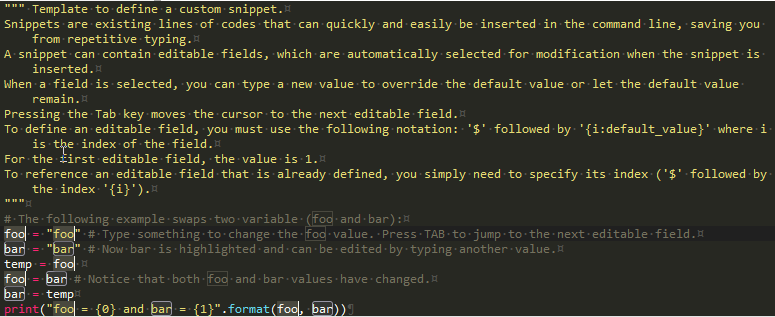
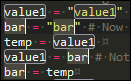
For example, in Snippet Template, the first editable field
(foo) is highlighted.

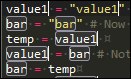
Typing something changes the foo value to whatever you type
(value1). Notice that both foo
values change to value1 in one operation.
Pressing the Tab key moves the cursor to the next editable field,
causing bar to be highlighted.
Typing something changes the bar value to whatever you type
(value2). Notice that both bar
values change to value2 in one operation.
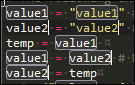
Pressing the Tab key again finalizes the code.
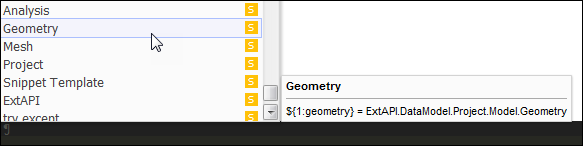
To define an editable field, you must use the following notation:
${,
where #:#}# is the index of the field. For the first editable
field, the value is 1. To reference an editable field that is
already defined, you simply need to specify its index
(${) as shown in the following
figure for the snippet Geometry. #}
For the previous example for swapping two variables, you can define the following snippet:
temp = ${1:foo}
${1} = ${2:bar}
${2} = temp
Creating and Managing Snippets
The Snippets panel displays all personal snippets, which are either those supplied by Ansys for ACT-specific commands or those that you create. It does not display snippets for basic Python commands because these snippets cannot be removed from the console. For example, the Snippets panel displays the supplied Snippet Template for swapping two variables, but it does not display the snippet lambda for this basic Python command.
In the Snippets panel, you can click a snippet to insert it in the command line.
Note: When typing in the command line, autocompletion displays all snippets in the Snippet panel as well as snippets for basic Python commands.
To make creating and managing snippets easy, the console panel provides toolbar bars and a context menu.
Snippet Toolbar Buttons
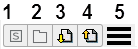
Add a new snippet.
Add a new snippet folder.
Import an existing snippets collection.
Export the current snippets collection.
Show hidden icons (visible only when the console window is not wide enough to display all icons in the toolbar).
Context Menu
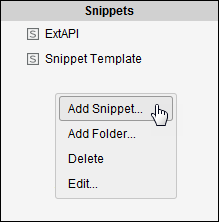
Creating Snippets and Folders
You can create snippets and folders using any of the following methods:
Click the button with the three dots to the right of an entry in the command history and select .
Click the toolbar button for adding a new snippet or folder.
Right-click a snippet or folder in the Snippets panel and select or . Where you right-click determines where the new snippet or new folder is placed in the Snippets panel.
When you right-click a folder, the new item is created inside this folder.
When you right-click a snippet, the new item is created at the bottom of the containing folder.
Once the snippet or folder is created, the Snippet Properties dialog box opens so that you can specify properties. A snippet has two properties, Caption and Value. A folder has only Caption.
Caption specifies the text to display as the name for the snippet or folder.
Value specifies the code that the snippet is to insert in the command line. When a snippet is created from an entry in the command history, Value displays the code for this entry by default.
After specifying the properties for the snippet or folder, you click to save your changes or to discard the newly created snippet or folder.
Viewing and Editing Snippet or Folder Properties
To view or edit the properties of an existing snippet or folder in the Snippets panel, right-click it and selecting to open the Snippet Properties dialog box. When finished, click to save changes or to exit without saving changes.
Deleting Snippets and Folders
To delete a snippet or folder from the Snippets panel, right-click it and select .
Caution: If you delete a folder, all of its contents are also deleted. Deleting a snippet from the Snippets panel also removes it from the list of suggestions for autocompletion.
Organizing Snippets and Folders
When creating a snippet or folder, you can determine its location by using a particular creation method, as described in Creating Snippets and Folders. To organize existing snippets and folders in the Snippets panel, you can drag them to the desired location in the hierarchical tree structure. Using folders, you can organize your snippets to create personal, reusable libraries.
Importing and Exporting a Snippets Collection
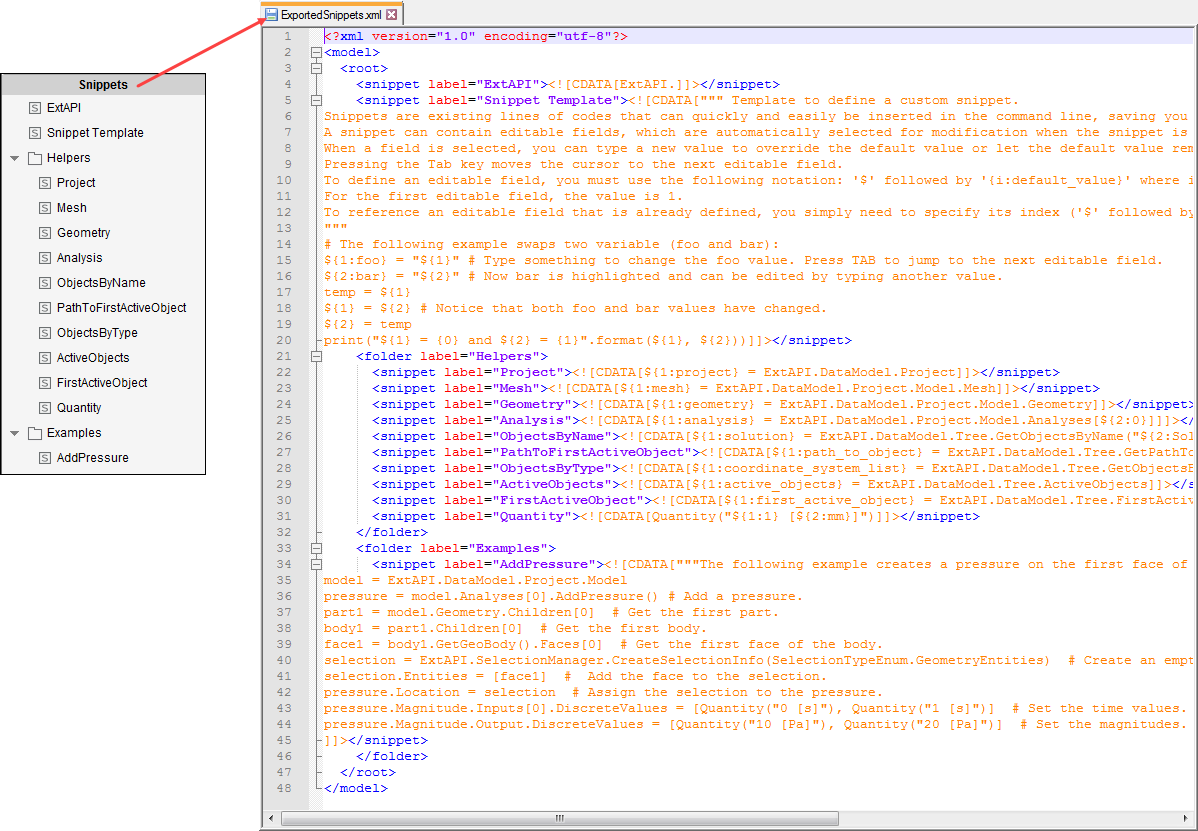
You can import or export a collection of snippets as an XML file.
Clicking the toolbar button for importing a snippets collection (
 ) appends
the snippets in the selected XML file to the list already shown in the
Snippets panel.
) appends
the snippets in the selected XML file to the list already shown in the
Snippets panel.Clicking the toolbar button for exporting a snippets collection (
 ) exports
all snippets in the Snippets panel to the specified XML
file.
) exports
all snippets in the Snippets panel to the specified XML
file.
The following figure shows an XML file created from the export of a snippets collection.