


This topic shows how to use the ACT Workflow Designer to
create an integrated “Squares”
application. This external application accepts an input text file and output text
file as command line arguments. The input file contains a double precision number,
preceded by the string input=. On reading and parsing an
input value, the application computes the square of this value. The application then
writes this result to the output file specified as a command line argument. In the
output file, the string output= precedes the result
value.
You can create this same custom workflow by downloading the compressed file CustomSquaresApp.zip and then extracting the files that it contains to a directory that you can access.
Create and Publish the Custom Workflow
Start Workbench.
In the Toolbox under ACT, double-click Create a workflow. The ACT Workflow Designer starts, opening on a new Workbench tab.
In the Toolbox pane, double-click Add a task group. A task group cell is added to the Workflow Preview workspace.
Select this cell and then specify task group properties in the Properties pane:
For Name, type
Squares.For Version, leave the default value, which is 1.
For Icon, browse to the directory to which you extracted files, select squares.png, and click Open.
For Category, leave the default value, which is ACT.
For Abbreviation, type
Squares.For Parametric, leave the check box cleared.
In the Toolbox pane, double-click Add a task to add a task cell below the task group cell.
Select this cell and then specify task properties in the Properties pane:
For Name, type
Run Solver.For Version, leave the default value, which is 1.
For Icon, browse to the directory to which you extracted files, select squares_component.png, and click Open.
For Application Path, browse to the directory to which you extracted files, select ExampleAddinExternalSolver.exe, and click Open.
Green check marks appear to the right of both cells, indicating that the minimum properties required for publishing are defined.
Select . The Publishing Settings dialog box opens.
For Workflow Name, type
Squares.Click Publish.
Once the workflow is published, the Workflow Designer closes,
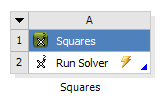
returning you to the Workbench Project Schematic. In the
Workbench Toolbox under ACT, the entry
Squares is now added. Additionally, the files for the ACT
extension named Squares are created here:
C:\Users\YourUserName\AppData\Local\Roaming\Ansys\vXXX\ACT\extensions,
where vXXX is the active Ansys version.
Add the Custom Workflow to the Project Schematic and Configure
To add this custom workflow to the Project Schematic, in the Workbench Toolbox under ACT, double-click Squares .
Right-click the Run Solver cell and select Properties.
In the Properties pane, you will see three properties highlighted: Command Line Arguments, Input Files, and Output Files.
Specify the input file and automatically add the single input parameter that this file contains:
In the Properties pane, click Input Files, which opens the Parse Input File dialog box.
For File Path, browse to the directory to which you extracted files, select input.txt, and click Open.
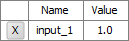
The dialog box displays the single line in this file:
input=1.0.To add this single value to the Parameter Set bar as an input parameter, click .
The table in the upper right of the dialog box displays this name and value.
Click Finish. In the Workbench Project Schematic, a Parameters cell is added to the custom workflow and the Parameter Set bar is shown. An upward arrow connects the Parameter Set bar to the Parameters cell.
Specify the output file and automatically add the single output parameter that this file contains:
In the Properties pane, click Output Files, which opens the Parse Output File dialog box.
For File Path, browse to the directory to which you extracted files, select output.txt, and click Open.
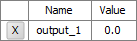
The dialog box displays the single line in this file:
output=0.0.To add this single value to the Parameter Set bar as an output parameter, click .
The table in the upper right of the dialog box displays this name and value.
Click Finish. In the Workbench Project Schematic, a downward arrow now connects the Parameters cell to the Parameter Set bar.
Specify command line arguments:
In the Properties pane, click Command Line Arguments, which opens a dialog box for entering arguments. For this example, you need to specify only references to the input and output files.
Click and then click .
The entry field now contains
[Input File][Output
                                        File]
Click .
No properties are now highlighted. With your custom workflow configured, you are ready to insert the data to process as design points.
Insert Additional Design Points
In the Parameter Set bar, you specify the data that the external application is to process as design points.
In the Workbench Project Schematic, double-click the Parameter Set bar to open it.
In the Table pane, you see the one input value that was in the input file:

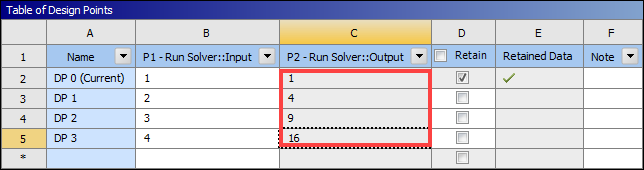
Insert three more design points with input values of 2, 3, and 4 as shown:
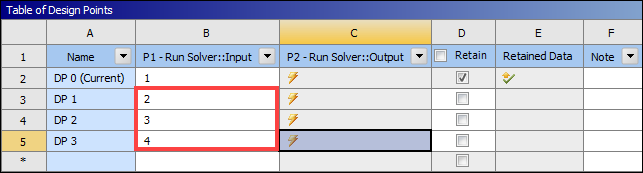
In the toolbar, click Update All Design Points. The executable specified for this custom workflow runs calculating an output for each design point.
When the update finishes, the Table pane displays a result for each design point. In this example, the result is the square of the input value.
Close the Parameter Set bar.
Close Workbench, saving the project only if you want to refer to it later.
Unless you delete the extension Squares, an entry for this
custom workflow remains in the Workbench Toolbar under
ACT. This means that you can always add this custom
workflow to the Project Schematic and then configure and use it
as indicated in this example.
Subsequent sections provide technical information for creating much more complex custom workflows and describes the manual creation process.