


Setting up the Camera
If not already done, consult the material requirements.
The LMK Labsoft software must already be installed on the computer.
To set-up the camera:
Create a dark environment (use a dark room if possible).
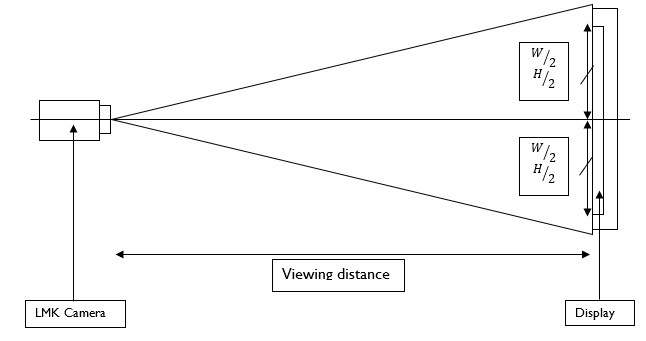
Install the camera on its tripod and position it at a suitable viewing distance from the screen to characterize:
For a review display, place the camera at a viewing distance that equals 2 times the width of the display.
For an immersive display, place the camera at a viewing distance that equals the height of the display.
When measuring an image displayed by a projector, make sure the image is sharp enough and that the camera can see the entire image. The suitable viewing distance is reached when the camera captures the integrity of the image.
Install the objective f 25mm on the LM camera.
Launch the LMK Labsoft software.
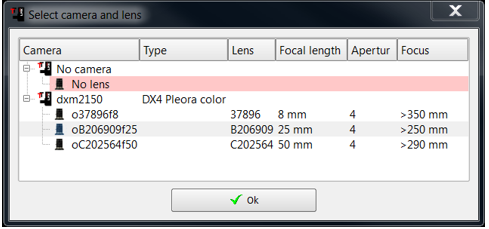
Select the lens you previously installed on the camera (here, the 25mm lens) and click ok.
Click the Live button
 .
.
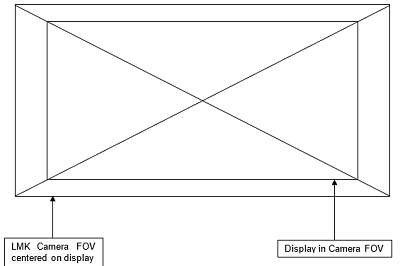
Adjust the position and the focus of the camera. It should aim at the center of the display but it should also be able to see the whole display.
Once the camera is set-up, do not move it until the end of the entire process.
If you note that the 25mm objective does not cover the whole displayed image, change the objective of the camera:
Click
 and
and  .
. Repeat the process from step 3.
Adjust the focus of the camera by rotating the focus ring.
Adjust the exposure time of the sensor so that the windows screen does not saturate (red parts on the Live window camera).
Click
 and adjust the exposure
time and the brightness.
and adjust the exposure
time and the brightness. 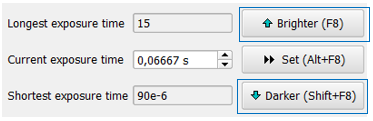
If the image saturates too much, place grey filters on the camera.
Once the focus and exposure time are set-up, click Camera > Recalibration to report those settings in the LabSoft parameters.
If more than one filter is installed on the camera, use Ctrl to allow multi-selection.
In the current window, select Color HighDyn and check Autoscan.
Now, perform the first measurement.