


Creating a 3D Texture
This page shows the first steps of a 3D texture creation.
To create a 3D Texture:
A pattern must already be created.
The pattern is a geometrical item (a part) that can be duplicated to generate a mapping. A pattern can have its own optical properties and scaling factors.
From the Light Simulation tab, click 3DTexture
_3D_Texture.png) .
.
Rename the feature.
-
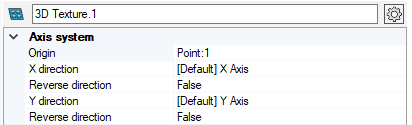
Set the Axis system by clicking a point for the origin point and two lines for X and Y directions or click
_Axis_System_Autofill.png) and select a coordinate
system to autofill the Axis System.
and select a coordinate
system to autofill the Axis System.The Axis System determines where does the mapping begins and in what direction it propagates. It is used as a reference for the position, orientation and scaling of each pattern.
Note: If you define manually one axis only, the other axis is automatically (and randomly) calculated by Speos in the 3D view. However, the other axis in the Definition panel may not correspond to the axis in the 3D view. Please refer to the axis in the 3D view. In the 3D view, click to select the Support to pattern.

- In Operation, from the
Type drop-down list, select the boolean operation to be executed on the patterns.

-
In Pattern, click in the file field and click Browse to load a pattern part.
 Note: The pattern file is not compatible with the assembly external component. That means you cannot retrieve a file that references another file containing the pattern geometry.Important: 3D texture does not support patterns composed of a material using a custom made *.sop plug-in (surface optical properties).
 Define the Global scale of the pattern.
Now set your Mapping type: Rectangular , Circular , Hexagonal , Variable Pitches , From File .