Installing Elasticsearch
Install Elasticsearch on your dedicated Elasticsearch server using the elasticsearch.bat command.
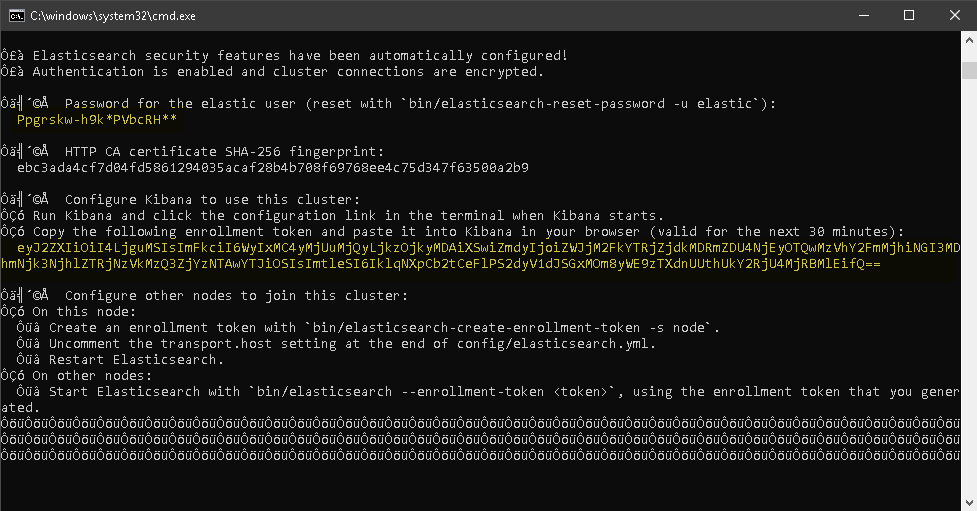
When you start Elasticsearch for the first time, the following security configuration occurs automatically:
- Certificates and keys for TLS are generated for the transport and HTTP layers.
- The TLS configuration settings are written to elasticsearch.yml.
- A password is generated for the
elasticuser. - An enrollment token is generated for Kibana.
-
Leave this command window open. After installing, Elasticsearch will
continue to run in the foreground. Later, you will configure Elasticsearch to
run as a Windows service,
but until that stage of the setup process, it must continue running manually in
this command window.
The password for the
elasticuser and the Kibana enrolment token (highlighted in the example screenshot below) are output to the command window. Copy both of these into a text file now, as you will need to enter them later at different stages of the setup process. Note that this enrollment token is valid for 30 minutes.