Installing and configuring Kibana

Install Kibana on the same server as Elasticsearch using the kibana.bat command.

To set up Kibana, you will need to provide:

  • The elastic user credentials (username=elastic, and the password that was generated during Elasticsearch setup).
  • The enrollment token generated for Kibana during Elasticsearch setup. This token automatically applies the security settings from your Elasticsearch cluster, authenticates to Elasticsearch with the built-in kibana service account, and writes the security configuration to kibana.yml.
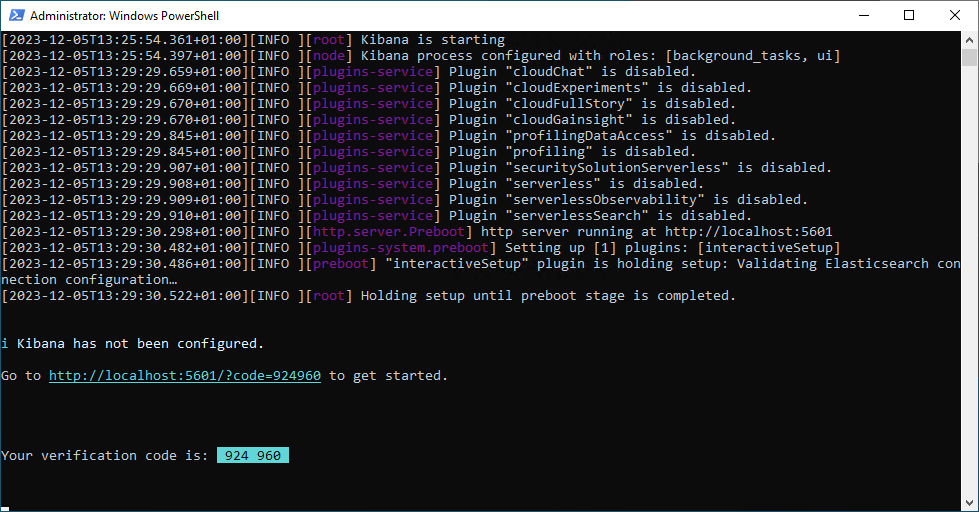
  1. Start Kibana:
    1. Open a new Administrator command-line shell (Command shell or PowerShell) .
    2. Navigate to your Kibana install folder and run the following command to start and set up Kibana:
      .\bin\kibana.bat

    The Kibana setup process can take some time, with no direct feedback on progress until it finishes. Once the batch file completes, you should see a verification code, and a link for the Kibana web application:

  2. In a browser, enter the Kibana web app URL shown in the console.
    The URL shown includes a verification code. If the code parameter is not specified in the URL, you are prompted to enter the verification code before the application loads in the browser
  3. Paste the enrollment token you copied earlier from the Elasticsearch command window and then click Configure Elastic.

    Note that the enrollment token generated during Elasticsearch setup is valid for 30 minutes. If it expires before you can enter it in Kibana, you can generate a new one by entering the following in a new Administrator command window from your Elasticsearch folder:

    .\bin\elasticsearch-create-enrollment-token -s kibana
  4. Log in using the elastic user credentials (username=elastic, and the password that was generated during installation).

You should now see the elastic home page.