
RSM Integration with Job Management UI
Ansys Electromagnetics supports its own Remote Simulation Management (RSM) software, along with other High Performance Computing (HPC) software management programs (see High Performance Computing (HPC) Integration).
When do you need RSM?
In general, RSM is required if you want to run remote or distributed simulations. However, if you have a separate scheduling system that Ansys Electromagnetics supports and you plan to run batchsolve simulations only, then you may not need to install RSM. For details of installation and configuration of RSM, see the Ansys Electromagnetics Installation Guides.
Job Management UI for RSM
You can use the Job Management UI to submit batch jobs to RSM. The Job Management UI is accessed by running Ansys Electromagnetics product Desktop on the designated 'Postprocessing node' of the cluster. The Desktop provides UI commands for Scheduler selection, Job submission and Job monitoring/control. You access the Scheduler User Interface by clicking Tools > Job Management > Select Scheduler...
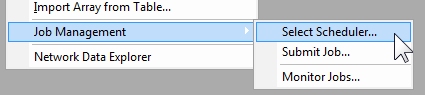
You can also select the Simulation tab of the ribbon, and click the Scheduler icon.
This displays the selection window. The Select scheduler drop-down menu lists potential schedulers (which can include RSM, LSF, Windows HPC, or sge, depending on the environment).

If you select a scheduler that is not supported in your environment, you receive a warning message.
If you select Remote RSM and your environment has been configured , you can select a computer, user name, and password.
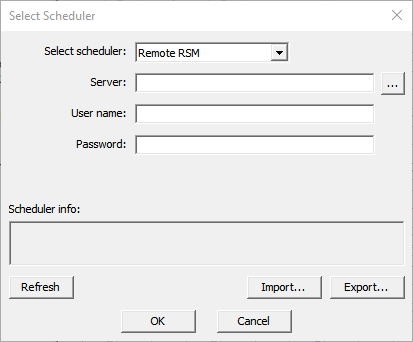
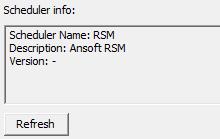
After selecting a scheduler, you can click Refresh to display information for that scheduler.
Once you have selected a scheduler supported in your environment, you can go through the following steps to submit a batch job:
- Setup and prepare the model on local workstation.
- Copy the input project (or folder, if the project references external files) from a personal workstation to a shared-drive on cluster (for example, project is copied to /home/projects/spool/test.aedt).
- In the RSM environment, you are required to specify a machine-list. (See the Remote Analysis options panel.) For example, say the machine-list is: three cores from 'm1' and three cores from 'm2', for a total of six engines. You select the list on the Compute Resources tab of the Submit Job to RSM window, as described below.
- Open a remote-desktop session (or equivalent such as vnc session) on the node corresponding to the first machine of job's machine-list, 'm1' in this case. Launch Desktop graphically on 'm1'.
-
Select Tools > Job Management > Submit Job... or Project > Submit Job... or [ProductName] > Submit Job... to open the Submit Job To window. You can also access Submit Job from the shortcut menus for the Project Name, Design name, Analysis Setup, or Optimetrics Setup.

- The Analysis Specification tab has parameters to specify the input project model, the analysis setup and analysis options (including batchoptions) that affect analysis algorithms.
- The Compute Resources tab specifies the amount of compute resources and how to select specific resources from the available pool.
- Use the ellipsis button [...] to open a browser to select the project. The Project can be an archive.
- In the Analysis setups field, you can
select radio buttons for All setups in the project, All setups in the
design, or a Single setup. For instance, the Rotational_actuator.aedt example includes setups for Nominal, Parametric, and Optimization.
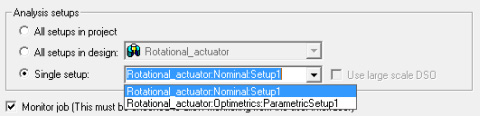
- The Analysis options includes check boxes for monitoring the job, whether to wait for a license, and a field for adding Batchoptions. via a graphical interface, or as text.
- If you intend to monitor the job through a user interface, you must check Monitor job. You can then monitor this job through the Tools > Job Management > Monitor Jobs... command or by checking the dialog that opens when you submit the job.
- The Batchoptions field allows you to add additional -batchoptions parameters, either as text, or by using a dialog with selection menus. Click the Add button to view the Add Batchoption dialog box.
- When you have selected a batchoption, you can type the value in the field, and click the Add button to add the option to the batchcommand.
- In the Submit Job To: dialog box, you can enable Show advanced options to display additional fields for Environment variables, and whether to Use batch extract.
-
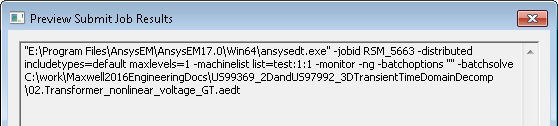
To see the command-line to be submitted to the scheduler, click Preview Submission:
For Parametric setups, you have the option to select Use Large Scale DSO. For details on how and when you use this feature, see Job Management Interface for Large Scale DSO.
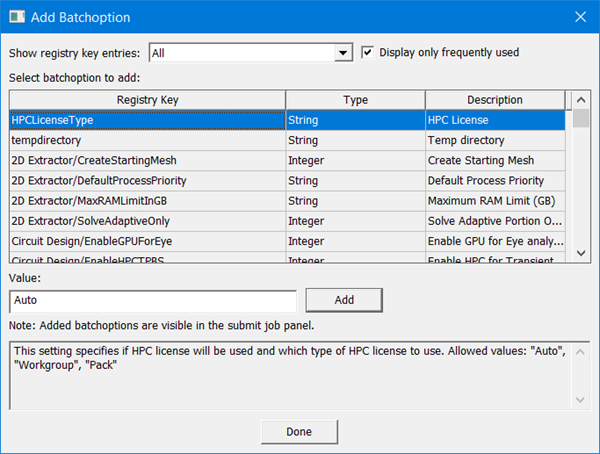
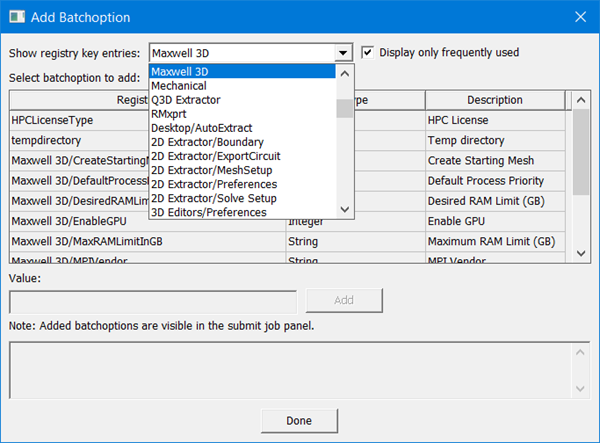
The Show registry key entries field lets you filter the entries displayed, by means of drop-down menu selection, and a check box to Display only frequently used entries.
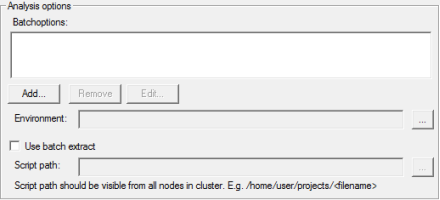
This field is for environment variables, for instance, for debugging features or other variable controlled features. Click the ellipsis [...] button to open a dialog for Additional Job Options.
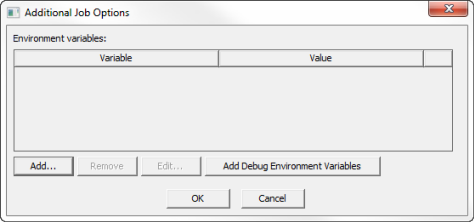
The Add... button opens a New Environment Variable dialog in which you can include a variable name and value.

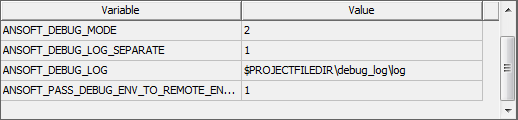
Clicking the Add Debug Environment Variables button automatically adds a set of debug variables. This can be useful in working with Ansys Application Engineering support.
Selecting a variable in the dialog enables the Remove and Edit buttons. The Edit button opens a dialog where you can change the variable and value.
The text can be copied to the clipboard, if desired.
Use Batch Extract for RSM
Selecting Show advanced options for RSM also shows the Use batch extract fields.
See the discussion on Running Maxwell from a Command line for a discussion of the solve information available through batch extract.
-
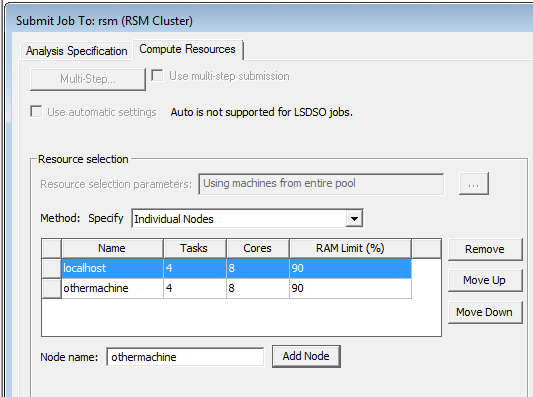
The Compute Resources tab of the Submit Job to: RSM dialog displays other parameters. Depending on the resources available for a scheduler environment, some of the fields may be disabled.
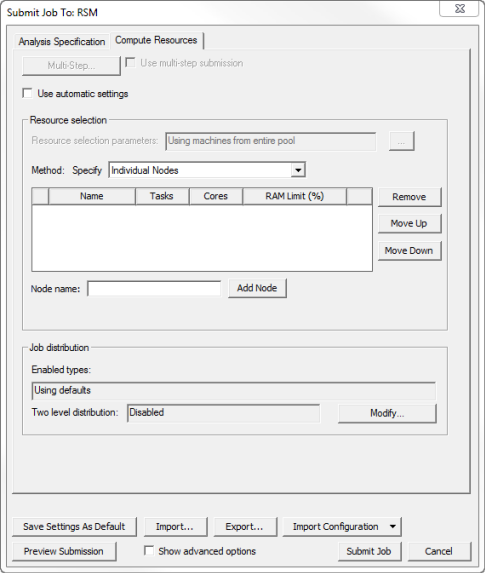
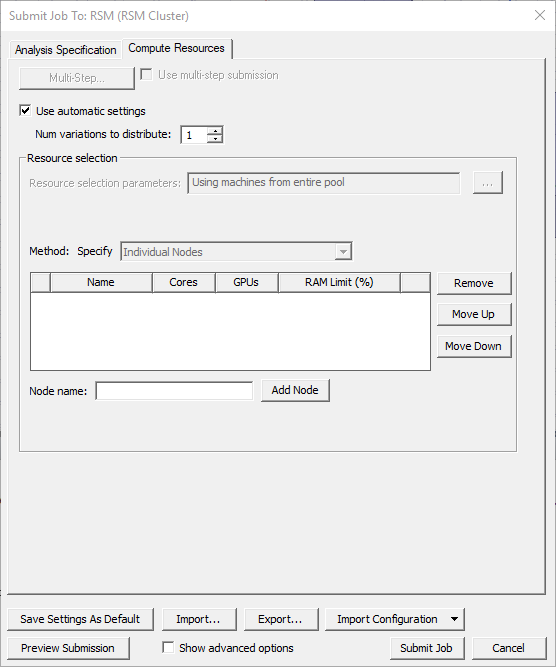
With Use automatic settings selected, the Job distribution field is removed and the Use automatic settings checkbox and Num variations to distribute field appears.
Otherwise:
- Specify node list
Here you can specify a node list. In a computing environment where the available cores are not uniform, you can use this to control which resources your job will use. For use with Large Scale DSO for RSM, for jobs that are submitted from job submission panel, localhost must be the first node in the resource selection node list; otherwise, LSDSO solve with RSM will fail.
Job Distribution
If you disable User automatic selection, you can modify the Job distribution settings:
Click the Modify button to display the Job Distribution dialog box.
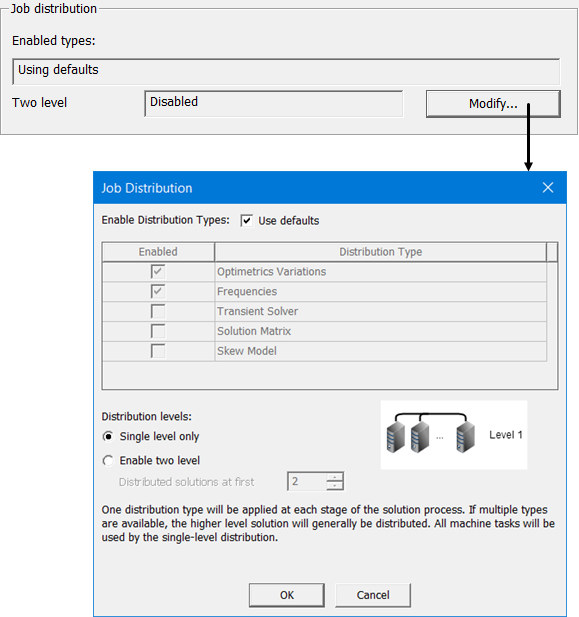
Enabled Distribution types can be modified here.
Second-level distribution operates within DSO. If available and enabled, you can specify a number of engines for level 1.
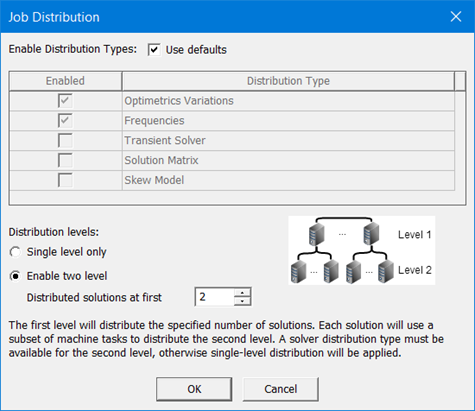
In response to a set of minimal constraints, the Scheduler may increase the resources assigned beyond the minimal values in order to meet the full set of requirements. For example, if you specify seven distributed engines, with two processors per engine, and also limit the number of engines per node to four, the scheduler may increase the number of cores used in order to meet the limit specified for engines per node. Notice that a preview of the Submit Job Results shows the number of resources assigned, and that the scheduler generated code includes an MPI specification.
- To submit the command with the specified parameters, click Submit Job.
- You can monitor this job either automatically
(by checking the option) or through the Tools > Job
Management > Monitor Jobs... command. For more details,
see Monitor
Job window.
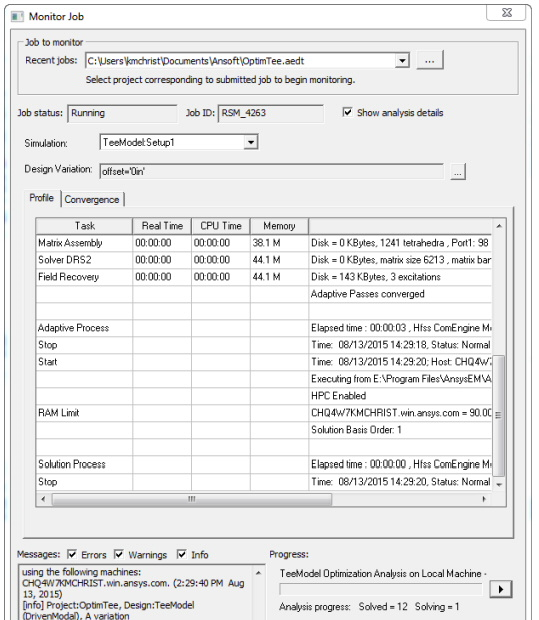
A dialog box displays in which you can check Begin monitoring this job now.
The dialog box contains fields reporting the job status,
job ID, messages issues, and progress. You can filter the messages for
Errors, Warnings, and Info. You can refresh the job manually or
automatically at specified intervals. You can choose to Clear
Progress Messages.![]()
You also have command buttons to perform a Clean Stop of a simulation between timesteps, or to Abort a simulation.
Process for Changing the Listening Port used by AnsoftRSM Service
To change the listening port used by the AnsoftRSMService, you need to change the configuration file, ansoftrsmservice.cfg, as follows:
You must specify the ListenPort within a CommDetails block, which must be within a
'Default:CommDetails' block, which must be within the top level block of the file, the AnsoftCOMDaemon
block. The following example shows the listen port changed from 32958 to 32957, with these blocks at the
beginning of the file:
$begin 'AnsoftCOMDaemon'
$begin 'Default:CommDetails'
$begin 'CommDetails'
ListenPort='32957'
$end 'CommDetails'
$end 'Default:CommDetails'
. . . .
$end 'AnsoftCOMDaemon'
For the second-level block, ensure that there is a single colon character and no spaces or tabs separating the two parts of the block name Default:CommDetails. The third-level block, with name CommDetails is also required. Use caution when editing this file by hand, because any mistakes in the block or value names may cause the data to be ignored.