


Ansys Zemax OpticStudio Virtual Desktop
Use the guidelines below to configure and launch a Windows virtual desktop with Ansys Zemax OpticStudio.
To be able to add resources to a project space, you must be a tenant administrator or have Admin permission in the project space. To be able to use resources in a project space, you must have a basic set of permissions in the project space (View, Start, Connect, and Stop). For more information see Setting User Permissions in a Project Space in the Administration Guide.
Create a virtual desktop. A project space administrator creates a Windows virtual desktop with Ansys Zemax OpticStudio installed. See Creating a Virtual Desktop in the Administration Guide.
Use the following guidelines:
Operating system: Windows Server 2022
Applications: Ansys Zemax OpticStudio
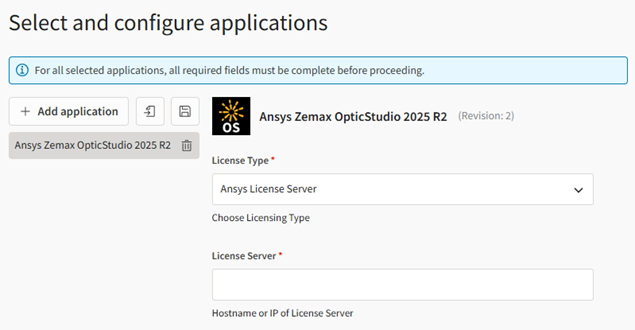 Note: Ansys recommends that you create the virtual desktop without any applications, and then add the application after the virtual desktop has been created. See Adding Applications to a Virtual Desktop in the User's Guide. Sometimes, Windows updates are triggered on newly created virtual machines, causing application installation to fail.
Hardware:
- c6i (2x - 16xlarge)
- c6a (2x - 16xlarge)
- m6i (2x - 16large)
- m6a (2x - 16large)
- c5a (2x - 16xlarge)
A minimum of 4 cores and 8 GB of memory are recommended.
Launch a virtual desktop session. Users with access to the project space connect to the virtual desktop to start a virtual desktop session. See Launching a Virtual Desktop Session in the User's Guide.
Run the remote application. Once the desktop is open you can launch and run Ansys Zemax OpticStudio on the virtual desktop just as you would on your local desktop.
If you need to transfer files to the virtual desktop, see General Guidelines for Transferring Files in the User's Guide.