


The File tab contains a variety of options for managing your project, defining author and project information, saving your project, and launching features that enable you to make changes to default application settings, integrating associated applications, and/or setting up how you want your simulation to operate.
| Option | Description | ||||||
|---|---|---|---|---|---|---|---|
|
Info |
Includes entry fields for project description and ownership (Project), a summary of the details of the project (Model Summary), as well as a history of when the project was saved (Save History). Also see the Project object reference section. This information can also be defined in the Details view of the Project object. Note: When you import a mesh file, the option Import Summary becomes available in the Model Summary content. When you select this option, the application goes to the Import Summary object in the Outline. That object presents upstream source file data. | ||||||
|
What's New |
Displays an illustrated review of the release's new features and capabilities. This display is also available from the Help drop-down menu option on the title bar. | ||||||
|
Home[a] |
Go to the Home page. This page displays recently opened projects as well as an option to open a new project. | ||||||
|
New[a] |
Begin a new session of Mechanical. | ||||||
|
Open[a] |
Open an existing project. | ||||||
|
[a]/ |
Saves your project. | ||||||
|
[a]/ |
Saves the current project under a different name and/or location. You are prompted to specify the name and location for the file. | ||||||
|
[a]/ |
Generates a single archive file that contains project files. During the archive process, the application prompts you with the following dialog to make optional selections. 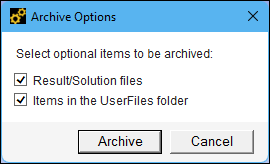 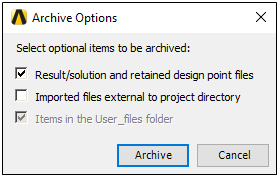 These options enable you to control whether the archive includes certain data. This can be helpful if you have file size concerns. Supported file types include Mechanical (.mechpz), Workbench Project Archive (.wbpz) or Zip (.zip/.tar.gz). You can also perform this action in Workbench. See the Archiving Projects section for more information. | ||||||
|
|
Enables you to save the current Mechanical session without having to save the entire project. However, you must save the project when you exit the application to properly save your changes. | ||||||
|
|
Updates the geometry, materials, and any imported loads that are in the tree. | ||||||
|
|
Clears all results and meshing data from the database depending on the object selected in the tree. This option is available via the right-click context menu on many objects. | ||||||
|
|
Available when you open Mechanical without a geometry or mesh. Selecting Import displays two additional options: Geometry and Mesh (External Model). These options enable you to import a geometry or a mesh file. Select Geometry or Mesh (External Model) and then select from the Recent list or select Browse to open a file. Using the Mesh (External Model) option automatically inserts and links a corresponding system to the appropriate cells (Engineering Data and Model) of the existing system. Note: Linux platform does not support the:
| ||||||
|
|
This option provides selections to export your project or components of your project, including:
| ||||||
|
|
Launches the Addins dialog that enables you to load/unload third-party add-ins that are specifically designed for integration within the Workbench environment. | ||||||
|
|
Opens the dialog. This dialog enables you to customize the application and to control the behavior of Mechanical application functions. This option is also available on the title bar of the application, beside the Quick Launch feature. | ||||||
|
|
Displays the Solve Process Settings dialog to configure your solution process. | ||||||
|
|
Opens the Variable Manager dialog. This dialog enables you to enter an application variables that can override default settings. | ||||||
|
|
Displays the License Options pane. This pane displays a list of all the licenses available to you as a user. Mechanical uses the first relevant license in the list. You can change the order using the Up/Down and Save options. Use the Disable option to exclude a potential license from your current and future Mechanical sessions. Use the Reset to Default option to restore the original settings. The application checks out a license for a session based on these preferences. For any subsequent license requests, the application refers to the preferences to fulfill the request. If any other license is available, individual or shared, the application uses that license. As indicated by a displayed message, it is necessary to close and reopen the application for licensing changes to take effect. Note: Upon installation, and prior to launching the application, you can use the
system Environment Variable,
Removing the Environment Variable and selecting the Reset to Default option returns the license ordering to the default setting.
Shared Licenses Workbench controls shared licenses. Using shared licensing, the active application holds the license, preventing other applications that are sharing that license from using it during that time. The application or operation requiring use of the license is called a concurrency event. For example, meshing and solving would each be a concurrency event. Single license sharing applies only to licenses of the same type (for example, Mechanical Enterprise). If a license is not available/checked out when you open Mechanical, the application automatically opens in Read-Only Configuration mode (as displayed on the Status bar). Under the License Options, the Activate License button displays. This option is only available when no license is checked out and the application is in Read-Only Configuration mode. From the License Options pane select a license and click the activate button. This removes the application from read-only mode. Review the material in the Ansys Workbench Licensing Methods section of the Workbench User's Guide for additional information. | ||||||
|
|
Exits your current Mechanical session. |
[a] Mechanical opened independently.