| Applicable Products: | Ansys Multiphysics, Ansys Mechanical, Ansys Structural |
| Level of Difficulty: | Moderate |
| Interactive Time Required: | 45 to 60 minutes (includes 15 to 20 minutes for solution) |
| Discipline: | Structural |
| Analysis Type: | Nonlinear quasi-static |
| Element Types Used: | SOLID185, TARGE170, CONTA174 |
| Features Demonstrated: | Symmetry boundary conditions, flexible-to-flexible surface contact, contact wizard, automatic time stepping, multiple load steps, symmetry expansion, animation, time history postprocessing, Solution Controls dialog box |
| Help Resources: | The Contact Technology Guide, SOLID185, TARGE170, and CONTA174 |
This is a 3D analysis of a steel pin contacting a smooth pinhole in a block. Due to the model's inherent symmetry, the analysis occurs on a quarter-symmetry model. Two different load steps are defined.
Objectives: First load step – observe the interference fit stresses of the pin which is geometrically thicker than its pinhole. Second load step – observe the stresses, contact pressures and reaction forces due to the motion of the pin being pulled out of the block.

The dimensions of the model are as follows:
PIN radius = 0.5 units, length = 2.5 units
BLOCK width = 4 units, length = 4 units, depth = 1 unit
INHOLE radius = 0.49 units, depth = 1 unit
Both solids are made of structural steel (stiffness = 36e6, Poisson's ratio = 0.3) and are assumed to be flexible.
A quarter-symmetry model is appropriate for simulating the contact phenomena. Two load steps are used to set up the analysis:
Load Step 1: Interference Fit -- solve the problem with no additional displacement constraints. The pin is constrained within the pinhole due to its geometry. Stresses are generated due to the general misfit between the target (pinhole) and the contact (pin) surfaces.
Load Step 2: Pull-out -- move the pin by 1.7 units out of the block using degree-of-freedom displacement conditions on coupled nodes. Explicitly invoke Automatic Time Stepping to guarantee solution convergence. Read results for every 10th substep during solution.
Use the information in the problem description and the steps below as a guideline in solving the problem on your own. Or, use the detailed interactive step-by-step solution by choosing the link for step 1.
To run this tutorial, a minimum workspace memory of 64 MB is necessary (and 100-200 MB is preferable). Before starting the tutorial, check your workspace memory:
Scroll down to the MEMORY STATISTICS heading and read the number of MB for Requested Initial Work Space.
If the memory amount is acceptable, proceed with the tutorial. If the number is too low, quit Mechanical APDL without saving changes, restart Mechanical APDL and, in the Interactive dialog, enter the appropriate number in the Memory requested for Total Workspace field before selecting Run.
Input Geometry
1. Read in the model of the pin and the block.
Define Material Property and Element Type
3. Define element type for solid volume.
Generate Mesh
5. Smooth element edges for graphics display.
6. Create contact pair using Contact Wizard.
Specify Solution Criteria
7. Apply symmetry constraints on (quartered) volume.
8. Define boundary constraints on block.
9. Specify a large displacement static analysis.
Load Step 1
10. Define interference fit analysis options.
Load Step 2
12. Set DOF displacement for pin.
13. Define pull-out analysis options.
Postprocessing
16. Expand model from quarter symmetry to full volume.
17. Observe interference fit stress state.
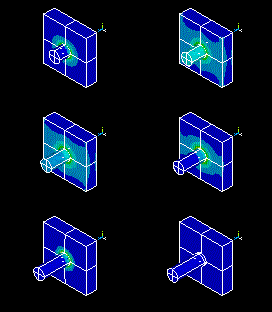
18. Observe intermediate contact pressure on pin.
19. Observe pulled-out stress state.
Read in the file containing the quarter-symmetry representation of the pin and block.
File name: block.inp (Click the link to download the file in .zip format.)
OK

Define the material property.
Double-click Structural, then Linear, Elastic, and Isotropic.
EX =
36e6PRXY =
0.3.Click .
Select from the menu bar.
Define the element type.
Click .
Select Structural Mass - Solid.
Select Brick 8node 185 (right column).
Click .
Click .
Select Lines - Set.
Pick the horizontal and vertical lines on the front edge of the pin.

Click .
Enter
3for No. of element divisions.Uncheck SIZE,NDIV can be changed to indicate No.
Click .
Select Lines - Set.
Pick the curved line on the front of the block.

Click .
Enter
4for No. of element divisions.Click .
Select Volumes from the Mesh drop-down menu.
Select Hex.
Select Sweep.
Click the button.
Pick the pin and block volumes.

Click and any warning messages that appear.

the MeshTool.
From the Facets/element edge drop-down menu, select 2 facets/edge.
Click .

Select the button (located in the upper left corner of the Contact Manager).
Select Areas from the Target Surface field.
Select Flexible from the Target Type field.
Click .
Pick surface of pin hole on block as the target.

Click .
Click .
Select Areas from Contact Surface field.
Click .
Pick surface area of pin as the contact.

Click .
Click .
Select Include Initial penetration.
Select 1 from Material ID drop-down menu.
Enter
0.2for the Coefficient of friction.Click .
Enter
0.1for Normal penalty stiffness.Select the Friction tab.
Select Unsymmetric from the Stiffness matrix drop-down menu.
Click .
Click Create.
Click Finish and close the Contact Manager.


Toolbar>SAVE_DB.
Pick the four interior areas that were exposed when original model was quartered.

Click .

Pick left side of block.

Click .
Select All DOF for DOFs to be constrained.
Enter
0for the Displacement value.Click to apply the constraints.

Specify the analysis option as a static analysis in which large deformation effects are to be included. Use the Solution Controls dialog, a central control panel enabling you to adjust the most commonly used settings for a structural static or full transient analysis. The controls consist of tabbed pages, each offering a related set of solution controls.
Select Large Displacement Static from the Analysis Options pull-down menu. Continue with the next step.
For both load steps, ramped (rather than stepped) loading is applied automatically.
Enter
100as the Time at end of load step.Select Off from the Automatic time stepping drop-down menu.
Enter
1as the Number of substeps.Click to apply the settings.
.
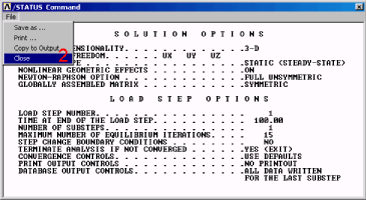
Review the information in the status window, then to close the window.

Click to begin the solution. Select if a Verify window appears, and ignore any warning messages, but do not close the warning message window yet.
the note window when solution is done.
. Continue with the next step.

To observe the effects of pulling the pin out of the block, apply a displacement value of 1.7 to all nodes on the front of the pin.
First drop-down menu = Nodes.
Second drop-down menu = By Location.
Select Z coordinates.
Enter
4.5for Min, Max.Click .
Click .
Select UZ for the DOFs to be constrained.
Enter a Displacement value of
1.7.Click .
Enter
200as the Time at end of load step.Select On from the Automatic time stepping drop-down list.
Enter
100for the Number of substeps.Enter
10000for the Max no. of substeps.Enter
10for the Min no. of substeps. Continue with the next step.
Select Write every Nth substep from the Frequency drop-down list.
Enter
-10in the where N equals (=) field.Click .
Toolbar>SAVE_DB.
Mechanical APDL may generate several warning messages while solving the second load step, but they do not impede the solution.
By default, Mechanical APDL displays only the first five warning messages. If more warnings occur (which may happen during the solution of this load step), they are not displayed, nor is the "Solution is Done!" message displayed.
To ensure that the "Solution is Done!" message appears, change the setting that controls the number of messages that are displayed from 5 to 100. Type the following command in the Input Window, then press Enter:
/NERR,100,100,OFF
The command also ensures that your Mechanical APDL analysis does not end if an error occurs during solution.
You can then proceed with the following steps to obtain the solution:
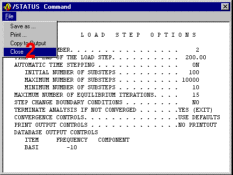
Review the information in the status window, then choose:
(Windows),
or
(Linux), to close the window.

Click to begin the solution. Ignore any warning messages, but do not close the warning message window yet.
the note window when solution is done.
Check 1/4 Dihedral Sym.
Click .

.
Load step number =
1.Click .
Select and then .
Click .

Enter
120as the Value of time or freq.Click .
In the first drop-down list, select Elements.
In the second drop-down list, select By Elem Name.
Enter
174as the Element name.Click .

Select Contact.
Select Contact Pressure.
Click .

Enter
2as the Load step number.Click .
Select Stress and then von Mises stress.
Click .

Select Load Step Range for the Model result data.
Check Include last SBST for each LDST.
Check Auto contour scaling (On).
(In the left column) Contour data for animation = Stress.
(In the right column) Contour data for animation = von Mises SEQV.
Click .

Make selections in the Animation Controller (not shown), if necessary, then .
Click .
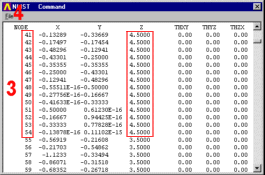
Make note of all the node numbers whose Z coordinates are 4.5.
Your node numbers may be different from those shown here.
(Windows),
or
(Linux), to close the window.

Select (left most button).
Select Reaction Forces, Structural Forces, and then Z-Component of Force.
Click .
Pick a node on the front surface of the pin whose number corresponds to one of the nodes listed above for z = 4.5. (Hold down the left mouse button and drag the mouse cursor across the front of the pin. The highlighted node numbers appear in the picking menu. Upclick on the one you want to select.)
Click .
Verify that the node number you picked above is displayed in the Node number field.
Your node number may be different from the one shown here.
Click (third button from left) .
Close all EXTREM Command windows.
the Time History Variables window.


