


You can insert an Image object in the tree or save the current
Model view to a file by clicking on the button  in the toolbar.
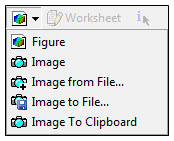
From the drop down menu, you can select:
to insert an Image object in the tree containing a snapshot of the Model's current view in the Geometry window.
to insert an image from a file as an Image object in the tree. Browse to an existing .bmp, .jpg, or .png file to insert the image.
to save the Model's current view. Browse to the desired location, and chose the file format: .png, .bmp, .jpg, .tif, or .eps.
In the Details view, you can enter an annotation for the image in the Text field. Image objects will appear in a generated Report under the parent object in the tree.
Note: If you are running on Windows 7, you must be using a Basic Theme for your desktop in order to capture an image. If you are using an Aero Theme, a warning dialog box will appear when inserting the Image or Image to File objects, and the image will not be properly created.