


To create a mesh:
Define the geometry.
For details, see Geometry.
Define the topology object(s) by selecting a method and optionally changing other settings.
For details, see Topology.
Optionally modify the
Mesh Dataobject to adjust the number of nodes.If you plan to make a fine (high-resolution) mesh, you can optionally set the mesh density at a later time in order to minimize processing time while establishing the topology. Keep in mind that changing the mesh density can affect the mesh quality.
For details, see Mesh Data.
Optionally modify the layer objects to improve mesh quality.
For details, see Layers.
Generate the 3D mesh.
By default, the
3D Meshobject is initially unsuspended, so mesh generation happens automatically whenever theLayersobject is (re)processed. For details, see 3D Mesh.Optionally investigate the mesh and refine any of the above objects as necessary.
To help identify problem areas of the mesh, mesh analysis tools are available. For details, see Mesh Analysis.
If you change any objects that affect the mesh, you must generate the mesh again.
Save the mesh to a file.
For details, see Save Mesh Command.
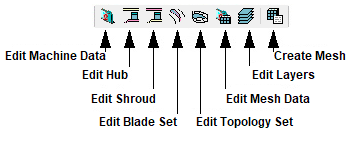
In general, you should proceed from top to bottom in the object selector, or from left to right on the toolbar.
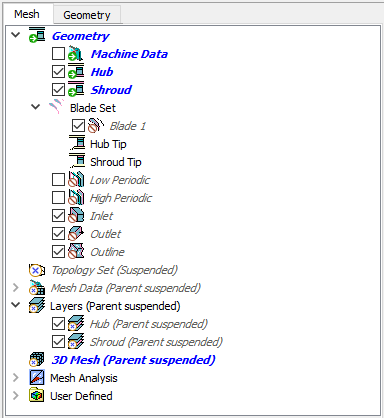
The other objects in the object selector are used for visualization and inspection purposes.
Not every object in the object selector requires a definition before a mesh can be created. However, every object represented by an icon on the toolbar must be defined.