


"Stitching" Surfaces Examples
Existing skin surfaces can be "stitched" into a single surface patch. Examples are shown below.
Use the Select Geometry Tool Guide to Select Rectangular Edges:
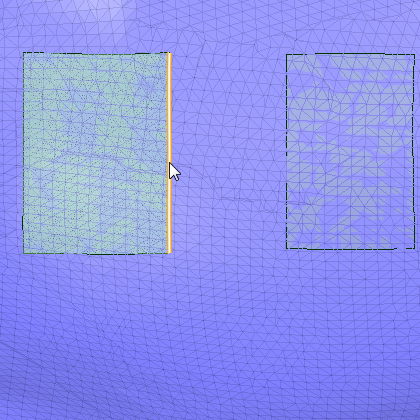
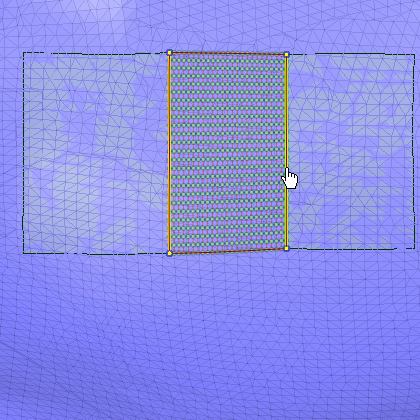
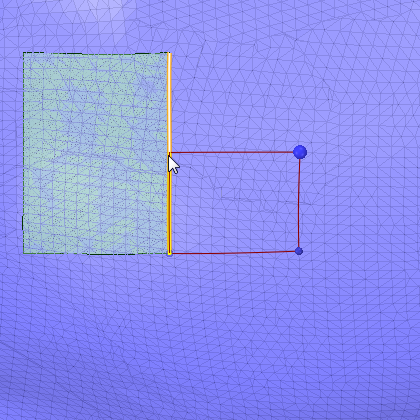
| You can bridge the gap between rectangular patches using the Select Geometry tool guide. pre-highlight and select one edge. |
|
|
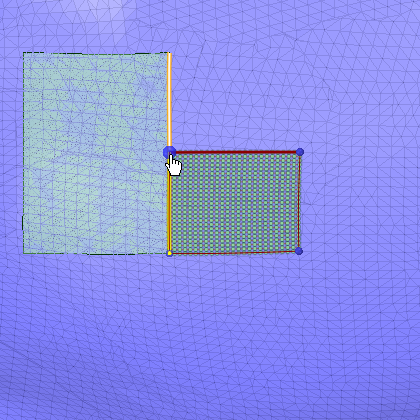
Pre-highlight and select the second edge to preview the surface. Click Complete to create the surface. |
|
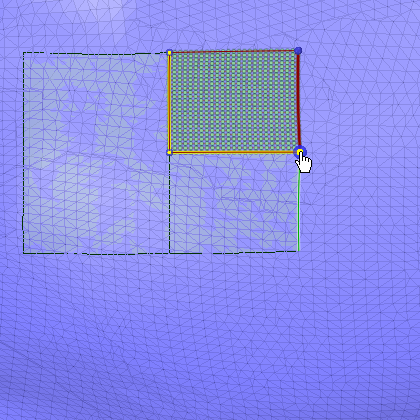
Use the Select Geometry Tool Guide to Select Triangular Edges:
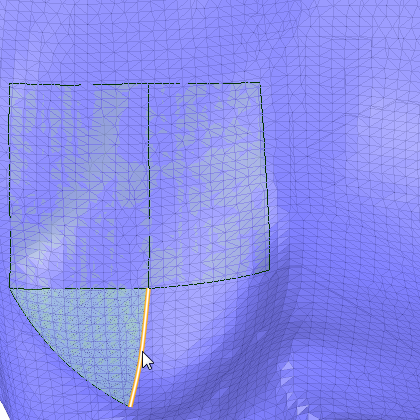
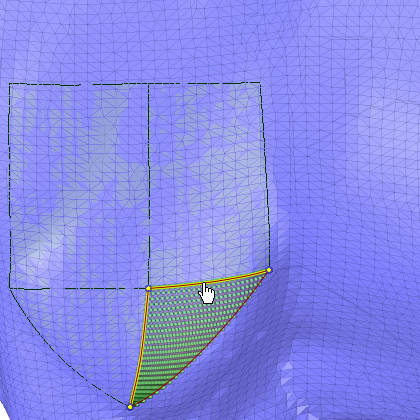
| The same procedure works for triangular patches. Pre-highlight and select the first edge. |
|
|
Pre-highlight and select the second edge to preview the surface. Click Complete to create the surface. |
|
Snap to Existing Patch Edges and Points:
|
Withe the Select Boundary tool guide active, you can snap to existing surfaces. Here, the sketch started by snapping to the bottom corner. The color and size of the start point indicate that it is snapped to the lower right corner of the existing surface. The sketch then proceeds in a counterclockwise direction. The end of the third edge snaps to the existing edge, which is highlighted to indicate it will be used. The fourth edge is auto-completed by the tool and is shown on top of the snapped edge. |
|
|
A single click completes the third and fourth edges and the surface previews. Click Complete to create the surface. |
|
|
The next sketch begins at the upper right corner of the first surface. Like the previous sketch, the color and size of the start point indicate that it is snapped. The sketch proceeds in a clockwise direction. When the second edge reaches the upper right corner of the previous surface, the corner and edge of that surface highlight to indicate they will be used. Two edges can auto-complete to complete the loop. They are highlighted on top of the existing edges that will be used. |

|
|
A single click completes the second, third, and fourth edges and the surface previews. Click Complete to create the surface. |
|