


Extending or Extruding Surface Edges
You can extend or extrude the edges of any surface with the Pull tool. When you extend an edge, the pull extends the neighboring faces without creating a new edge. Extruding an edge creates edges.
Click
 Pull in the Edit group on the Design tab. The Select tool guide on the
right side of the Design window should be active.
Pull in the Edit group on the Design tab. The Select tool guide on the
right side of the Design window should be active.Select the outside edge of a surface.
Ctrl+click to select multiple edges.
Click the Pull arrow oriented along the surface to extend the edge. Press Tab or click the other Pull arrow to extrude the edge in another direction.
(Optional) Ctrl+click the vertex of one or both neighboring edges to ignore their influence.
Drag in the direction of the Pull arrow to extend the edge or create a new surface perpendicular to the old one.
If the correct pull arrow is not highlighted, press Tab or click the Pull arrow you want to use.
The natural direction of a surface edge is in the plane of the surface.
You can use the Up To tool guide to pull a linear edge up to a face, surface, edge, or point. If the face or surface does not intersect the edge you are pulling, the edge will be pulled parallel to the selected object.
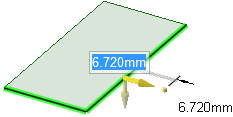
To dimension the extension, type the distance you want to extend the surface while you are pulling and press Enter.
The common pull options are described in Pull Options. Once you select the edge or face to pull, select these options from the Options panel, or right-click and select them from the mini-toolbar.