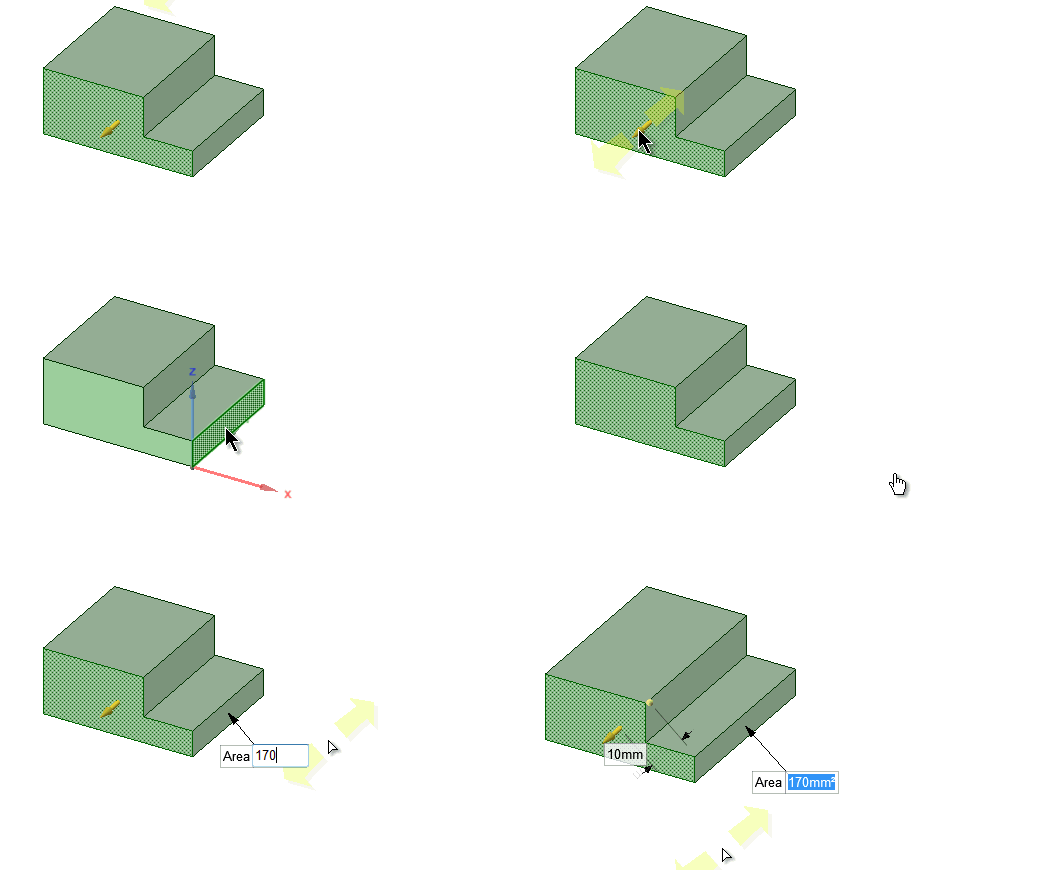
Using Measurements from Within the Pull Tool
- Enter the Pull tool
- Select an object to pull
- Enter the Measure tool (shortcut is "e") and measure any single object or measure between two objects
- Click the measurement result that will drive the Pull (hover over measurements to display a purple box). Once selected, that single measurement will display on screen with arrows pointing to either object chosen for measurement.
- Click in the highlighted dimension box and modify the value for a one-time adjustment of the model.
- (Optional) Create a Measurement Group which can be modified at any
time.
- Select a single measurement
- Open the Groups panel
- Click Create Group
- The measurement group is created
- At any time, clicking on the group in the Group tree will open the Pull tool and put the measurement value in edit mode. Simply enter a new value and complete the Pull.
Measurement groups can also be created from Area and Perimeter results. Modifying the group then adjusts the model to produce a desired area. For example, create a Measurement group for the area of a side of a box. While pulling the front of the box, you can enter a new area value for the side to complete the Pull.


