


Open Ansys Workbench ().
Open your CFX project.
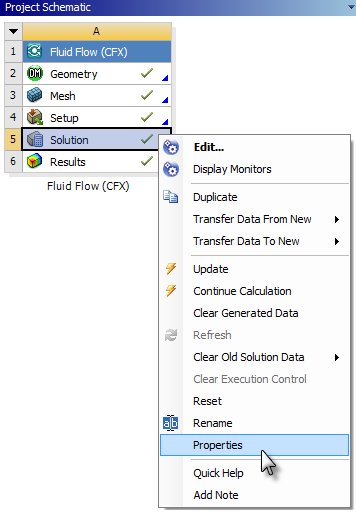
In the CFX system, right-click the Solution cell and select .
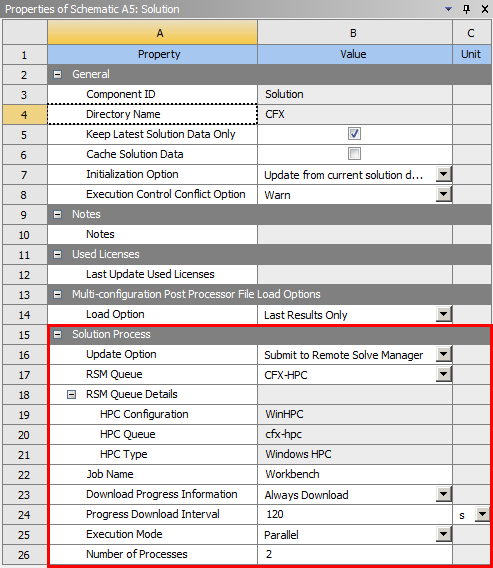
In the Solution Properties view, set Solution Process properties as follows:
Set the Update Option to Submit to Remote Solve Manager.
From the RSM Queue drop box, select the queue that will be used for the job. If credentials have not yet been cached for the selected queue, you will be prompted to specify them, as described in Automatic Account Creation.
The RSM Queue Details section displays the HPC Configuration, HPC Queue, and HPC Type with which the RSM queue is associated.
By default, the Job Name is
Workbench. The job name provides a traceable piece of data that administrators can use to track job submissions to a cluster (for billing purposes, for example). To edit the default job name, double-click it and type the desired name.For automatic downloading of progress information, verify that Download Progress Information is set to Always Download.
Leave the Download Progress Information at the default of 120 seconds (or a different value depending on how frequently you would like the solver to query RSM for output files in order to display progress). Note that if the job finishes before the first interval is reached, you will not see progress results until the end of the job.
Set Execution Mode to Parallel.
Specify the Number of Processes to be used.
Right-click the Solution cell and select Update.