


The Design Point Import wizard allows you to open postprocessing directly from a data file without having to convert it to an optiSLang monitoring database file first (for example, with Excel).
To run the wizard:
Open the wizard using either of the following methods:
In the Postprocessing window, select > > .
Edit the Postprocessing node, and select a text, comma separated values, or spreadsheet file. Right-click the node on the Scenery pane and select .
If the Chosen file field is empty:
Click
 .
.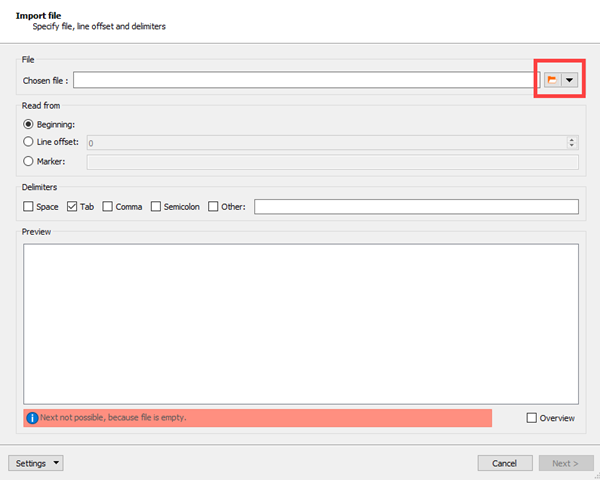
Browse to a text (*.txt), comma separated values (*.csv), or spreadsheet (*.xlsx, *.xls, *.ods) file.
Select the file and click .
If you have previously run this wizard and exported the wizard settings, you can import them.
Select > .
Browse to the location of the settings JSON file, select it, and click .
The settings are loaded into the wizard. You can now click through the remainder of the wizard and click to run it.
In the Read from section, select one of the following options:
: Reads through the total file from the start.
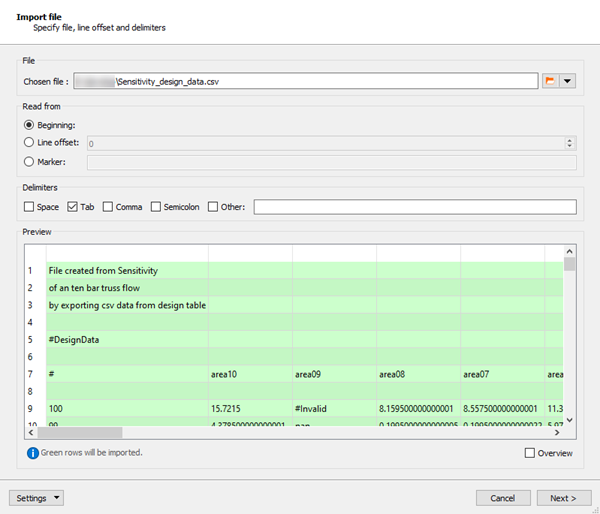
: Starts reading after skipping the first n lines. Enter the value of n in the text field.
: Starts reading when a specific text string (for example #DesignData) is found.
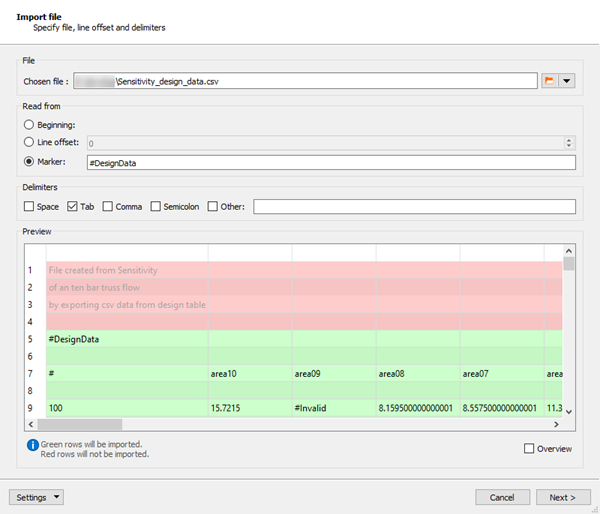
In the Delimiters section, select the character that separates the lines.
If you have selected the check box, enter the custom delimiter (for example, | or *) into the text field.
Check the Preview pane to ensure you are importing the correct information.
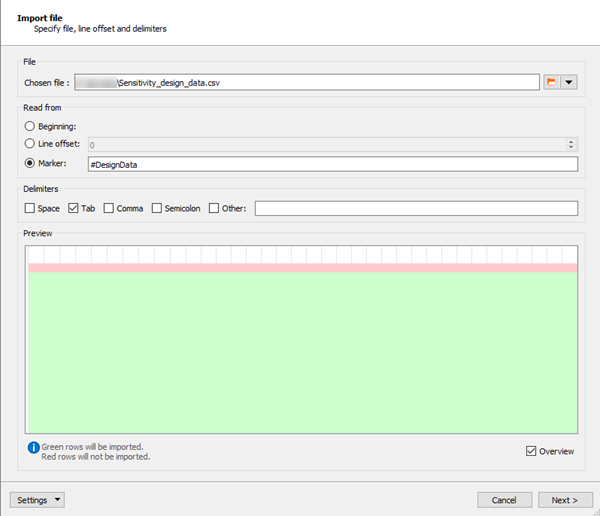
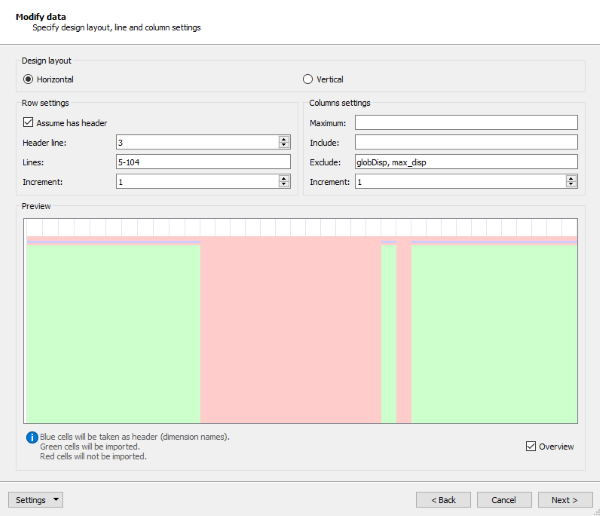
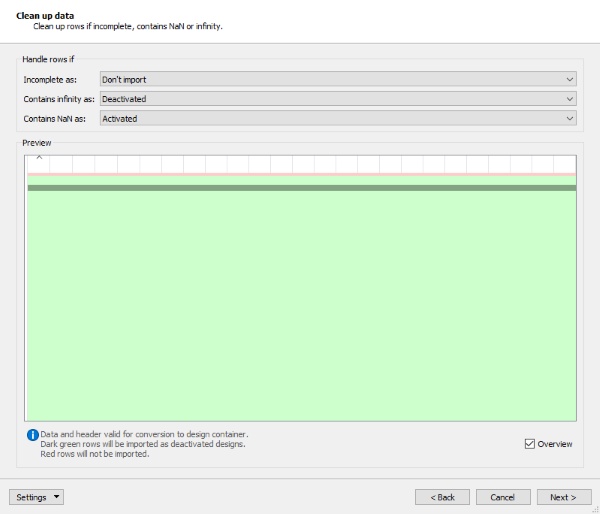
To show the rows that will be imported without displaying the data, select the Overview check box.
Click .
The Modify data page is displayed.
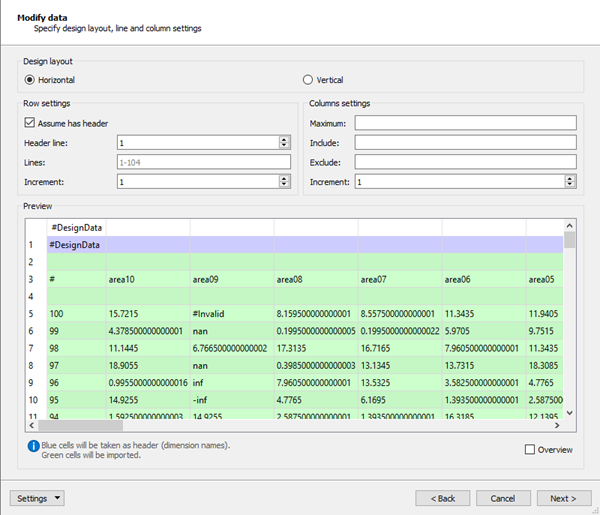
In the Design layout section, if the data is organized in a horizontal table, leave the setting as . If the data is organized in a vertical table, select ,
Note: The preview pane shows the outcome after the settings in the wizard have been applied, not the initial data in the file.
Adjust the row and column settings as needed.
Option Description Row settings Assume has header When selected, finds the line containing dimension names to be used in the postprocessing (selected by default). Header line Sets the table row that contains the header data. Only available when the check box is selected. Lines Sets the range of table rows to import data from. Increment Imports the first table row set in the Lines field and every n-th row following. Column settings Maximum Sets the header name or column number of the final column to import. Ignores any columns after this point. Include Sets the header names or column numbers of the columns to import. Ignores any columns not in this field. Exclude Sets the header names or column numbers of the columns to exclude. All other columns are imported. Increment Imports the first table column and every n-th column following. 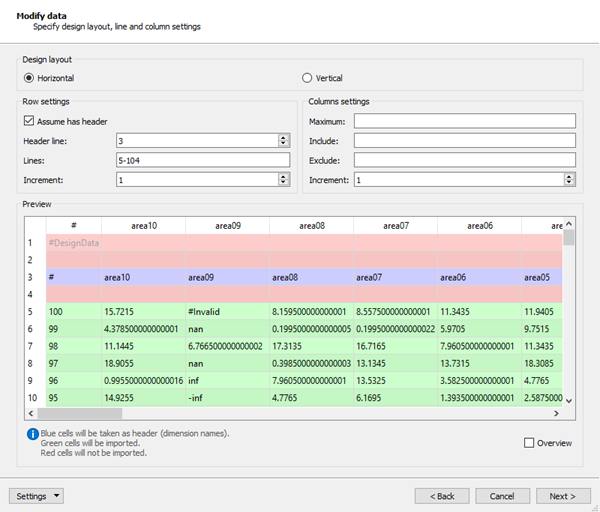
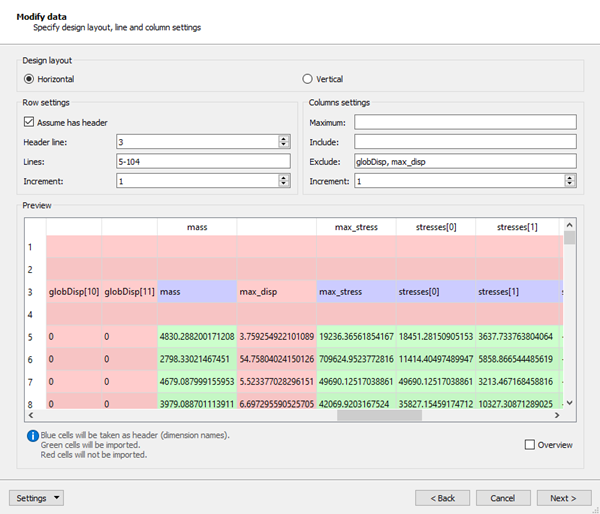
Check the Preview pane to ensure you are importing the correct information.
To show the rows that will be imported without displaying the data, select the Overview check box.
Click .
The Manipulate page is displayed.
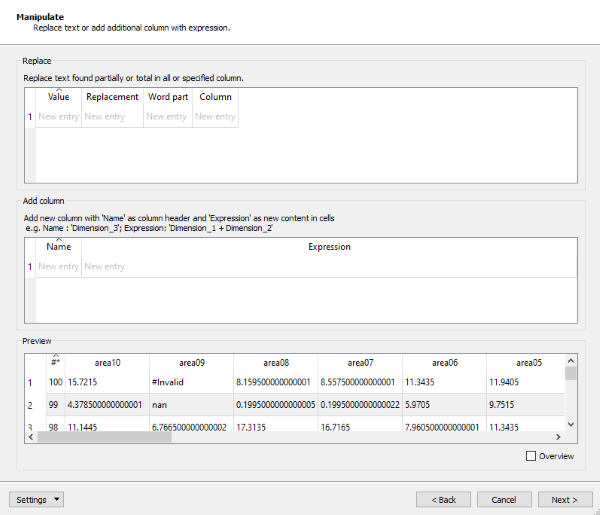
In the Replace table, you can replace text found in the specified columns.
Option Description Value Sets what text to search for. Replacement Sets the text that replaces the contents of the Value field. Word part Sets the text replacement conditions: : The replacement is done for every partial text found, even if it occurs more than once in the cell text.
: The entirety of the cell's text must equal the value for the replacement to occur.
Column Sets search area: : Searches for text in all columns
: Searches in the column specified by the column number. To search in multiple specified columns, add another line to the Replace table.
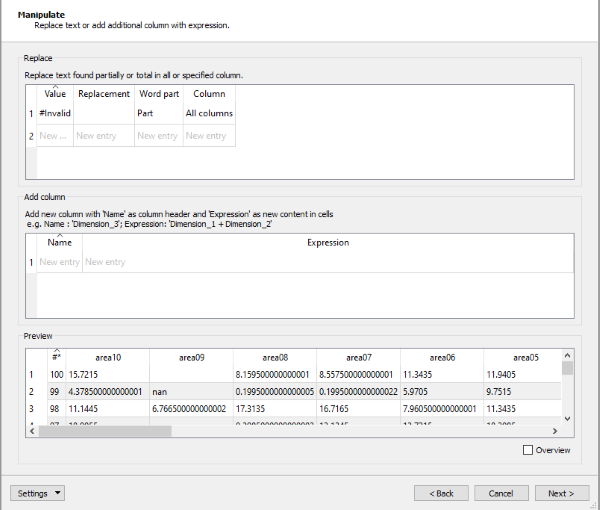
In the Add column table, you can add a new column to the data set by creating an expression from existing table cells.
Option Description Name Sets the column header name (for example, max_stress_modified). Expression Sets the data calculation (for example, max_stress-25000). 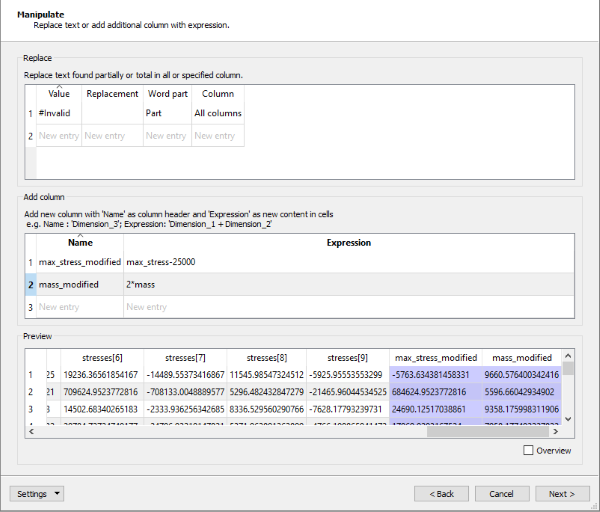
Check the Preview pane to ensure you are importing the correct information.
To show the rows that will be imported without displaying the data, select the Overview check box.
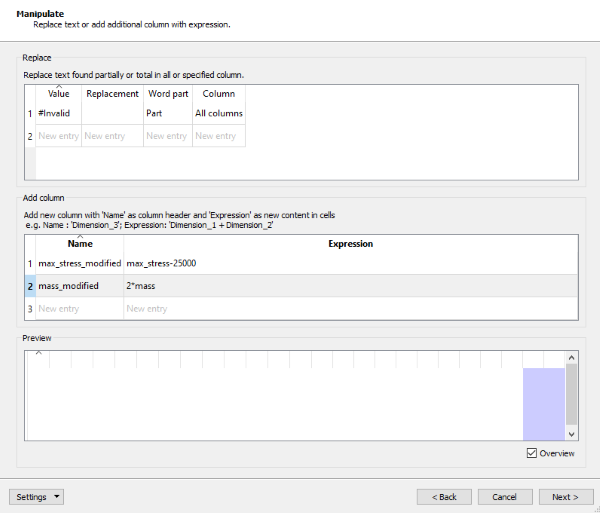
Click .
The Clean up data page is displayed.
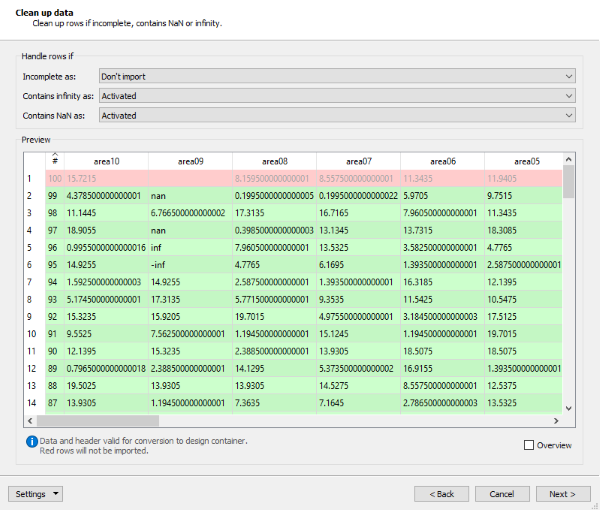
You can use this page to determine how the data import will be handled if the rows contain certain conditions.
Option Description Incomplete as Sets how a row is handled when one or more cells in the row do not contain data: : The applicable table rows are highlighted light green and are shown as active designs on the next page of the wizard.
: The applicable table rows are highlighted dark green and are shown as deactivated designs on the next page of the wizard.
: The applicable table rows do not appear on the next page of the wizard.
Contains infinity as Sets how a row is handled when one or more cells in the row contains inf, -inf, infinity, or -infinity (text case does not matter): : The applicable table rows are highlighted light green and are shown as active designs on the next page of the wizard.
: The applicable table rows are highlighted dark green and are shown as deactivated designs on the next page of the wizard.
: The applicable table rows do not appear on the next page of the wizard.
Inf can be a valid design entry, dependent on the use case, and will be displayed as inf in the design table on next page of the wizard.
Contains NaN as Sets how a row is handled when one or more cells in the row contains nan, notanumber, or not a number (text case does not matter): : The applicable table rows are highlighted light green and are shown as active designs on the next page of the wizard.
: The applicable table rows are highlighted dark green and are shown as deactivated designs on the next page of the wizard.
: The applicable table rows do not appear on the next page of the wizard.
NaN will be treated as non-existent dimension value for this design, the same as if empty cells are imported.
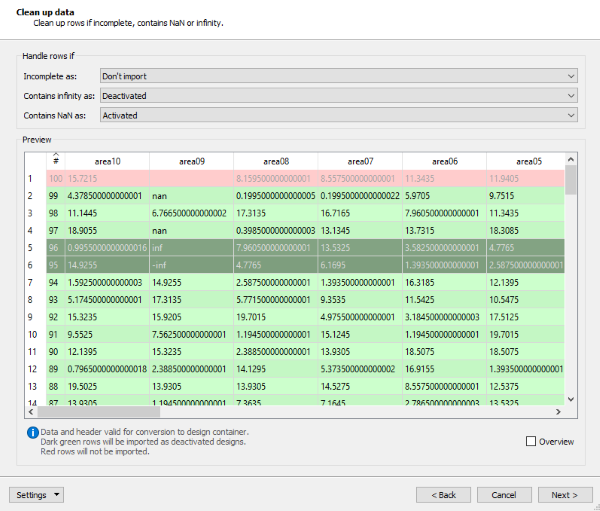
Check the Preview pane to ensure you are importing the correct information.
To show the rows that will be imported without displaying the data, select the Overview check box.
Click .
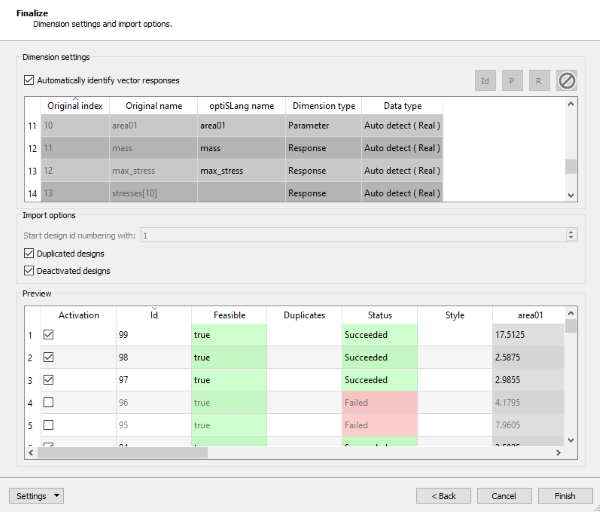
The Finalize page is displayed.
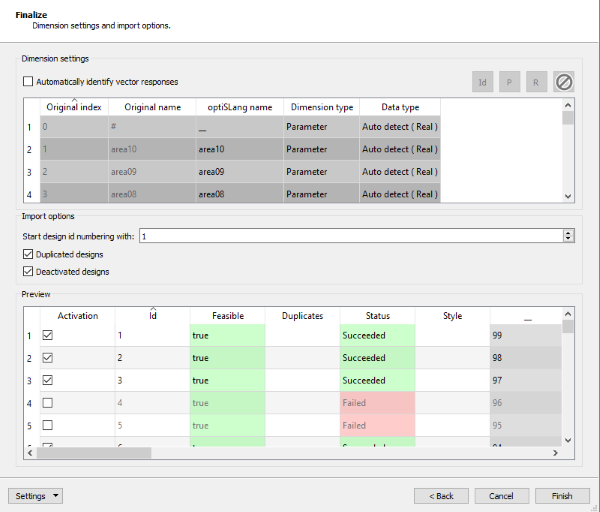
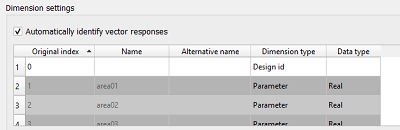
In the Dimension settings area, you can select various dimension types. If nothing is changed here, all columns are imported as parameter values.
Option Description Automatically identify vector responses When selected, turns dimensions names with brackets at the end (for example, stresses[0]) into vector responses. Dimension type buttons Activate these buttons by selecting one or more table rows, then click the appropriate button: : Design ID (active when only one table row is selected)
: Parameter
: Response
 : Do not import
if vector response rows are selected, you cannot select or .
Original index Restores the original order of the table rows. Name Displays the detected dimension name. Alternative name Displays a valid name if the dimension name is not found. You can also enter an alternative dimension name if you do not like the entry in the Name cell. Dimension type Sets the dimension type from the following options: : Import as parameter
: Import as response
: Use values as design IDs. only one dimension can be a design ID, if another is chosen, the previous one is reset
: Do not import dimension
Data type Sets the data type: (preselected)
In the Import options area, you can set some final import options.
Option Description Start design id numbering with If the original data table does not have a design ID column, you can set the starting ID number. The default value is 1. Duplicated designs When selected, imports duplicated designs. Selected by default. Deactivated designs Checks the following in the Preview table: If this check box is selected and one or more check boxes in the column are cleared, the designs are imported into postprocessing but are deactivated. They must be activated again there to be visible.
If this check box is cleared and one or more check boxes in the column are cleared, the designs are not imported into postprocessing.
Check the Preview pane to ensure you are importing the correct information. You can activate or deactivate designs here.
If you want to save these wizard settings for future use, you can export them.
Select > .
Browse to a location where you want to save the JSON file, enter a File name, and click .
The settings are saved to the JSON file. You can import the settings the next time you run the wizard.
Click .