


You can export a plot as an image file.
To export from the context menu:
Right-click a plot and select from the context menu.
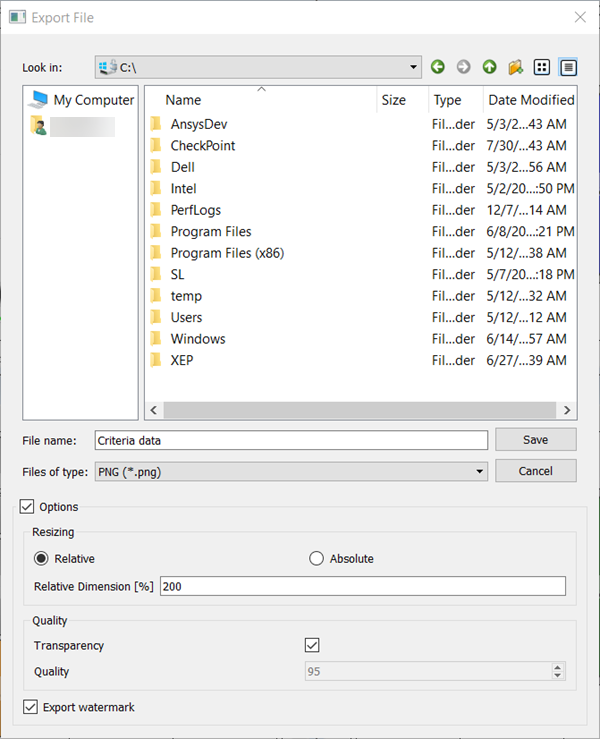
In the Export File dialog box, browse to the location where you want to save the file.
In the File name field, enter a name for the image.
Select a file type from the Files of type list.
To apply advanced options to the file, select the check box and adjust the settings as appropriate.
Option Description Resizing : Select this option to scale the width and height of the image as a percentage, then enter the percentage value in the Relative Dimension field.
: Select this option to change the horizontal and vertical pixel sizes. To retain the image proportions, select the check box.
Quality To make the background transparent, select the check box. This option is only available when you have selected an image format that allows transparent backgrounds.
To increase the quality of the image, increase or decrease the number in the Quality field. This option is only available when you have selected an image format that allows quality changes.
Export watermark To export the image with the optiSLang watermark displayed on the border, select this check box. Click Save.
To export from the Manage Windows dialog box:
From the menu bar, select > .
In the Manage Windows dialog box, select a plot.
Click .

In the Export picture dialog box, browse to the location where you want to save the file.
In the File name field, enter a name for the image.
Select a file type from the Save as type list.
Click Save.