On the SIwave Simulation tab, click Icepak.
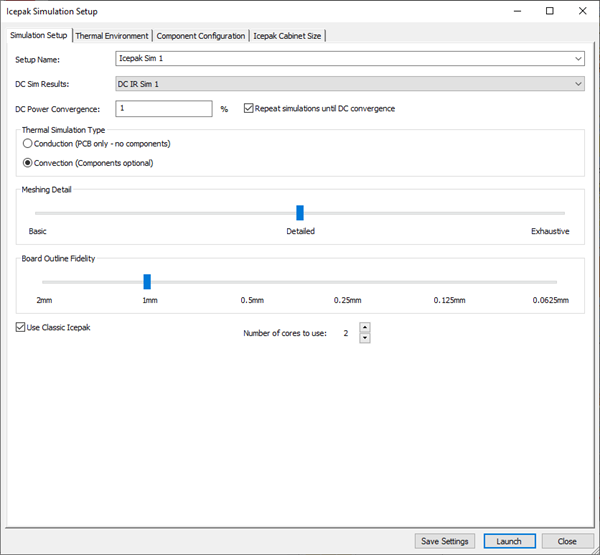
In the Icepak Simulation Setup dialox box, specify a Setup Name for the simulation.
For DC Sim Results, note that the initial DC IR solution is automatically selected.
For DC Power Convergence, retain the default and ensure Repeat simulations until DC convergence is enabled.
Under Thermal Simulation Type, select Conduction (PCB only - no components).
Retain the settings for Meshing Detail and Board Outline Fidelity.
Select Use Classic Icepak.
If High Performance Computing licensing is available, increase the Number of cores to use.
On the Thermal Environment tab, retain the settings for Forced Convection.
Note: Conduction-only modeling sets wall boundary conditions based on flow inputs. Inputs can be based on forced convection (forced airflow) or natural convection (bouyancy-based).
Forced Convection has separte top and bottom flow rate and temperature inputs.
Natural Convection uses the board orientation only (gravity direction) and ambient temperature.
Note: As this is a conduction-only simulation, there are no components or cabinet size settings to define.
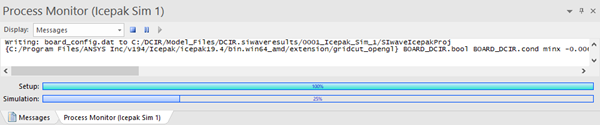
Click Launch to start the Icepak simulation. The simulation progress is displayed in the Process Monitor.
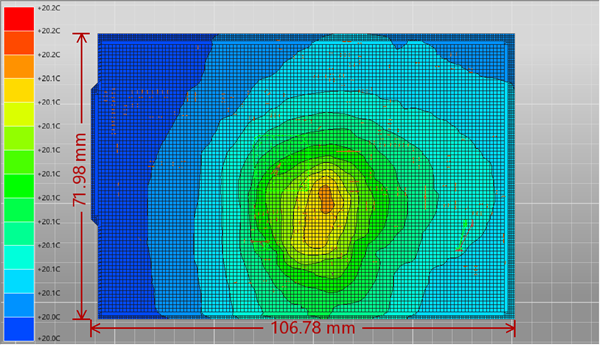
When the simulation loop is complete (after DC IR Sim 2), right-click on the Icepak simulation in the Results pane (Icepak Sim 1) and select Display Temperature to show the temperature contours.