


When you save a Workbench project (for example, my-project), the project is saved with a .wbpj extension (for example, my-project.wbpj). Other files associated with the project (through other Workbench applications
such as Ansys Fluent or CFX) are located in the dp0 folder within a _files folder
(for example, my-project_files).
Each system in the Project Schematic has
its own directory under the dp0 directory.
The directory is named using the corresponding system identifier (for
example, FFF represents a Fluent-based
analysis system; FLU represents a Fluent-based
component system; Post represents a Results component system, and so on). The directory name
is appended with a number to distinguish it from the directories for
other systems of the same type (with the exception of the directory
name for the first system of a specific type which has no number appended
to it).
Within each system directory is a folder for each application that is part of the system. This folder is used to store the files generated and used by the application.
In addition to the settings, case and data files, the following files are managed by Fluent in Workbench:
monitor files
flamelet files
view factor files
non-premixed files (
.pdf)interpreted user-defined (UDF) files
compiled UDF libraries
Discrete Transfer Radiation (DTRM)
.rayfilesmechanism files (
.cheor.inp)property database files (
thermo.dbandtransport.db)
You may use other types of files with Fluent in Workbench, however, you are responsible for making sure that they are located in the appropriate folder within the project file structure.
The following figure represents an example of the directory structure for Workbench project with two Fluid Flow (Fluent) systems and one Results system:
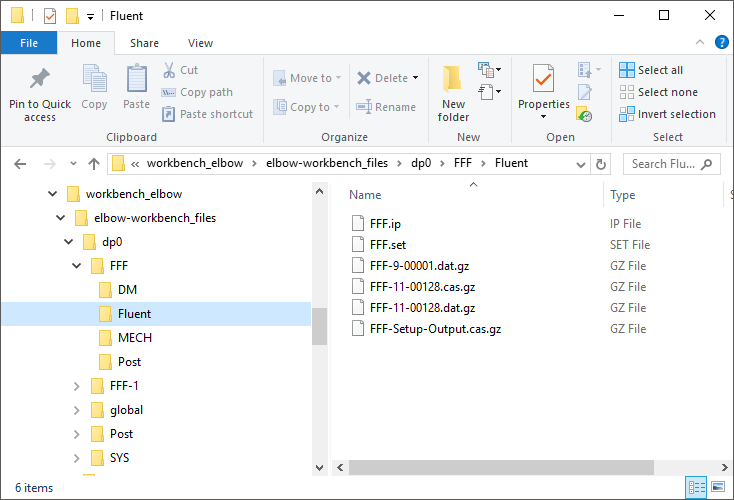
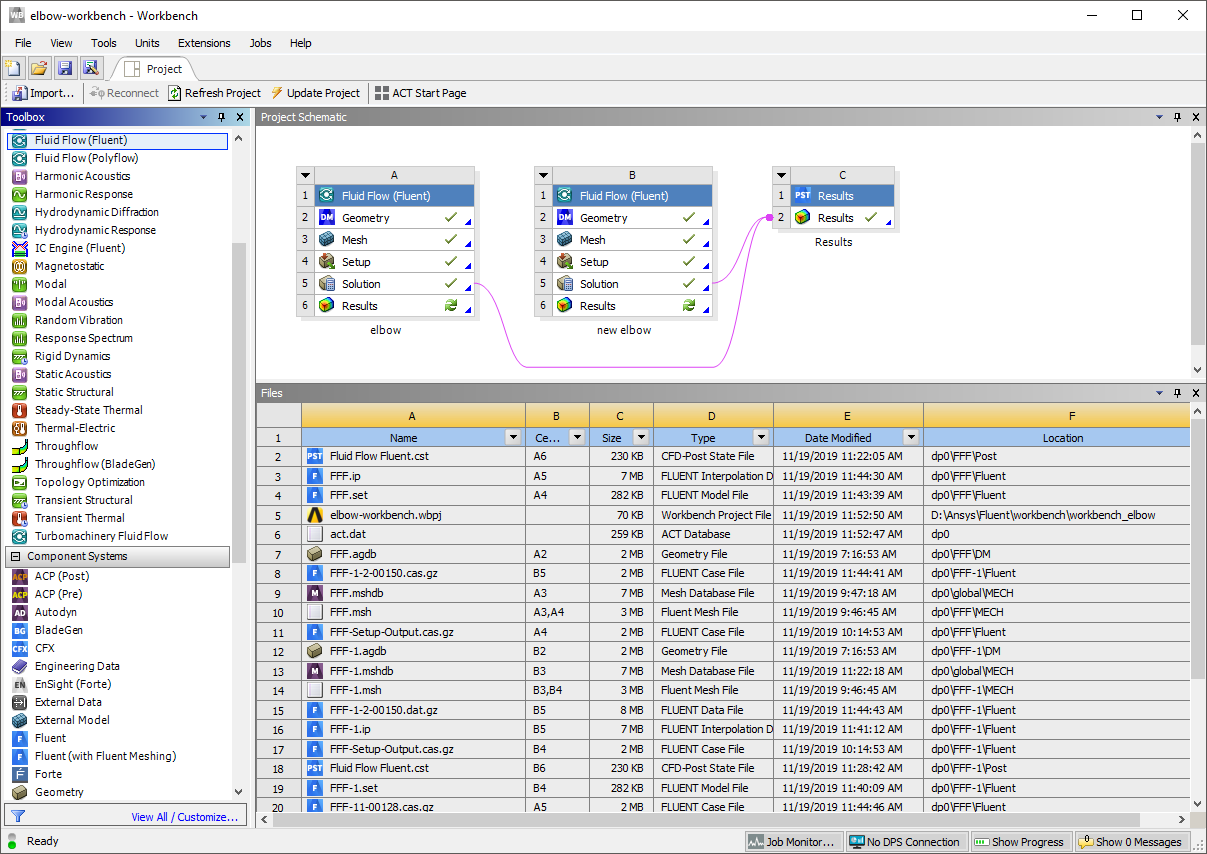
You can view the files associated with your Workbench project by selecting the Files option under the View menu.
View → Files
If data is shared between two systems, then files are also shared between the two systems. The shared file will exist in either the directory of the first system that used it, or in a global directory in the design point directory (depending on the type of system that generated the file).
The _files folder also contains a user_files directory. This directory should be used
for any files you create or reference that you would like to store
with the project.
Important: In general, you should not modify the structure of the project directories or delete or modify any of the files that Workbench applications have stored in the project directories. However, you may delete Fluent case and data files that are stored with the project but are no longer needed. You should close Fluent before deleting Fluent case and data files from the project directories.
Important: Monitor files are automatically written to the appropriate working directory within the Workbench project files directory. You will not be able to specify a different path for monitor files from within Fluent. When reading older case files in which a different location is specified for monitor files, a warning message will inform you that the path will be modified.
Important: If you intend to use a Fluent journal file that reads or writes files while running under Workbench, the journal file and the files it references should be moved to the appropriate Fluent folder in the appropriate system folder in the Workbench project working directory. File paths in the journal files should use relative paths to point to the new locations for the files.
Important: If you use models that generate mesh-dependent information the
first time they are set up (for example, DTRM, S2S) and then you change
the mesh used in your system, the mesh dependent information (for
example, .dtrm file, .s2s file) may be incompatible with the new mesh. To resolve this issue,
you can:
Open Fluent from your system, compute/write the
.dtrmor.s2soutput files, and then update the system.Use a solution strategy and write the
.s2sfile as a pre-initialization method using the appropriate command (for example,(write-sglobs "2d.s2s.gz")).
Important: If your Fluent setup involves compiling and loading a user-defined function
(UDF), it is recommended that you copy the UDF source code files to the same location as
your mesh and settings files before compiling the UDF libraries. This location is available
in the Files pane in Workbench. You may need to save the project first
to create the appropriate files folder within the Workbench project (for example
project name\dp0\FFF\Fluent\). If you need to unload a UDF library
for any reason during your simulation, it is recommended that you save the project soon
after unloading the library. If you archive a project that includes compiled user defined
functions, you will need to recompile the libraries after opening the archived project. To
do so, you will need to open Fluent from the Setup cell, go to
the UDF Library Manager dialog box (User Defined/User
Defined/Functions/Manage...) and unload the existing UDF library. Next, rebuild
the UDF library locally by going to the Compiled UDFs dialog box
(User Defined/User Defined/Functions/Compiled...), selecting the
archived .c and .h files, compiling, and
loading the new UDF library. Finally, save the project.
For more information, see the following section:
When running under Workbench, Fluent automatically saves the settings, case, and data files for your system as needed.
Fluent names these files using the base name of the mesh file. If a mesh (or case) file is imported, the base name of the imported file is used as the base name for the settings, case, and data files. If the mesh is created in Workbench, the mesh file uses the system’s directory name as its base name.
When Fluent saves a case file, it appends the base name with the run number. When Fluent next writes a case file, the run number is incremented in order to avoid overwriting the previous case file. When Fluent saves a data file, it appends the base name with the same run number as the associated case file and with the iteration (or time-step) number at which it was saved. A new case file is not written every time that a data file is written. The case file is only written when the settings and/or mesh is changed.
The following example shows how file naming works in Fluent under Workbench. In this example, you have a single Fluid Flow (Fluent) analysis system and you have created the mesh in Workbench.
Double-click Setup cell. Fluent launches and loads
FFF.msh.h5.In Ansys Fluent, specify boundary conditions, initialize the solution and enter 10 iterations on the Run Calculation task page.
In the Fluent application, select the button.
FFF.setfile is written and 10 iterations are completed.Save the project.
FFF-1.cas.h5andFFF-1-00010.dat.h5are written.In the Fluent application, select the button.
10 additional iterations are completed.
Save the project.
FFF-1-00020.dat.h5is written.In the Fluent application, change the value of the inlet velocity, select the button. When prompted, select the Store the modified settings for a future calculation and use them this time option.
FFF.setis written (overwriting the existing file) and 10 additional iterations are completed.Save the project.
FFF-2.cas.h5andFFF-2-00030.dat.h5are written.Important: The same naming convention is used when autosaving with Fluent under Workbench.