


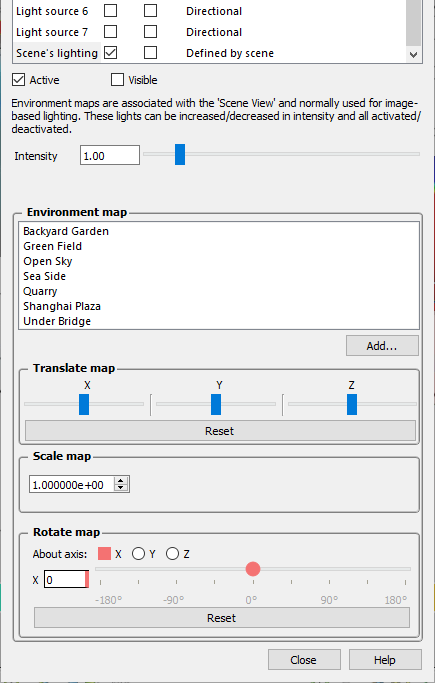
The scene environment specifies both the background image as well as input for lighting the scene. Using the Scene’s lighting toggle, you can separately turn off the use of the light defined from the scene or adjust its intensity to remove the effect of the environment light from the scene’s lighting. You can also select a background image from the Environment map list, or add a new one.
Select Scene’s lighting.
To see its effect in the viewport, click .
To see its appearance in the viewport, click .
Select an Environment map to use from the list.
You can use to specify an HDRi image to use for the scene. Typically a 4k or 8k spheroid image is used.
You may also want to turn on/off other light sources if you feel the lighting is too weak/strong.
As required, adjust the Intensity slider.
To adjust the up vector of the environment light source, use the ground plane's normal direction option (see Adjusting Ground Plane Settings).
Manipulate the environment sphere using the following tools:
Translate map
Shift the position of the sphere along the X, Y, and Z axes without moving the model.
The values are incremental values specified in the world space. This control sets the translation values for the current active viewport. Each viewport can have its own translation values.
To reset the changes, click Reset.
Scale map
Enlarge or shrink the radius to match the model.
Rotate map
Rotate the sphere along the X, Y, and Z axes without rotating the model.
The X,Y,Z axes are in world space, specified for the master viewport ( viewport 0). All other viewports share the same rotation transform
To apply the rotation:
Under Rotate map, select the , Y, or Z axis button.
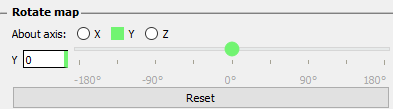
Move the angle slider left or right, or enter a specific value.
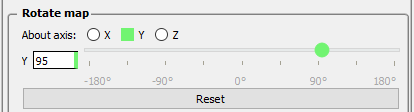
Note: If you do not change the axis, the rotation inputs are cumulative.
If required, switch to a different axis.
The angle value is reset to 0°.
To reset the changes, click Reset.