This chapter describes the functions available through the Feature ribbon ribbon, which contains the Feature Icon Bar (including Secondary Feature icons) and the Quick Action Icon Bar.

Secondary features can be turned on as desired. These are not features in and of themselves, but are accelerators into various settings of the main features. For example, the Clips feature is really a shortcut to the clip settings of the Part feature.

By default you will see the five secondary features in the figure above. They are attached to the feature ribbon by a separator. You can configure the Feature ribbon ribbon by right-clicking anywhere on the ribbon and choosing Customize Feature Toolbar....
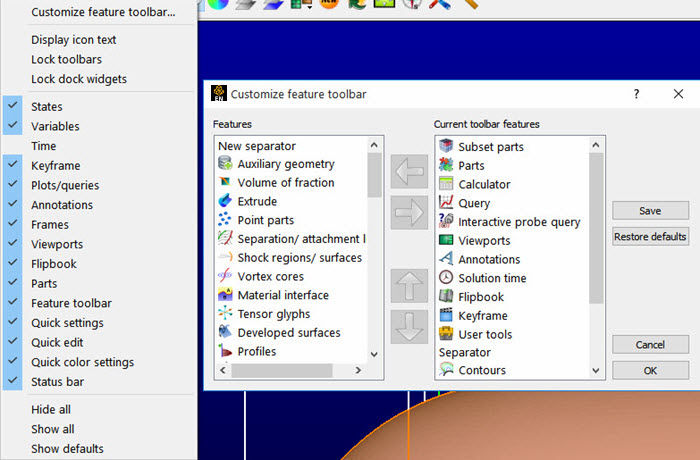
Selecting items and using the left or right arrows will allow you to move icons on or off of the toolbar. Selecting and using the up or down arrows will change the icon position in the toolbar. When you have made your changes you can hit the button to save them for the current session, or the button to save them for this and future sessions.
Quick Action Icons for easy manipulation of the major attributes of selected features change in the Feature ribbon according to selection in the list panels. For example, when a part is selected, you will see:
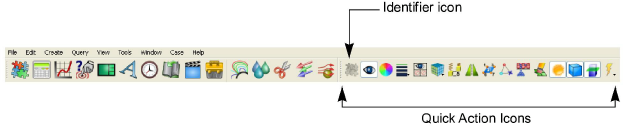
Just to the right of the separator, a greyed-out icon of the feature will be shown, followed by the Quick Action Icons for the selection. These icons allow you to change popular attributes without having to open the Feature Panel.
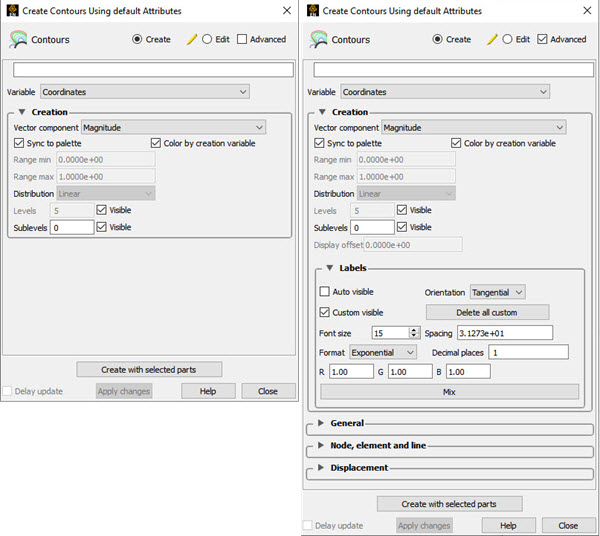
The Feature Panel (FP), is available for manipulation of a features attributes, for both creation of new entities, as well as editing of existing entities. This editor can be brought up in several different ways, including clicking the feature icon itself, double-clicking on entities in the list panels, right-clicking entities in the list panels and selecting Edit..., etc. For ease of use, this editor can often have both a basic and advanced mode. The following is an example of this editor for contour parts.