


The following topics are included in this section:
You can have EnSight automatically generate and display isosurfaces as you adjust a slider with the mouse.
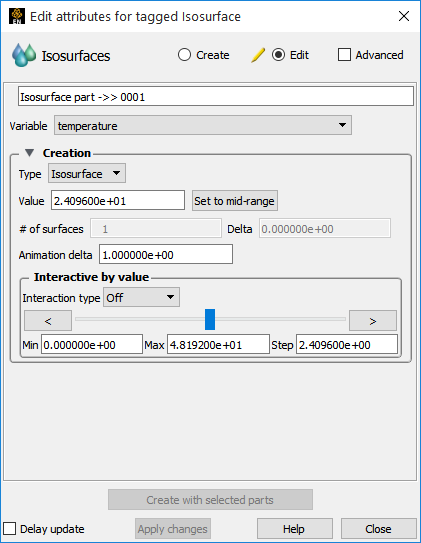
Set the Interactive mode to Manual.
Adjust the slider to the desired location.
You can also set the Interactive type to Auto and EnSight will automatically sweep from Range Min to Max with step size equal to Increment.
In the graphics window, left click on the isosurface and you will see a green handle appear. Drag the handle to change the value of the isosurface and see a printout on the screen of the actual value as you drag the isosurface.
A range of isosurfaces can be automatically generated and viewed in a flipbook. Flipbooks provide on-screen animation of various dynamic events and (in default setting) permit graphic manipulation (for example, rotation or zoom) while the animation runs.
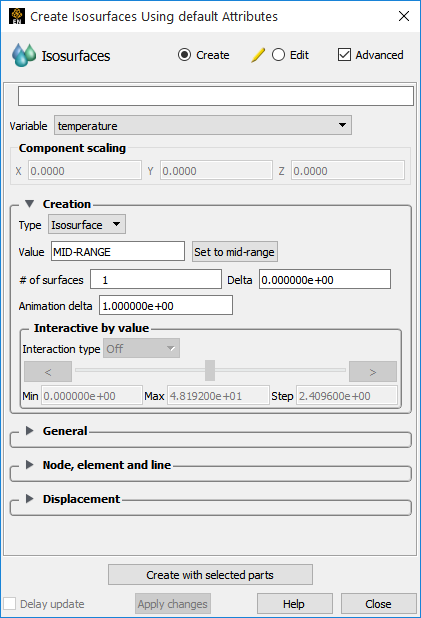
Double click on the Isosurface part.
Click on the button.
In the Creation section, set the Animation Delta to an appropriate value. For each page (frame) of the flipbook, this value will be added to the current value to yield the new isovalue.
Click the Flipbook icon.

Choose Create Data.
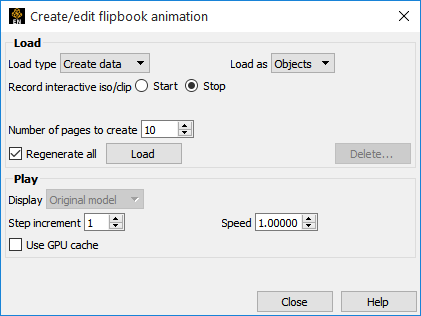
Set the Number of pages to create to an appropriate value.
Click .
When loading is complete, use the controls to play the flipbook.
Alternatively you can put the isosurface in interactive manual mode, and then click on the flipbook icon, click on the more detail icon, choose Load Type Create Data, then click on the button, move the isosurface, then click on the button and choose your number of pages and click Load.
You can have EnSight create multiple isosurfaces at a specified delta value. The result is a group of isosurfaces:
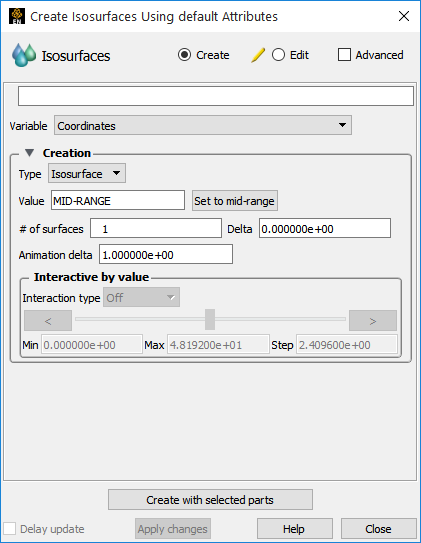
Select the parent part.
Click the Isosurface Feature icon.
Select the Variable to use.
Select an appropriate isovalue. (the default will be a mid-range value).
Set the # of surfaces and the Delta between them.
Note: You can only change the number of surfaces at creation.
Click .
An isovolume is a volume whose constituents (for example, nodes and elements) are constrained to a constant interval range in a scalar field. In EnSight, you can constrain the isovolume to ranges less than an interval minimum, greater than an interval maximum, or between the interval minimum and maximum.
In the Isosurface Feature Panel, toggle on .
Choose a Variable.
Set the type to Isovolume.
Set the Isovolume range Min and Max.
Set the Constraint to Band to constrain the isovolume within an appropriate Min and Max range of the scalar variable. Min will create an isovolume constrained to be <= o the value given while Max will create an isovolume >= to the value given.
Click .