


Unlike the case of unstructured meshes as in the previous example, logical planes of a structured mesh may be viewed in addition to the arbitrary planes described using the plane tool. In this demonstration, constant I, J, and K planes will be created and used to display results.
Remember that model reads in with shaded surfaces toggled ON:
Use the Shaded toggle on the Tools Icon Bar to toggle shaded surface OFF then back ON for all parts

Toggle OFF Highlight Selected Parts.

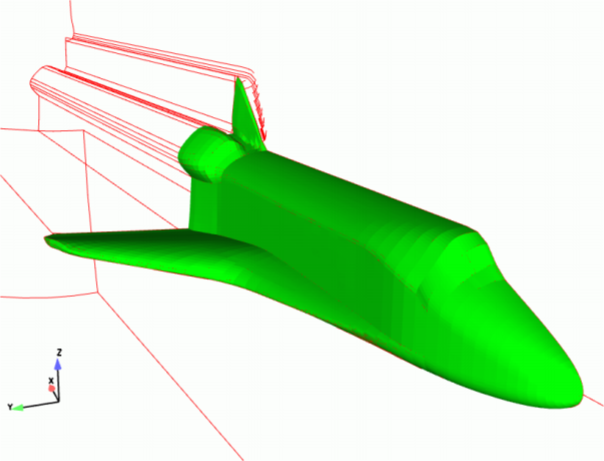
After some rotations, translations, and a zoom - you should be able to produce an image approximately as follows:
(The model should be green)
Select the external flow field part in the Parts list.
Click the Clip icon in the Feature Icon Bar to open the Feature Panel for clip creation.

Click the button and change the setting to IJK.
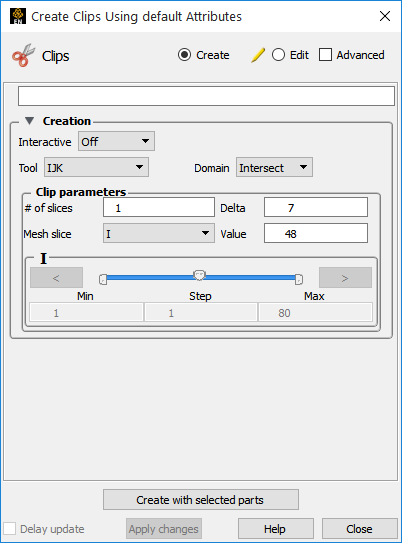
Change the value for an I Mesh Slice to
48.Click Create with selected parts.
Note: You will notice that a new part appears in the Parts list, Sweep surface.
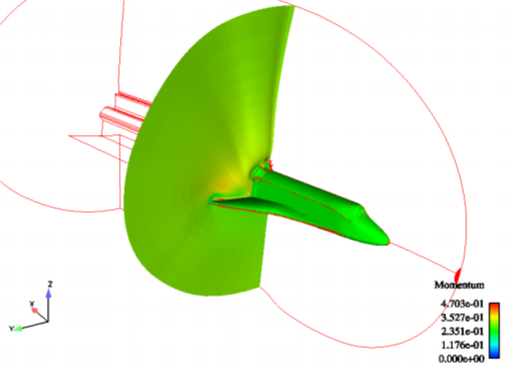
Right click the Sweep surface part to bring up the right-click pulldown. From the pulldown select → and in the resulting pop-up dialog choose Momentum (under Vectors) followed by the button.
The image in your graphics window should appear as follows:
As in the previous example, it is possible to interactively manipulate the clip plane. In this case, however, the plane will move along a given logical coordinate as the slide bar is moved:
Select Manual from the Interactive menu.
Move the slider to view different constant I Mesh planes.
Change the Mesh Slice from I to J and K and use the slider to view different constant J and constant K mesh planes.
Note: The Min, Max and Step settings can be used to limit the extent and resolution of these planes.
Set the Mesh Slice back to I.
Set the Interactive setting back to OFF.
It is possible to use both IJK and arbitrary plane Clips within the same session of EnSight. The IJK Clip feature may also be used as an alternative to creating model parts via the Part Builder as described above.
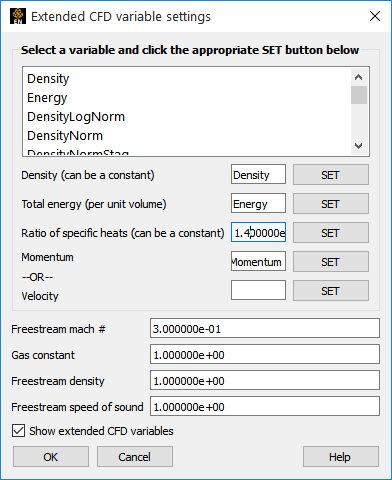
Extended CFD Variables
Often, the primitive variables solved by a given CFD code are of less interest than certain derived variables, for instance the Mach number, defined as the ratio of the local fluid speed to the freestream speed of sound. In the aerospace community, a number of these derived quantities are referred to as the PLOT3D functions, as they were available in the program PLOT3D. EnSight includes most of these functions, and enhances their original form in two important ways. First, these Extended CFD Variables may be computed based on the
q filevariables of the PLOT3D format, namely the scalars density and energy and the momentum vector. In this case, EnSight makes the appropriate mapping of the variables. If, however, PLOT3D files are not used, or if the PLOT3D variables are used in a non-standard fashion, the user may define the appropriate mapping between the variable names as they were defined in the results and those quantities needed by EnSight to create the desired extended variable. The second enhancement is the ability to define any value for the ratio of specific heats, Cp, or use a scalar variable to define a different Cp value at each node of the mesh.The Extended CFD variables are turned on by default when you read a Plot3d file. To edit the settings or to turn them off:
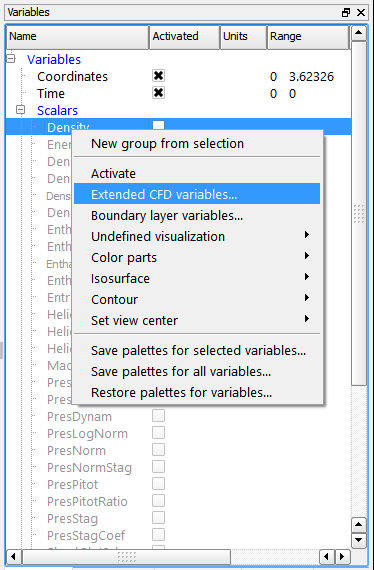
Right-click any variable in the Variable list.
And select Extended CFD Variables... from the pulldown which opens the Extended CFD Variable Settings dialog
Normally this is where you would adjust any needed parameters or turn the extended CFD variables off. Things are good for this model.
Click .
With the Extended CFD Variables turned on the Variable list contains the original variables as well as the Extended CFD Variables. As with all others, these variables will not be activated until they are needed, for instance to color a model part. The activation of the extended variables involve a computation requiring one or more of the primitive variables. This, in turn, will require their activation, which EnSight performs automatically. All activated variables will remain so until they are explicitly deactivated.
Note: Some extended variables (for instance vorticity) involve complex computations which may require significant time to complete. Variables that are grayed out in the list have not yet been activated (or computed). Solid black colored variables are active.
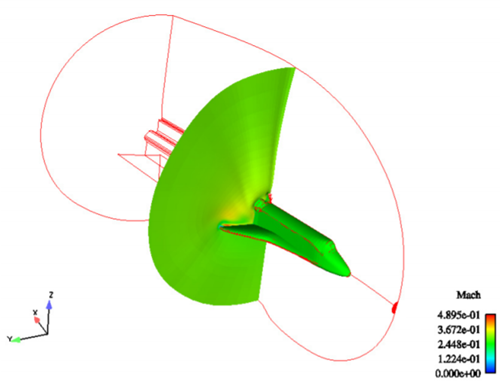
Right-click the Sweep surface part in the Parts list and color the part by Mach number. The image in your Graphics Window should look something like the following:
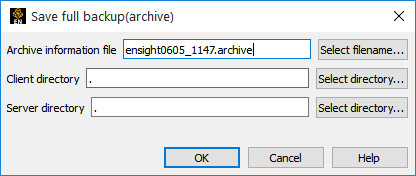
EnSight can save the complete state of a session as an archive. An archive consists of two binary files containing the state of the Client and Server as well as an "Archive Information file" that stores additional information (including pointers to the two binary files).
Although you can duplicate a session by replaying a saved command file, restoring an archive is much faster. When you replay a command file, EnSight has to re-execute every action performed by the user, even if that action had no effect on the final state. An archive restores quickly since only the final state is restored.
To save an archive:
Select → → to open the Save Full Backup Archive dialog.
By default, EnSight will save the archive information file and the Client archive in the directory from which the Client is started. The Server archive will be saved on the Server host (by default, in the directory from which the Server was started). Since these directories are part of the EnSight distribution, they are probably write protected. To save the archive files in your home directory instead, prefix the entries with
~/.Triple-click in the Archive Information File field and type
~/ens_chapter5.ar.Double-click in the Client Directory field and type
~/.Double-click in the Server Directory field and type
~/.Click .
You can restore an archive during a session (either immediately after the Client-Server connection or after replacing a case) by selecting → → . You can also have an archive automatically load at startup. From a command line:
% ensight -ar ~/ens_chapter5.ar
And even easier - drag and drop the .ar file from a file browser onto the EnSight 2024 R2 desktop icon. See How To Save or Restore an Archive (Help → How to manual...) for more information.