Once Ansys Chemkin has been installed and your Chemkin license service is operating (see the Ansys licensing documentation on the Ansys Help site or email licensing@ansys.com for help with licensing), then you can verify the installation by running a sample problem. Complete the following steps to verify the installation.
The first time you run Ansys Chemkin, a personal copy of the sample projects will be copied into a
directory named samples<release_number> (where <release_number>
looks like 2021R1 or similar) in your " Chemkin_HOME" location. By
default, this location is C:\Documents and
Settings\<username>\chemkin on Windows systems and is
$HOME/chemkin on Linux systems. You can override this location by
setting an environment variable named CHEMKIN_HOME to an existing, writable
directory. The CHEMKIN_HOME location contains user interface log files
(logs directory) and sample projects
(samples<release_number>). (There will also be a
samples directory if you have previously installed Chemkin 4.x.) This
location is also the default Working Directory for any new project. Finally, it contains your
preference file. To avoid having conflict in your preferences and project history information,
you should always choose a location for CHEMKIN_HOME that is used only by
you.
Tip: Starting with version 2021 R2, the directory of samples, the samples<release_number> directory, is installed anew with each release and does not overwrite any pre-existing samples directory. Uninstalling Chemkin also does not remove this directory.
Note: If your Windows user name contains Unicode characters (such as Kanji), you must override
the default location of CHEMKIN_HOME. To do so, explicitly set the
CHEMKIN_HOME environment variable to an existing directory location whose
path does not have any Unicode characters.
Ansys Chemkin's computational jobs run in a DOS environment that does not support Unicode characters in the file paths. Similarly, beware of using any Working Directory location containing Unicode characters in any component of the full path to its location.
For Windows/PC, the install program may have placed an icon labeled Ansys Chemkin on your desktop. Double-click the Chemkin icon to launch the program. You can also access Chemkin from the Windows Start menu option, selecting the desired release:
The rd_workbench alias is also defined if you installed the optional Reaction Workbench product. (This product requires additional license features.)
A sample project similar to Figure 1.1: Chemkin Diagram Panel should appear on your screen after the samples<release_number> directory is created.
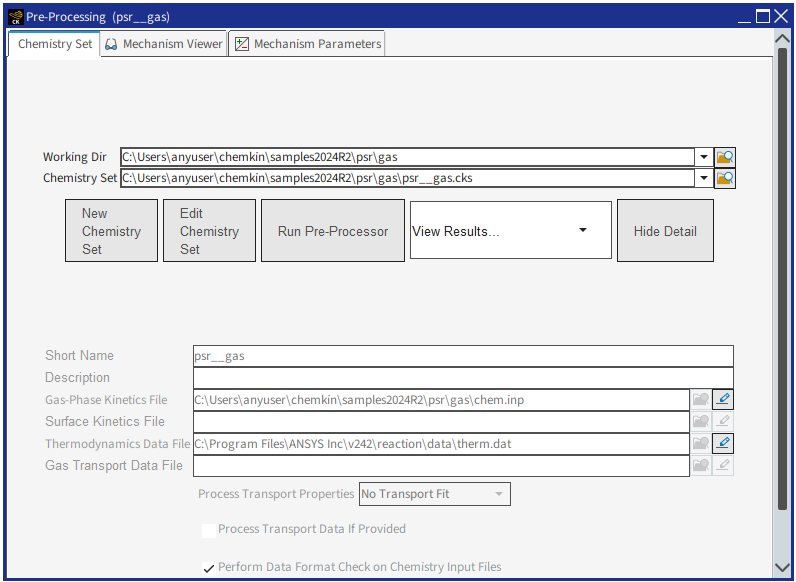
Double-click the Pre-Processing option on the Open Projects tree. A panel similar to Figure 1.2: Chemkin Pre-Processing Panel should appear. For pre-defined sample problems such as this one, the Pre-processing of chemistry data will proceed automatically. On this panel, if the "View Results" pull-down is enabled, the chemistry has already been pre-processed and you can proceed to step 4. Otherwise, proceed to step Acquiring Chemical Data.
At the Pre-Processing panel, click the Run Pre-Processor button.
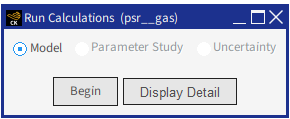
Double-click the Run Calculations node on the Open Projects tree. A small panel similar to the one in Figure 1.3: Chemkin Run Calculations Panel should appear in front of the diagram.
The simulation runs and reports success. As each reactor is analyzed, it is highlighted with a colored outline, and at the end of the simulation the final reactor model shows a green outline.
A Monitor Project Run panel also opens below the diagram panel to allow you to observe the progress of the analysis.
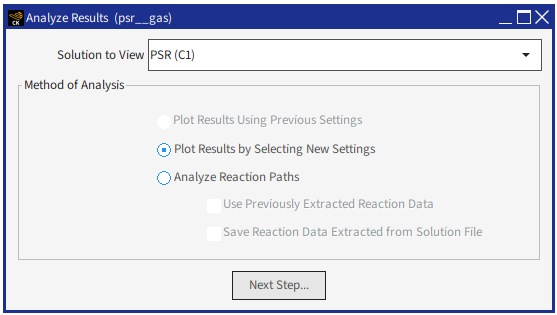
Once the simulation run is complete, the Analyze Results node on the Open Projects tree is active. A successful run will automatically open the Analyze Results panel, as shown in Figure 1.4: Analyze Results Panel. Here you can select to plot results from the solution or analyze the reaction paths for the solution.
Accept the default options of PSR (C1) for Solution to View and Plot Results for the Method of Analysis. You do not need the other options offered. Click the Next Step button.
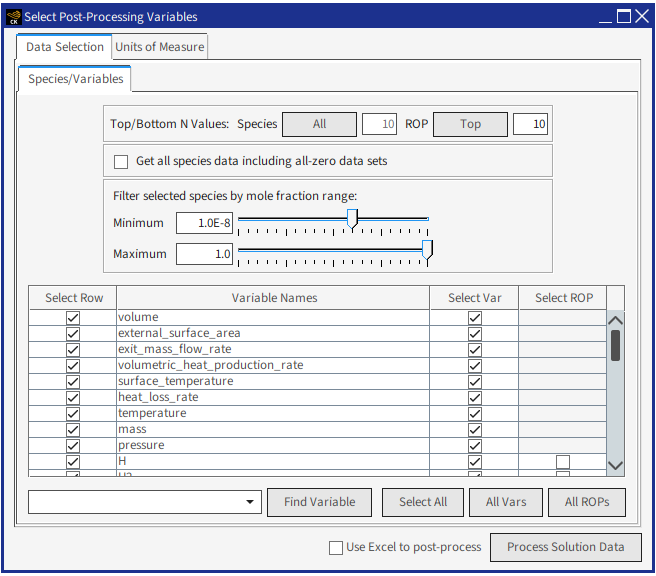
The Select Post-Processing Variables panel opens at the Species/Variables tab, as shown in Figure 1.5: Select Post-Processing Variables Control Panel.
Accept all the default selections and click the Process Solution Data button.
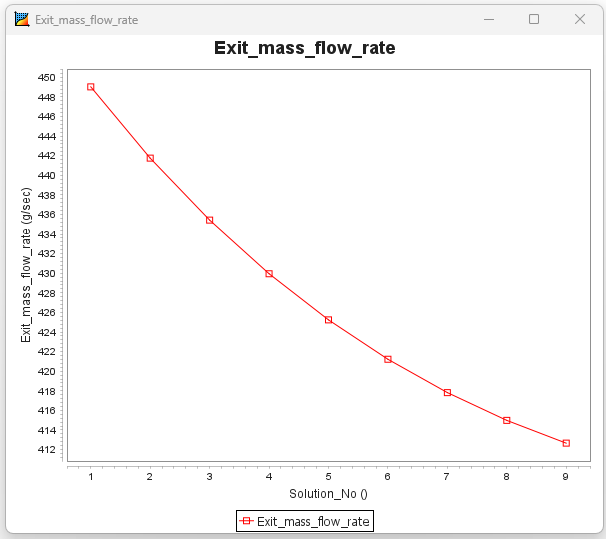
The Ansys Chemkin Visualizer opens at the Line Plot tab. (It may be hidden behind the Chemkin User Interface so, on Windows, look for it in your task bar.) Within this Visualizer, select Exit_mass_flow_rate as the Y variable and then click Create Plot. A new window similar to Figure 1.6: Visualizer Plot Window should appear, with the default plot of volume vs. solution number for the constant-volume problem.
This confirms that Ansys Chemkin has been installed successfully.
In the Visualizer, select the File > Exit command to close the Visualizer. The plot window will also close.
Select the Exit command from the Ansys Chemkin Interface Home tab on the ribbon to exit Chemkin.