Automatic Support Regions
To create automatic support regions:
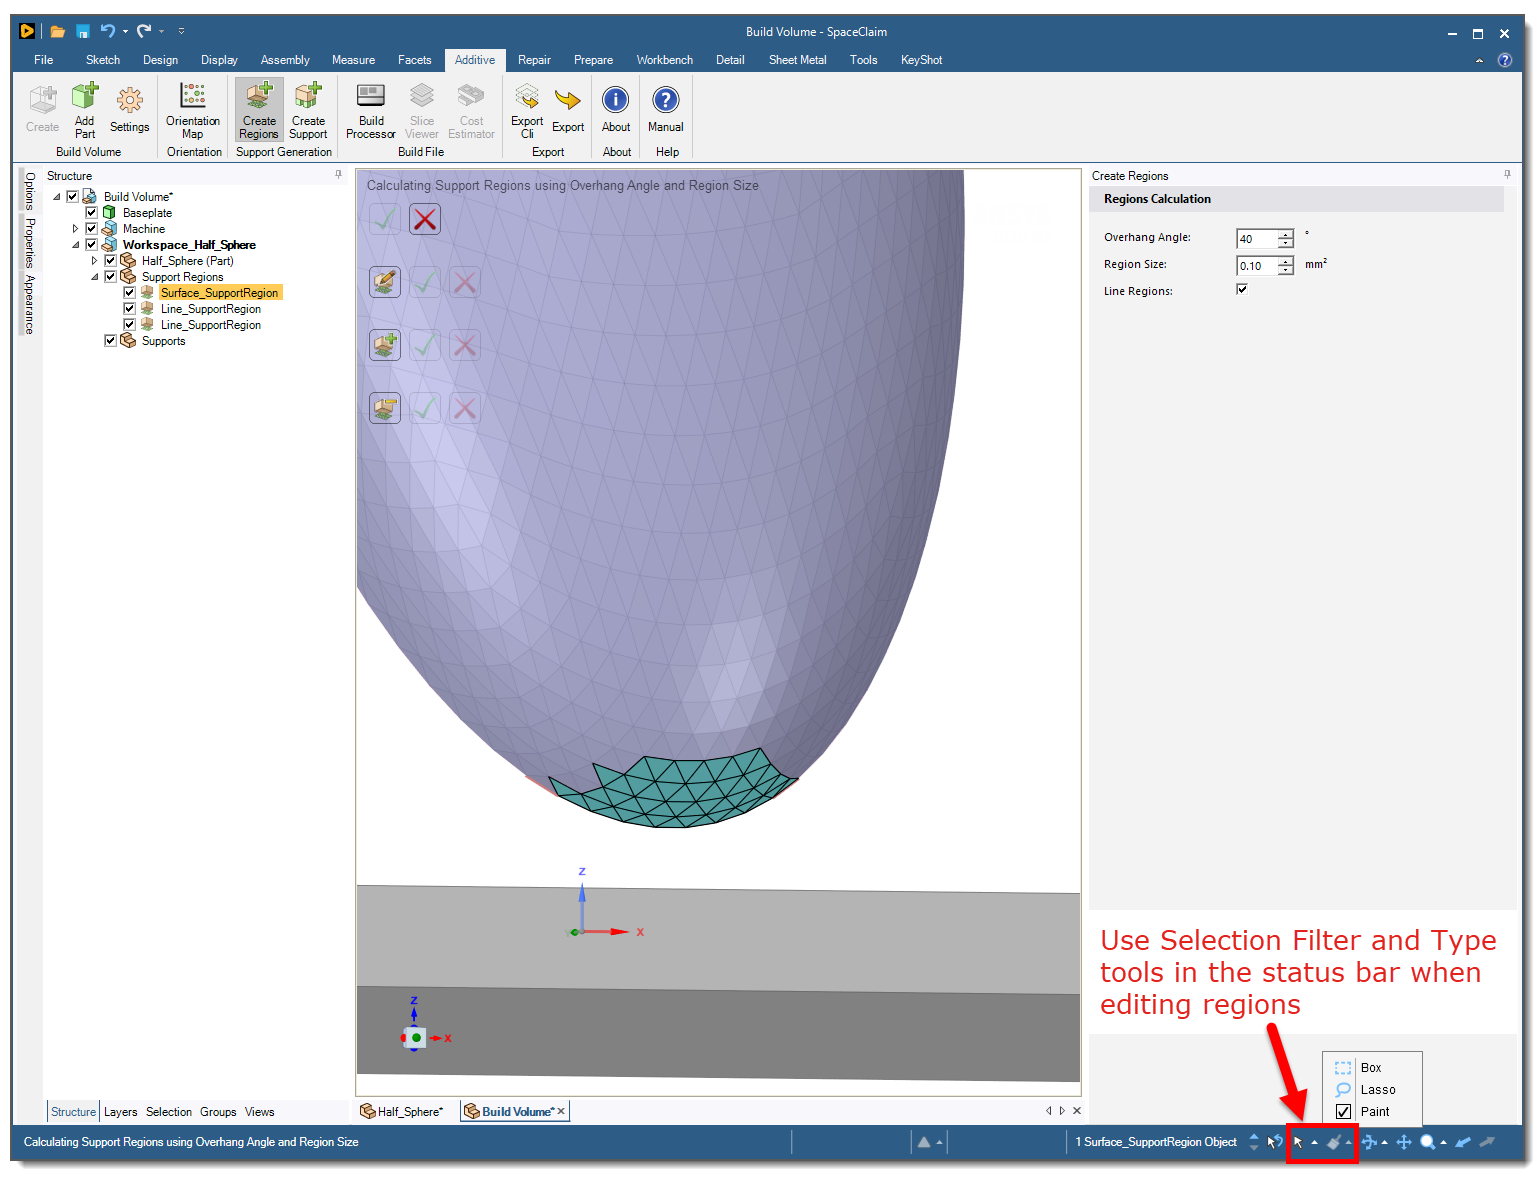
Select the Workspace (or any of the components in the workspace assembly) and then click Create Regions.
Adjust the Overhang Angle and Region Size criteria in the Create Regions panel on the right side of the interface. Check the Line Regions check box to have support regions created at edges of your part.
Click the green check box
 to create the support regions. Depending on the complexity of the part, you may see a
status window showing the progress of the faceting operation. You will then see new
Support Region objects added under the Support Regions component in the Structure
tree—surface support regions on surfaces and line support regions on edges.
to create the support regions. Depending on the complexity of the part, you may see a
status window showing the progress of the faceting operation. You will then see new
Support Region objects added under the Support Regions component in the Structure
tree—surface support regions on surfaces and line support regions on edges.To make changes, simply adjust the criteria in the panel and check the green check box again
. Click OK on the
confirmation window to clear existing regions (and their supports, if any) and new
support regions are created.
Manual Support Regions
To create manual support regions for faceted .stl parts only:
Select the Workspace (or any of the components in the workspace assembly) and then click Create Regions.
Click the Manual Region icon
 to enable selection of individual
facets. Use Ctrl click to select multiple facets. To change to another means of selection,
such as box selection, lasso, paint, etc., click the Selection Type tool in the status bar
at the bottom of the interface window.
to enable selection of individual
facets. Use Ctrl click to select multiple facets. To change to another means of selection,
such as box selection, lasso, paint, etc., click the Selection Type tool in the status bar
at the bottom of the interface window. Click the green check box
to create the manual support regions. Depending on the complexity of the part, you may see
a status window showing the progress of the faceting operation. You will then see new
manual Support Region objects added under the Support Regions component in the Structure
tree—surface support regions on surfaces and line support regions on edges.Click Add to Region
 to add triangles to the existing set, or Remove from Region
  to remove triangles from the
existing set, as needed, followed by the green check box .
to remove triangles from the
existing set, as needed, followed by the green check box .