


Creating Spectrum Files
Install the Konica Minolta CL-70F Utility software.
Perform the dark calibration on the Konica Minolta illuminance meter by following the instructions on the screen.
Choose Spectrum then press the settings icon (at the bottom right corner of the screen)..
Choose a name for the memory title.
Measure the white, red, green and blue spectrum of the 1st set.
Plug the Konica Minolta to the computer.
Launch the utility software.
Click Memory Data.
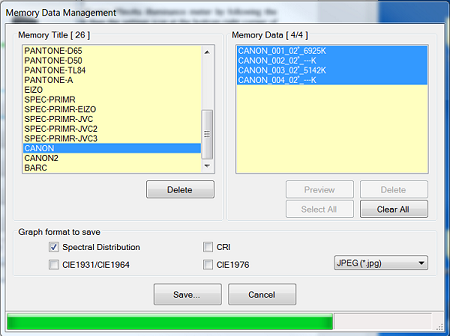
From the Memory Title list, select the title previously created and in Memory Data, select all 4 measurements.
Check the Spectral Distribution and save those files in the 5th set.
Open the white spectrum excel file and select the cells from A38 to A108.
From the Excel menu, click Data and select Text to Columns.
Select Delimited, click Next, uncheck Tab and check Comma, then click Finish.
Select cells from B38 to B108 and copy them.
Open the SpectrumCreation excel file (under Konica folder in 5th measurement set) and paste the data in the yellow cell named "WHITE Raw data".
Replace "." by ",".
Copy the data and paste as values in the blue cell.
Change "," to ".".
Select the 2x71 cells and copy them.
Open the White.spectrum file (spectrum file located in 5th measurement set) with Notepad ++.
Under 71, select all lines and paste the data coming from the excel file.
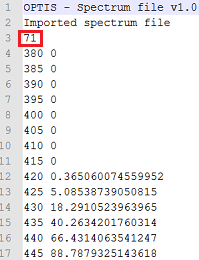
Save the modified .spectrum file.
To verify the values, open the file in Virtual Photometric Lab.
If the values are incorrect, repeat the procedure from step 11.
Repeat the procedure from step 11 for each spectrum file (red, green and blue).
Now that all spectrum files are created, apply them to the gradient maps.