This procedure shows you how to solve simulations in the Cloud using Speos Core to
specify the cluster configuration and Ansys Cloud as a job scheduler.
Prerequisites: Ansys Cloud Installation should be complete and your Speos Core
environment should be configured.
-
Open Speos Core.
-
Click to load an exported (*.speos) simulation.
-
Click Speos HPC Simulation
_Speos_HPC_Simulation.png) .
.
-
In Job name, type a meaningful job simulation name that will
help you identify the job in the job monitor.
Note: By default this name is your user name with a simulation index. The index is
incremented at each new simulation.
-
From the Select Region drop-down list, select the Cloud region
that is the closest to you.
Note: A flexible region allows you to define the Total number of cores below.
-
In Configuration choose from a list of pre-configured hardware
configurations that have been optimized for the solver that you are using. Each
configuration has a set number of cores, nodes, and Ansys Elastic Units (AEUs) per
hour.
-
If you selected a flexible region, with the Total number of cores slider, define the maximum number of cores to use for the simulation.
-
Check Download results after completion if you want the results to be downloaded in the .speos folder.
-
In Number of rays, define the number of rays used for
simulation. This number is retrieved from the *.speos data set in Speos but can be
adjusted if needed.
-
In Simulation time, define maximum time the simulation can run.
Note: This duration cannot exceed the "Maximum scheduler wall clock", that is 1 hour.
-
Tick Disable ray files and lpf/lp3 output if you want to disable
the generation of these outputs in order to improve simulation time and performance.
Note: This option may be greyed out if your simulation does not contain ray files or does not use
Light Expert.
-
Click Submit job.
The job input files begin uploading to a storage directory in the Cloud. Once
the files have been uploaded, the Cloud service will allocate resources for the job, and
the job will start running on the Cloud hardware.
Note: You will receive an email
notification when a job starts, completes, fails, or is stopped, enabling you to keep
track of jobs even when you are not using the Cloud portal.
-
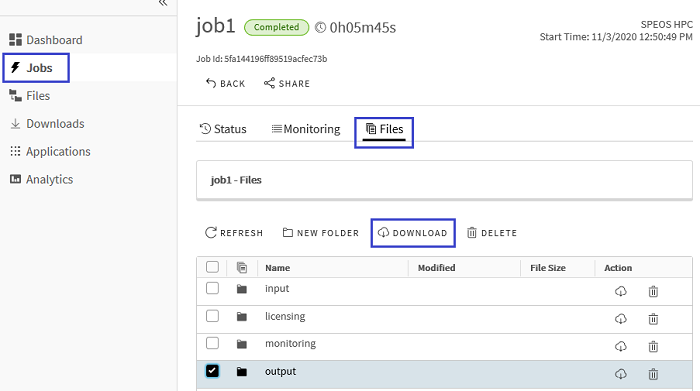
Once the simulation is complete, from the Ansys Cloud portal, click
Jobs, select your job from the list, then click
Files and download your output result files.
The simulation is solved through the Ansys Cloud and can be managed from the Cloud
portal.For more information on file transfers or job monitoring on the Cloud portal,
please refer to the Solving in the Cloud section of the Ansys
Cloud Guide.


_Speos_HPC_Simulation_Ansys_Cloud.png)