


Exercise 3: Battery Designer
Battery Designer is a Synthesizer model that estimates the performance of battery module and pack designs based on the materials, battery cell type, and thermal management system used.
-
Create a bubble chart to compare individual battery
cells.
-
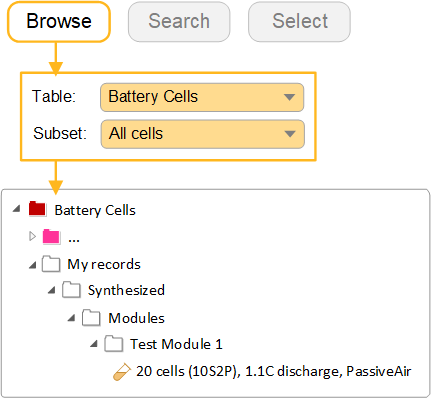
On the
 Chart/Select panel, in
the Select from list under Selection
Data, choose Battery Cells: All
Cells.
Chart/Select panel, in
the Select from list under Selection
Data, choose Battery Cells: All
Cells.
-
Click
 Chart/Index
and set the following x- and y-axis values:
Chart/Index
and set the following x- and y-axis values:
- Category
- General
- X-Axis Attribute
- Specific power
- Y-Axis Attribute
- Specific energy
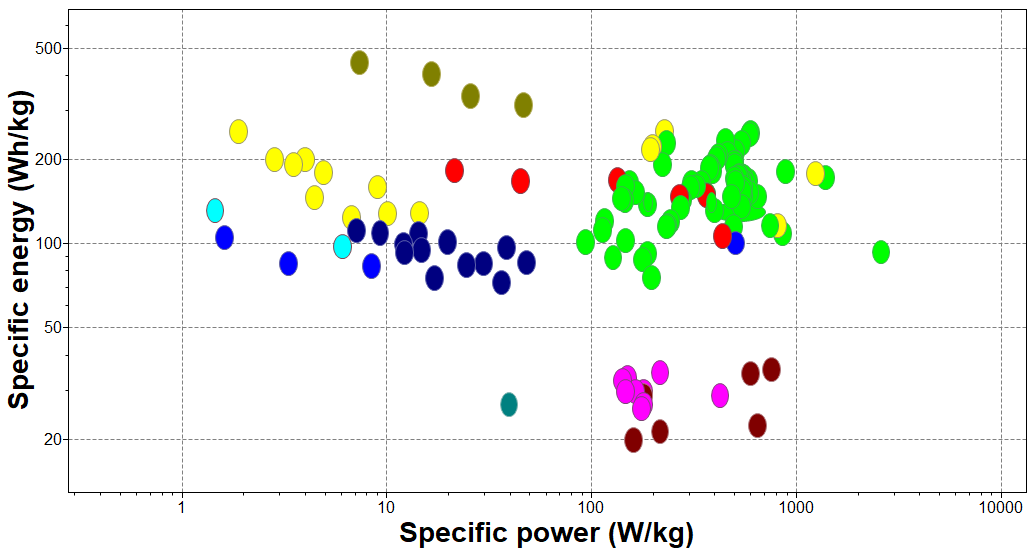
Charts of Specific power against Specific energy are also known as Ragone plots.
By default, this will display all cells in the Battery Cells table, as well as any synthesized Module and Pack records in the Selection Project.
-
On the
-
Use the Battery Designer to estimate the performance of an example
multi-cell module configuration
Click
 Synthesizer on the toolbar.
In the dialog, select Battery Designer - Cell to Module (by
number of cells).
Synthesizer on the toolbar.
In the dialog, select Battery Designer - Cell to Module (by
number of cells). -
Click Create and then Finish to
create the synthesized record and close the Battery Designer
Synthesized records created using Battery Designer are appended to the Battery Cells table under .
-
Now use the Battery Designer to create some Module
records based on desired performance, and compare them to the existing
Module.
Click
Synthesizer and select Battery Designer -
Cell to Module (by performance). -
Compare Module records using the bubble chart
All the synthesized Modules can now be compared with each other and with individual cells.
You can also open Module datasheets to view other calculated properties associated with that module, for example predicted operating temperature and operating time.
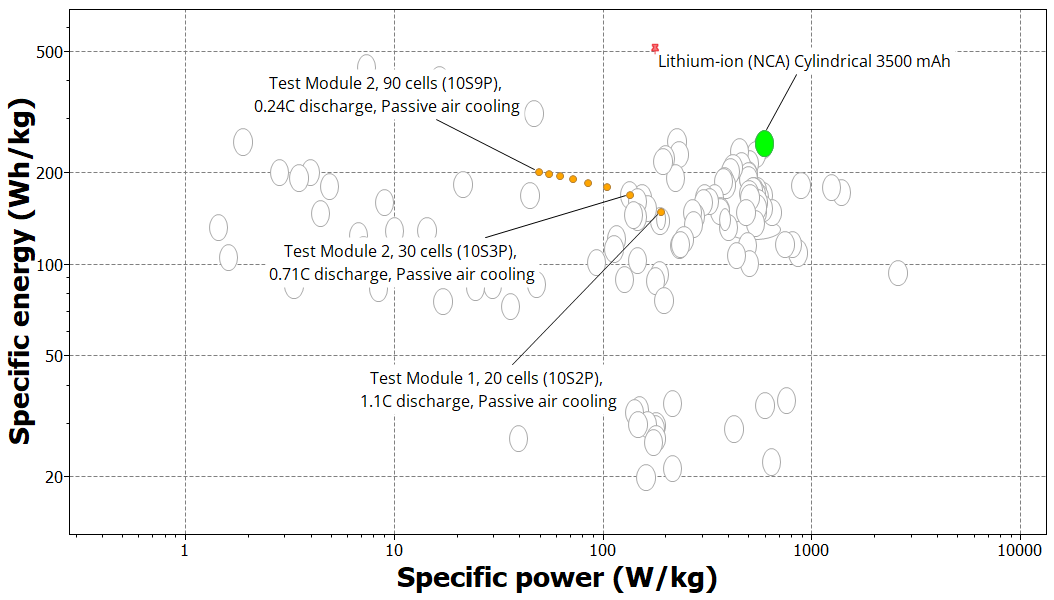
To reproduce this chart:
- Set Lithium-ion (NCA) Cylindrical 3500 mAh as the Reference record.
- Select
 Highlight
Synthesized Records and
Highlight
Synthesized Records and  Highlight Reference
Record on the Chart toolbar.
Highlight Reference
Record on the Chart toolbar.