
Inserting Additional Layout Component Instances
Once you have added a layout component to a design, you can insert additional instances of it easily, duplicating the definition of the first one.
To insert two or more instances of the layout component:
- Insert additional instances of the layout component using one of the following:
- Right-click 3D Components in the Project Manager and choose Insert Instance > {Layout_Component_Name}
- From the menu bar, select Draw > 3D Component Library > Insert Instance > {Layout_Component_Name}
- After inserting an instance, select it in the Project Manager and move it using standard modeling commands; see Editing the Placement of a Layout Component for more details.
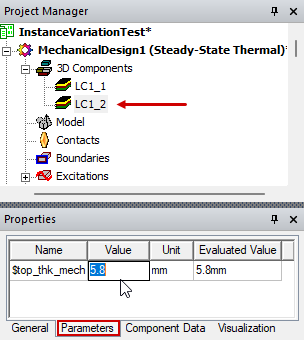
- Under 3D Components in the Project Manager, select the instance for which you want to change a mapped parameter (such as "LC1_2").
- In the Parameters tab of the Properties window, change the Value of one or more parameters and press Enter.
- Position the viewpoint and zoom in/out as required to clearly compare the geometry for each instance.
Instances of a layout component will be placed so that the component reference coordinate system is aligned with the current working coordinate system.
Note: For variations to occur between instances of the same component, at least one project or design variable must be defined and used in the source layout.
The geometry changes should be immediately visible in the Modeler window.
If you later decide to change any property in the layout component definition, use the Edit Definition function. However, be aware that changing the definition in this manner affects all instances of the component.