
Job Management Interface for Large Scale DSO
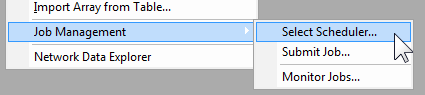
Large scale DSO jobs run only in non-graphical batch mode, irrespective of the scheduler environment. This is in contrast to a regular DSO job, which, in an RSM environment, can be launched from a graphical desktop. This consideration implies that an input project corresponding to large scale DSO job must be saved and closed, prior to job submission. Secondly, the command to submit a large scale DSO job is only available through the Tools > Job Management menu or a window. Right-click the parametric setup to run a regular DSO job in the RSM environment. The Job Management UI is accessed by running Ansys Electromagnetics Desktop on the designated postprocessing node of the cluster. The Desktop provides UI commands for scheduler selection, job submission and job monitoring/control. Select Tools > Job Management > Select Scheduler to access the Scheduler User Interface.
Click Select Scheduler to display the selection dialog box. A drop-down list displays potential schedulers, which can include RSM, or lsf, depending on the environment.
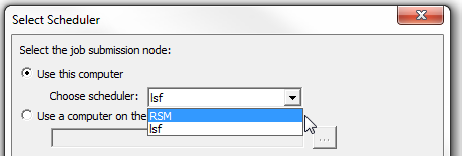
If you select a scheduler that is not supported in your environment, you will receive a warning message.
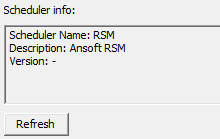
After selecting a scheduler, click Refresh to display information for that scheduler.
Once you have selected a scheduler supported in your environment, follow these steps to submit a large scale DSO job:
- Set up and prepare the model on a local workstation
- Launch Desktop. Open project, for example, /home/projects/spool/test.aedt.
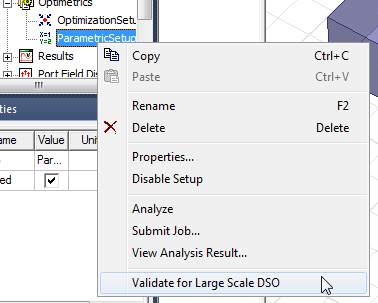
- Suppose the variations to solve come from ParametricSetup1
setup. Right-click ParametricSetup1 and run Validate for Large
Scale DSO. Fix any validation errors.
- Save the project, in case of edits.
- Close the project.
- Copy the input project (or folder, if the project references external files) from a personal workstation to a shared drive on cluster (say project is copied to /home/projects/spool/test.adsn).
- In the RSM environment, you must specify a machine list. See Setting HPC and Analysis Options. For example, if the machine list is: 3 cores from 'm1' and 3 cores from 'm2', for a total of 6 engines. Select the list on the Compute Resources tab described below.
- Open a remote desktop session (or equivalent such as vnc session) on the node corresponding to the first machine of job's machine-list, 'm1' in this case. Launch Desktop graphically on 'm1'.
- Optionally, double-check that the model is prepared correctly.
- Open project /home/projects/spool/test.adsn.
- Right-click ParametricSetup1 and run Validate for Large Scale DSO. Fix any validation errors.
- Save the project, in case of edits. Close the project
- Run Tools > Job
Management > Submit Job.
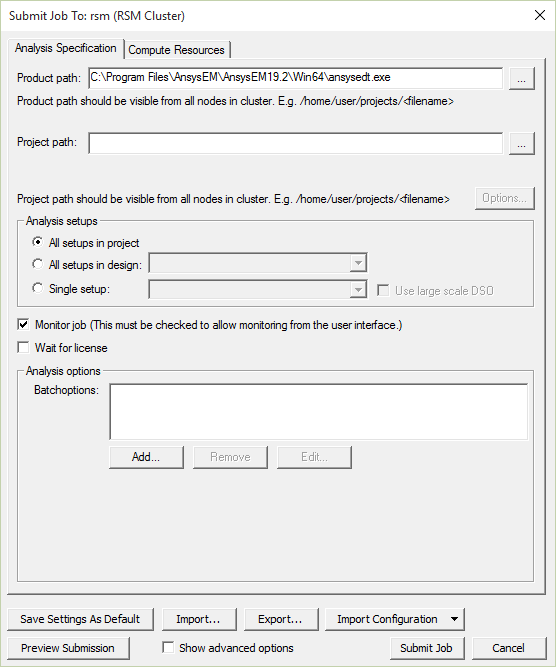
The standard job submission panel displays.
The panels for LSF and other schedulers have some differences. See Job Management User Interface for LSF.
- Enter all fields. Make sure to select ParametricSetupn
for analysis and select the Use large scale DSO check box.

- To see the command line submitted
to the scheduler, click Preview Submission. This opens a dialog
box showing the command to send to the scheduler.

The text can be copied to the clipboard.
- The Batchoptions field lets you add additional -batchoptions parameters.
- If you intend to monitor the job through a user interface, select Monitor job. You can then monitor this job by selecting Tools > Job Management > Monitor Jobs, or by checking the dialog box that opens when you submit the job.
- The Compute Resources tab displays other
parameters. Depending on the resources available for a scheduler environment,
some of the fields may be disabled.
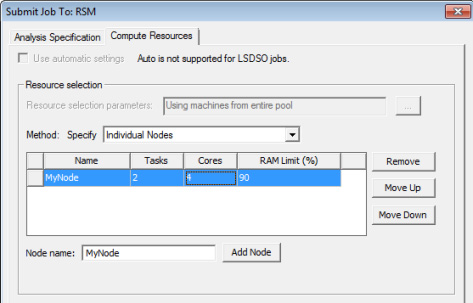
- Specify nodes.
- Total number of Tasks.
- Whether nodes are for exclusive usage by this job.
- Whether to limit number of tasks per node to a value.
This can be useful in situations where the amount of memory available for a node is limited relative to the requirements for the project, and you want to ensure sufficient memory per process.
- To submit the command with the specified
parameters, click Submit Job.
Note:
The RSM environment does not support queuing, so the job will immediately start running.
A dialog box displays in which you can Begin monitoring this job now.
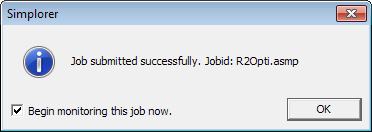
- You can monitor this job by checking the option, or with the Tools > Job
Management > Monitor Jobs command.
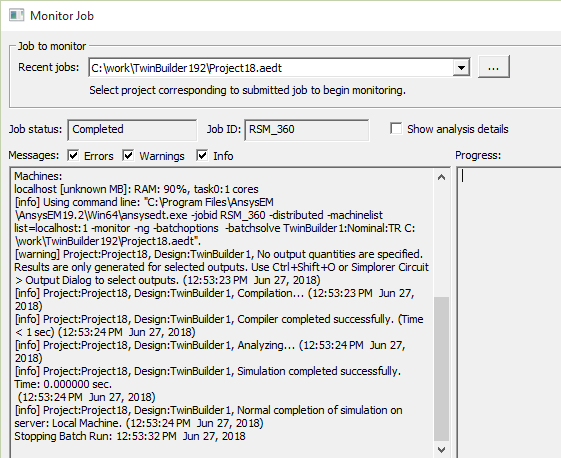
The dialog box contains fields reporting the job status, job ID, messages issues, and progress. You can filter the messages for errors, warnings, and info. You can Clear Progress Messages. You can refresh the job output manually or at specified intervals.
You can also perform a Clean Stop for a simulation between time steps, or Abort Job.
The process for submitting and monitoring large scale DSO jobs in the LSF environment is similar.
- Set up and prepare model on your local workstation:
Launch Desktop. Open project /home/projects/spool/test.adsn.
Suppose the variations to solve come from ParametricSetup1 setup. Right-click ParametricSetup1 and run Large Scale DSO/Validate. Fix any validation errors.
- Copy the input project (or folder, if
the project references external files) from your personal workstation to
a shared drive on cluster (say project is copied to /home/projects/spool/test.adsn).
In the scheduler environment, a cluster must have a designated postprocessing node. Open a remote desktop session (or equivalent such as vnc session) on the designated post-processing node. Say the name of this node is 'm1'. Launch Desktop graphically on 'm1'.
Optionally, double-check that the model is prepared correctly.
Open project /home/projects/spool/test.adsn.
Right-click ParametricSetup1 and run Large Scale DSO/Validate. Fix any validation errors.
Save project, in case of edits. Close the project.
- Run Tools > Job Management > Submit Job. The standard Job Submission panel pops up, which is documented as part of the scheduler-gui-integration feature.
- Enter all fields. Make sure to select ParametricSetup1 analysis and select the Use large scale DSO check box.
- Click Preview to check (and/or copy to clipboard) the job's command-line. Click Submit Job.
- Monitor this job through the Tools > Job Management > Monitor Jobs command. See Scheduler GUI Integration for details regarding the job submission and monitoring panels.