
Editing the Placement of a Layout Component
Once you have imported a Layout Component, you can move it using standard modeler operations. Modeler operations like Move, Rotate, and Mirror also apply to Layout Components. During these operations, snapping points can be helpful to set the start and end points of the move. Any visible object (layout component geometry and 3D geometry) will have snapping locations when in snap mode or when creating a CS. Note the following about layout component snapping:
- The snapping location of a layout component behaves the same way as that for a 3D component.
- All snapping types are supported, which include vertex, face center, edge center, edge quadrant, and arc center.
- If an object from a layout component is visible, its snapping locations will be turned on. Once the object becomes invisible, its snapping locations will be removed.
- Snapping locations are restricted to the top and bottom of layers.
To move a layout component, select one of its vertices snapping point as the start location and another 3D object’s vertex as the end location. The layout component will be moved from the start to the end location.
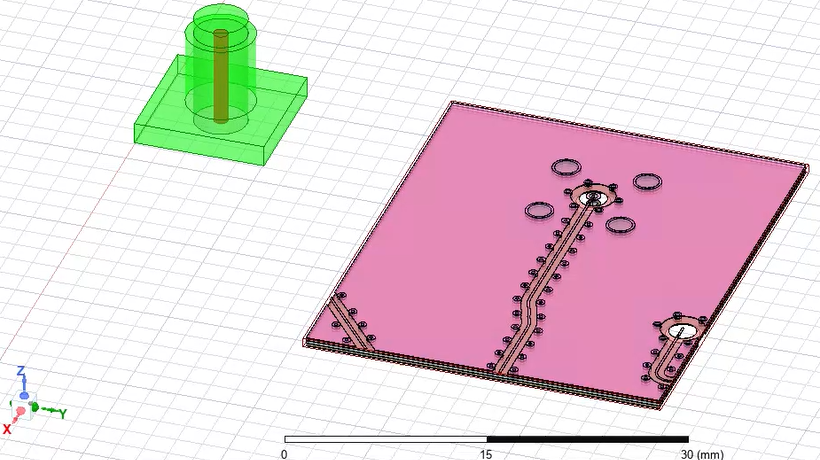
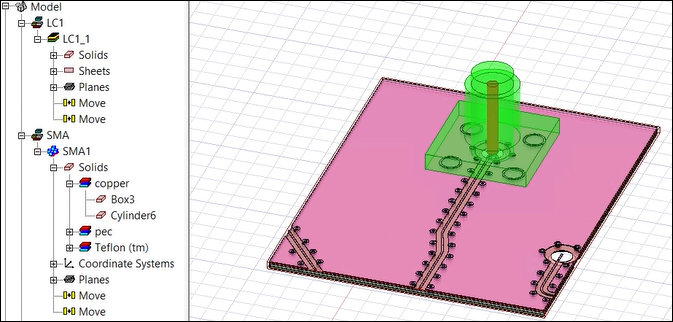
To demonstrate, we will have the example shown below. The green component is a 3D component, and the pink component is an imported layout component. In this example, you want to place the layout component under the 3D component so that its holes (in the middle of the component) are aligned with the hole from the 3D component.
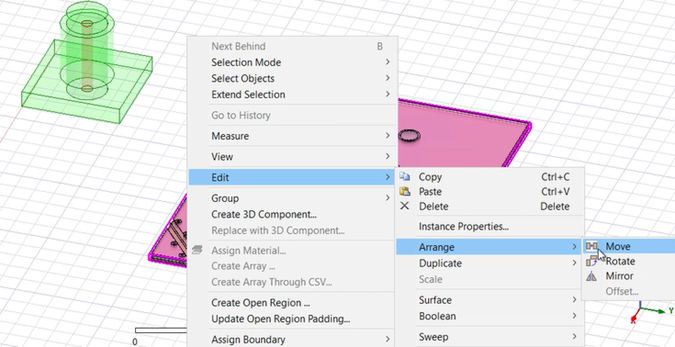
- Right click on the Layout Component, and select Edit > Arrange > Move.
-
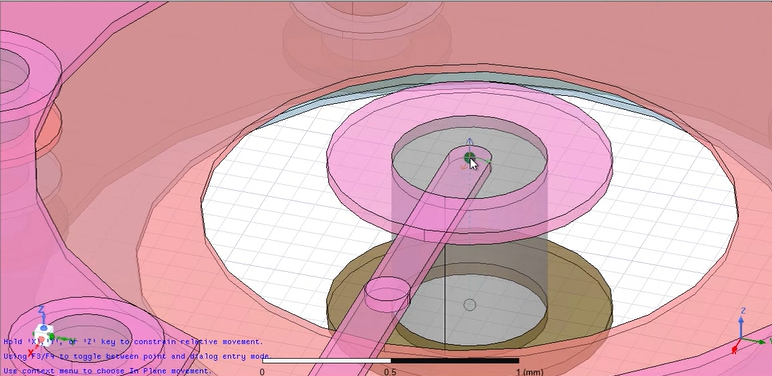
Zoom in on the center hole of the Layout Component, and a snapping point will appear. Click to select.
- Drag your cursor to the snap location where you want to move the layout component, and then click.
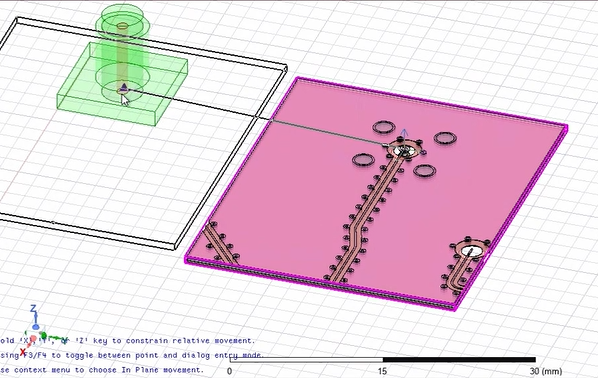
The layout component is now located underneath the 3D component.
For a detailed view of how to move a layout component, watch the following video: