
Wrap Sheet Command
You can use Modeler > Surface > Wrap Sheet command to wrap a sheet object around a suitable 3D object. The sheet object does not have to be in contact with the 3D object. It should have smaller dimensions than the 3D object.
When the sheet to be wrapped and the target body do not touch, the wrap sheet command chooses among several different methods for bringing them into contact.
- If an edge from the sheet body and the target body are close enough and at a small angle (10 degrees), the edges are brought into alignment before the wrap.
- If a vertex from the sheet body and an edge on the target body are close enough, the vertex is moved to the target edge.
- If the previous criteria are not matched, a vertex from the sheet body is moved to the closest face of the target body.
If both the sheet to be wrapped and the target face are both planar and have the same or opposite normal, the closest vertex from the sheet body is moved to the target face. No movement to or alignment of edges is performed.
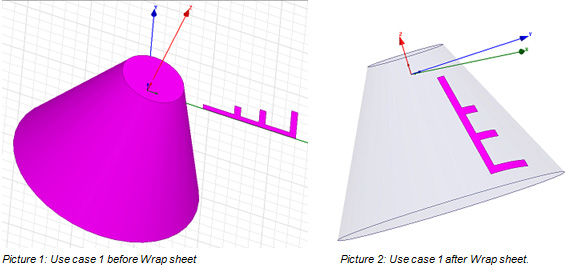
If the sheet body has multiple lumps, a single rectangle is fitted around all of the lumps. The rectangle is moved to the target surface using the above procedure.
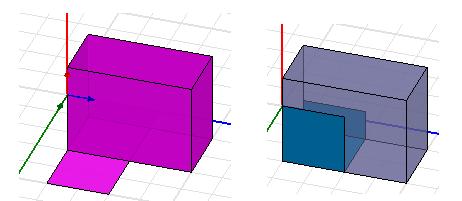
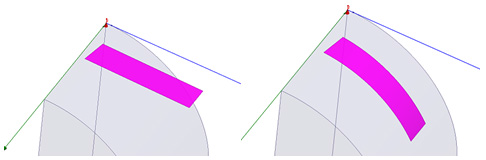
If the sheet object does not overlap the corners of the 3D object, the wrap is straightforward, as shown in the figure.
If you delete the 3D object, the wrapped sheet retains the form it took when wrapped.
A sheet object that overlaps corners may not wrap in straightforward fashion, depending on both the angle(s) involved, and the sheet object. While it is possible, it is not recommended.
Examples:
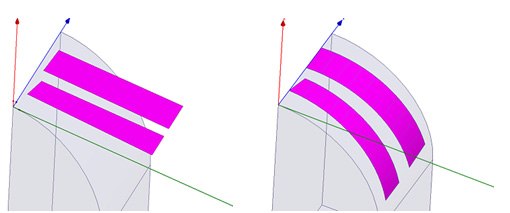
The following figure illustrates wrapping on a target surface with the snap to an edge. The surface will snap to an edge if close relative to length of edge. If the angle between the edge is less than 10 degrees, the edge to be wrapped will be aligned to the target body. In the example on the left, the lower sheet has an edge angle more than 10 degrees. The vertex will be snapped to the edge. The top sheet in the picture has an edge angle of less than 10 degrees. The vertex is snapped to the target edge and the sheet edge is aligned to the target. To avoid snapping to an edge or edge alignment the wrap sheet can be put into contact with the target surface. In that case the sheet will vertex will not be moved to target edge unless it is within modeling tolerances.
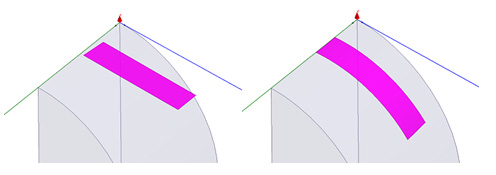
The following figure shows the situation when you move the edge to the edge before wrapping.
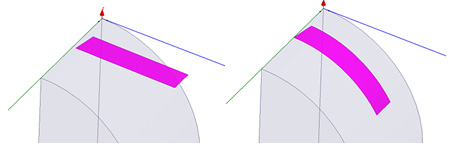
The following figure shows the situation when you move a vertex to an edge before wrapping.
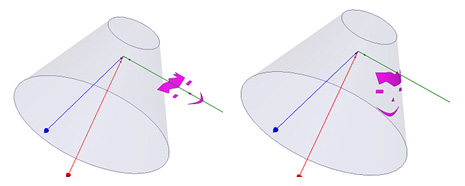
The following figure shows the situation where you move a vertex to a face before wrapping.
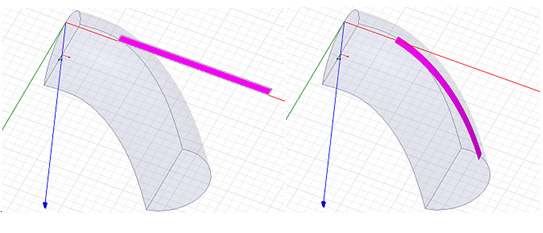
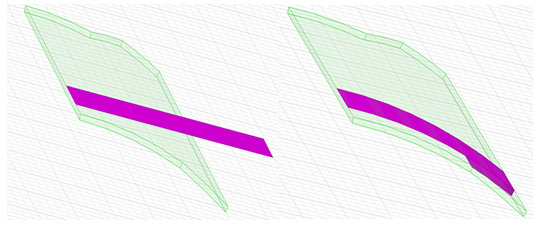
The figure below illustrates wrapping sheet onto cone. The sheet does not have line contact.
The following figure shows the situation when you move a multilump sheet to touch the target body.
The next figure illustrates wrapping to a non-developable surface. The area of sheet changed from 0.7000 mm2 before wrap to 0.6986 mm2 after.
The following figure illustrates wrapping on a target surface which has tolerant edges. The tolerant edge is at the beginning of the wrap. The tolerant edge is not evident visually.
Limitations/Error Conditions:
- Wrapping on non-developable surfaces creates distortion in lengths.
- Wrapping is not allowed across curved boundaries between faces.
- Working with tolerant edges will work only if the gaps can be tightened sufficiently for the operation.
- Wrapping on the pole of a surface (such as sphere or cone) is not supported. A warning is given: WrapSheet: Wrapping sheet contacted pole of target surface. Recommend moving sheet and splitting out pole from target surface.
- The choice of method for how the sheet body is moved to touch the target face is not directly selectable by the user. If the sheet to be wrapped and target body touch, then the sheet body is only rotated at point of contact.
To wrap a sheet object:
- Create a sheet close to an appropriate 3D object.
- Select both objects.
- Click Modeler > Surface > Wrap Sheet.
The sheet object wraps around the 3D object. You can select the wrapped sheet object and the 3D object separately, and assign properties separately.
If the object cannot wrap, the Message window contains a warning and description.
You can wrap multiple sheets on the same 3D object.
If you delete the 3D object, the wrapped sheet retains the form it took when wrapped.
You can use the Tools > Options > Modeler Options to automatically perform a Modeler > Boolean > Imprint command after performing a Wrap.