
Coupling Maxwell with Ansys Motion (Stand-Alone)
Direct cosimulation between Maxwell and Ansys Motion makes possible magnetic latch modeling, which is typically used for modeling magnetic latching structures such as magnetic chargers used by mobile devices. Ansys Motion is the primary (controlling) design, while Maxwell serves as the secondary design. During the cosimulation, Motion provides objects position data to Maxwell, then Maxwell feeds force/torque data for these objects back to Motion.
The suggested workflow for magnetic latch modeling using cosimulation with the Ansys Motion stand-alone preprocessor and Maxwell is outlined in this topic.
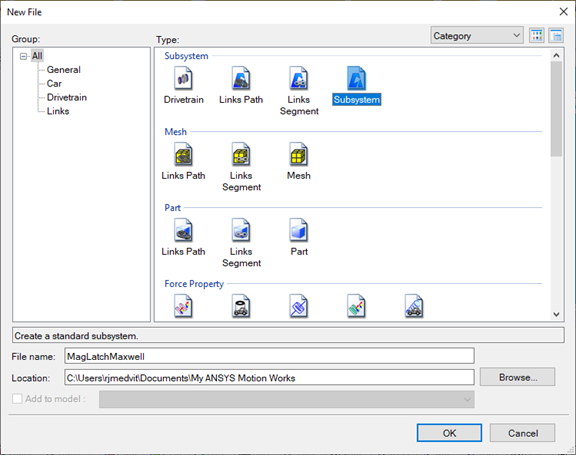
- In Ansys Motion Preprocessor, create a new Subsystem file for which you specify a project path and project name.
- Import a CAD file of the model. You can modify object properties such as materials as needed.
- After creating the model, Group objects of interest that have position changes and/or need force/torque calculations in the Maxwell design.Note: For performance considerations, it is recommended that you not perform force/torque calculations on all objects.
- On the Ansys Motion Preprocessor Force tab, click the Magnetic button, pick the desired Groups, then click OK. In the Magnetic dialog box enter the desired Interface Step Factor (in seconds) or accept the default 0.01. This sets the Maxwell simulation rate. The Coordinate System assigned to each group defaults to center-of-mass.
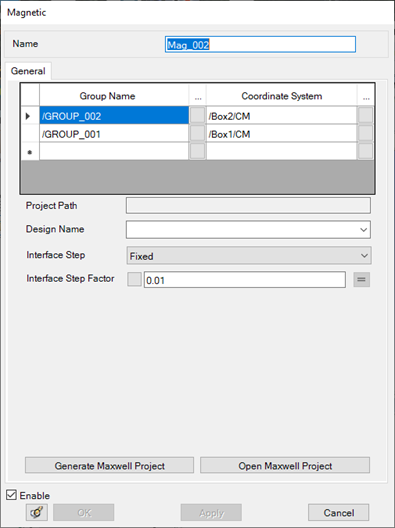
- Click Generate Maxwell Project. A Maxwell desktop will be launched automatically with the generated Maxwell magnetostatic design, which includes the following:
- The model geometry (including necessary coordinate systems)
- If a Material is not found in the Maxwell system or user libraries, a new material with the default properties of vacuum will be created.
- Force/torque calculation setups
- A [default] Solve setup
- Data table for force/torque parameters
- Field plot for magnetic objects
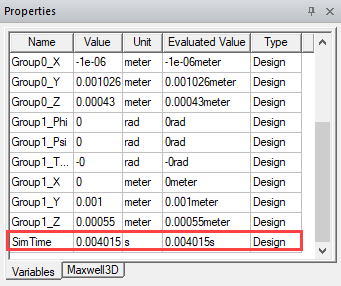
- Ansys Motion passes the Motion solve timestep as a variable named SimTime to Maxwell. Excitations can be created depending on this variable.
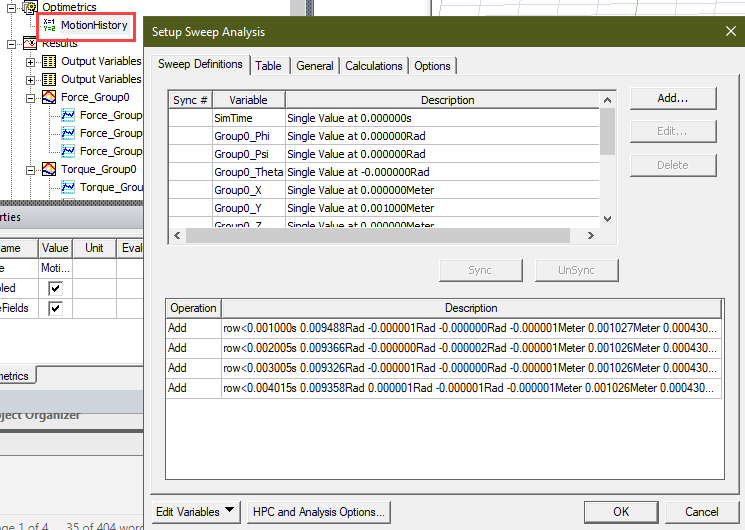
A parametric setup called MotionHistory will be automatically created and will be updated for each timestep, keeping a table of variations for all the simulation steps. This data can be used to create an animation of all the simulation steps.
- Optionally, you can customize various settings manually in Maxwell, such as:
- Material properties for objects, especially characteristics for permanent magnets
- Excitations can be created dependent on the SimTime variable.
- Coordinate system settings
- Mesh setup
- Solve setup
- After the setups on both Ansys Motion and Maxwell (if any) are completed, you can start the cosimulation solve in Motion by selecting Simulation > Run on the Home tab.
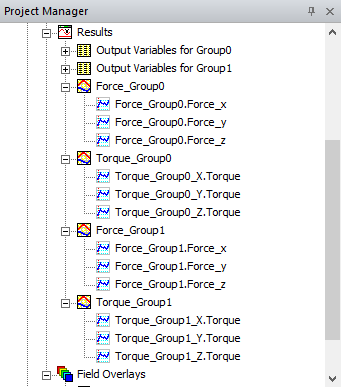
- After cosimulation is completed, Maxwell Project Manager Results should show two reports for each group, one for force, one for torque. The reports plots are force/torque against SimTime.
- Optionally, you can create an animation of all the simulation steps. A parametric setup called MotionHistory is automatically created and updated for each timestep, keeping a table of variations for all the simulation steps.
- Optionally, to create an animation using the automatically generated MotionHistory parametric setup:
- Right-click on the desired field plot and click Animate…
- In the Create Animation Setup dialog, select Parametric setup in the first box, then select the parametric design called MotionHistory in the second box.
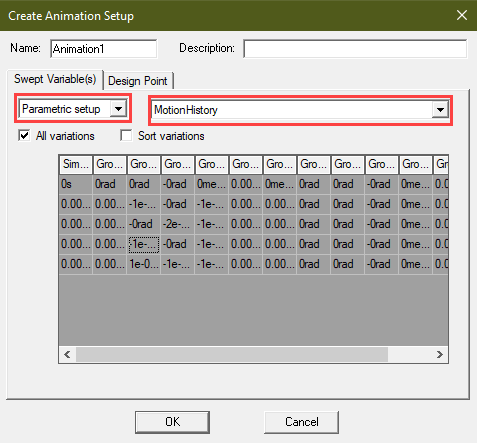
- Click OK to create the animation.
Related Topics