
Editing a 3D Component Definition
The Edit Component definition feature allows you to create new version of component definition just by using previous 3D component file. This should also allow you to quickly create new version without having to go through all the creation steps. For 3D Components that are not encrypted you can edit the definition. Software will automatically create new project in the existing session. The Project will have one design of same type as original design from which edit definition was initiated. All 3D component data from the file will be read in ‘exploded’ form in that design. Component materials will be added at the project level, variables will be added at the project and design level, geometry will create detailed history for all objects in the component and design data will be added to respective folder in the project tree in the detailed form.
The Edit Definition command creates a new project named for the component. You can see the project in the Project Manager window.

You can then edit this new project. When you save the edited component, you see an Update 3D Component dialog including radio buttons for whether you want to save the edited component as a local instance, or to the original library.
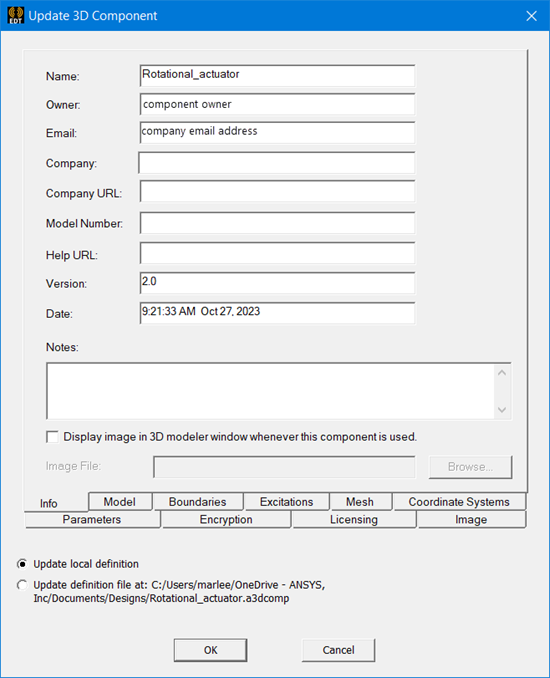
If you select Update local definition, any changes you make apply only to the local file. If you choose Update definition file at: <path> to save the component to the definition file in your library, you can Update 3D Component Definition for other component instances inserted in your designs.
To edit a 3D Component definition.
- You can begin editing a 3D component definition from either the History tree or the Project tree.
- To begin from the History tree, select the component, and right-click to display the shortcut menu and click Edit Definition.
For unencrypted components, this creates a new project in the Project window named for the component. For encrypted components, you must first supply the edit password.

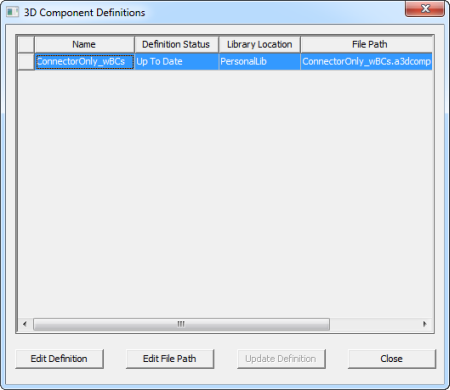
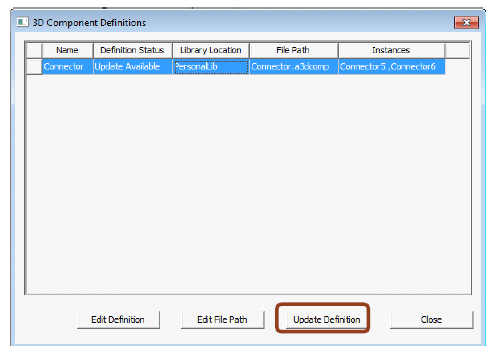
- To begin from the Project window, select the 3D Components icon and right-click to display the short cut menu. Then select Definitions.
This displays the 3D Component Definitions window in which you can select the component and then click Edit Definition.
-
For 3D Components that are not encrypted, you can edit the definition. Software will automatically create a new project in the existing session. The Project will have one design of same type as the original design from which edit definition was initiated. You can now edit the design with component data as required without any restrictions. All the component details are available in their respective folders. Complete geometry history is available in history tree. Material properties are added to the project definition folder. Boundaries, excitations, etc., go to their respective folders in the project tree and component parameters become project or design variables.
-
You can use File>Save to update the original component definition file. The Update 3D Component dialog will come after File>Save.
The Update 3D Component dialog is populated with all entities - objects, boundaries, excitation etc. in the “component-edit” design. In addition, previous settings like reference coordinate system, component name, owner etc. from the Info tab, as well as encryption settings, are preserved. You can also select whether to Update local definition (for local editing) or Update definition file at: <path> to update the component library, which will affect other instances when updated.
If you use File/Save As to save to a new component definition file, you also have the option to Save As Ansys Electronics Desktop file.
-
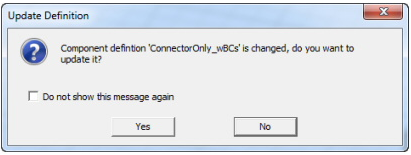
Once you have saved the updated component version, you can go back to the original design and update all the instances using that component. Note that update definition is not automatic even though component definition edit was triggered from that design. Instead when an assembly design becomes active, it prompts you to update the 3D component definition. You can then select to update the definition.
-
After editing is done, you also select the model and then use the Create 3D Component command.
See Creating a 3D Component from an Existing Model.
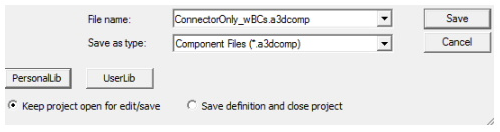
The component data is loaded from component definition file. The Info tab version automatically increments. Before saving, you have the option to Keep project open for edit/save, or Save definition and close project.
-
You can select Edit File Path to update the file path for component definition. This opens a browser window that lets you navigate your file system and select a file path to be used for the new component definition.

You can also open the 3D definitions window to select a component, and view the Definition Status column. If an update is available, you can select the component and click Update Definition.
See Update 3D Component Definition for more details.