
Creating a User-Defined Primitive
The modeler allows you to generate user-defined primitives customized to suit any application. User-defined primitives are accessed using DLLs that you build and compile. When user-defined primitives exist in your UserLib or Personal directory (given the paths specified in Tools > Options > General Options > Directories tab), they appear in the Draw > User Defined Primitives menu. Newly created UDPs will appear after a restart, or Draw > User Defined Primitive > Update Menu.
Example C++ source and header files that can be used to generate DLLs are located in the /UserDefinedPrimitives/Examples subdirectory under the Ansys Electromagnetics Suite installation directory.
As an example, create the primitive myUDP.dll using Microsoft Visual C++ Developer Studio:
- Create a directory to store all of the workspace information, call it UDPDir.
- Use the sample workspace RectangularSpiral.dsw as a template:
- Copy RectangularSpiral.dsw and RectangularSpiral.dsp from the /UserDefinedPrimitives/Examples directory to this new directory.
- Make sure the new files have write permissions.
- Rename the files to myUDP.dsw and myUDP.dsp respectively.
- Open the .dsw and .dsp files in a text editor, and replace every occurrence of RectangularSpiral with myUDP.
- Save myUDP.dsp and myUDP.dsw.
- In the UDPDir directory, create a Headers subdirectory.
- Copy the UserDefinedPrimitiveStructures.h and UserDefinedPrimitiveDLLInclude.h files from the /UserDefinedPrimitives/Headers directory.
- In the UDPDir directory, create a Sources subdirectory.
- Use the sample source file RectangularSpiral.cpp as a template:
- Copy RectangularSpiral.cpp from the /UserDefinedPrimitives/Examples directory to this new directory.
- Make sure the new file has write permission.
- Rename the file to myUDP.cpp.
- Open myUDP.dsw using Microsoft Visual C++ Developer Studio, and edit the source code to create your desired primitive. You may also add additional headers and source files as appropriate.
- Build myUDP.dll using the Win32 Release configuration.
- Copy the resulting file myUDP.dll to the [ProductInstallationPath]/userlib/UserDefinedPrimitives directory.
- To view your primitives, click Draw > User Defined Primitive > Update Menu and then click Draw > User Defined Primitive > UserLib or Draw > User Defined Primitive > PersonalLib.
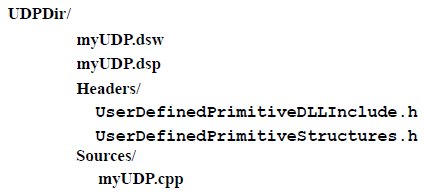
The resulting directory structure will appear similar to the following:
The UDP dll contains a data structure called UDPPrimitiveTypeInfo. This contains information about the UPD, its purpose, company/author who created it, date created, and the version number. When you select a primitive from your library, you see the Create Primitive dialog box with a Parameters tab for setting the parameters, and an Info tab with the information from this data structure.
Optionally, copy the resulting file to the UserDefinedPrimitives directory in your PersonalLib. The PersonalLib directory path is specified on the Directories panel under General in the Options window.
As with the Windows DLL, the compiled library will work only on the operating system on which it was built.
Related Topics
User-Defined Primitives for Motor Geometries
Drawing a Spiral Using User-Defined Primitives
Drawing a Segmented Helix with Polygon Cross-Section Using a User-Defined Primitive
Drawing a Segmented Helix with Rectangular Cross-Section Using a User-Defined Primitive