
Sweeping Along a Vector
Sweep a 1D or 2D object along a vector using the Draw>Sweep>Along Vector command.
- Select the object you want to sweep.
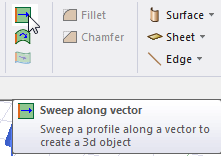
- Click Draw> Sweep> Along Vector or, in the Draw ribbon tab, click Sweep along vector:
- Draw the vector you want to sweep the object along:
- Select the start point by clicking the point or typing its coordinates in the X, Y, and Z boxes.
- Select the endpoint in one of the following ways:
- Click the point.
- Type the coordinates of a point relative to the start point in the dX, dY, and dZ boxes, where d is the relative distance from the previously selected point.
The Sweep along vector dialog box appears.
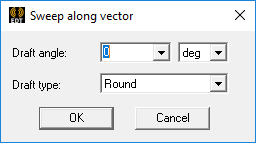
- Type an angle into the Draft angle text box and select the desired unit of measure.
This is the angle to which you want a 2D object's profile, or shape, expanded (positive angle) or contracted (negative angle) as it is swept. Among other purposes, drafts make it easy to remove molded or cast parts from their molds.
For 1D objects, the draft angle alters the sweep direction but does not alter the length of the object as it is swept. For example, a 10 mm straight line swept with a 5-degree draft angle does not produce a trapezoidal 2D object. It produces a rectangle with a constant 10 mm width but tilted 5 degrees relative to the specified sweep vector.
- Select one of the following Draft type options from the drop-down menu. The draft type instructs the modeler whether to maintain the original object shape and how to transition between adjacent faces. This setting affects the results when sweeping 2D objects into 3D solids or when sweeping lines and curves into 3D sheets.
- Extended
- Round
- Natural
For a complete description of the behavior of each of these three options, see the Draft Types page.
- Click OK.
The object is swept along the vector. The new object has the name and color of the original profile. The Properties dialog box appears, enabling you to modify the object's properties.