Editing a 3D Component Definition
The Edit Definition feature allows the user to create new component definition using an existing, unencrypted 3D component file. This speeds up the task of creating new versions of components without having to start from the beginning. When Edit Definition is initiated, Electronics Desktop automatically creates a new project containing all 3D component data from the file in ‘exploded’ form. Component materials are added at the project level; variables are added at the project and design level; a detailed history is created for all objects in the component; and design data is added to the appropriate folders in the Project Manager.
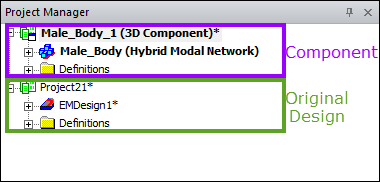
The Edit Definition command creates a new project, named for the component, in the Project Manager window.

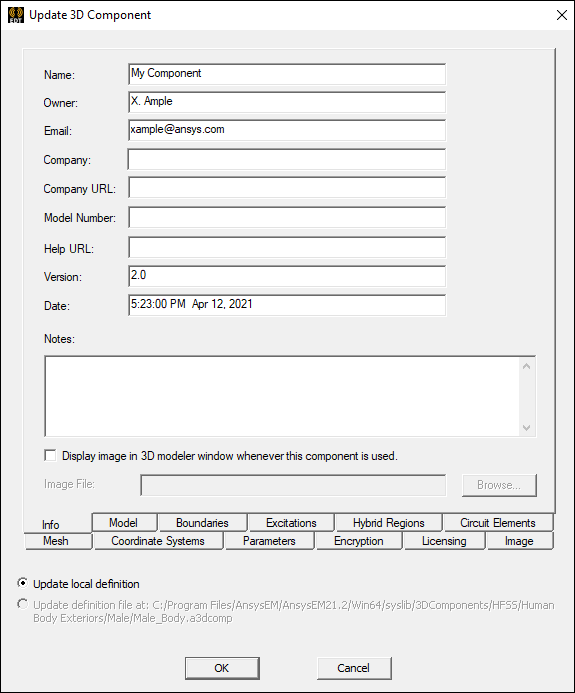
When the edited component is saved, an Update 3D Component window appears. From the Update 3D Component window, choose whether to save the edited component as a local instance or to the original library. To edit a 3D component definition:
- Navigate to the Edit Definition window by following one of the following paths:
- From the History Tree, right-click the component and select Edit Definition.
- From the History Tree, right-click an instance under the component and select Components > Edit Definition.
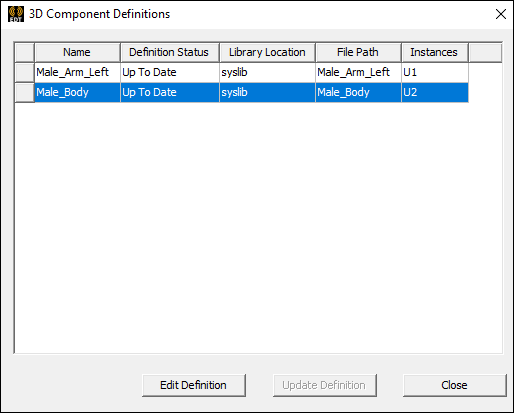
- From the Project Manager, right-click 3D Components and select Definitions to open the 3D Component Definitions window. From the 3D Component Definitions window, select a component and click Edit Definition.

Regardless of which path is taken, a copy of the 3D component opens in the Layout Editor, and a new project folder appears in the Project Manager window, containing a copy of the original design.
- Edit the component as desired.
- To save the component as a new component (*.a3dcomp) or as its own Electronics Desktop (*.aedt) file, click File > Save As. Specify a file name and destination and click Save.
- To save the component in the current project or for all projects, click File > Save to open the Update 3D Component window.

This window is populated with all entities (objects, boundaries, excitations, etc.) in the component design.
- Use the radio buttons to select one of the following options:
- Update Local Definition – updates the component definition for use in the original design only.
- Update Definition File At <Path> – updates the component in the component library, affecting all other instances.
- Click OK.
Verifying Updates to Components
To verify that a component has been edited:
- Access the 3D Component Definitions window:
- From the Project Manager, right-click 3D Components and select Definitions.
- Click Close to exit the window.
The Definition Status column shows "Locally Edited" for any altered components.

Updating Definitions
Once the updated component is saved, return to the original design and update all instances of that component. See: Updating 3D Component Definitions.
To update a component's definition:
- Access the 3D Component Definitions window:
- From the Project Manager, right-click 3D Components and select Definitions.
Components with updates available display "Update Available" in the Definition Status column.
- Select the desired component and click Update Definition.
- Click Close to exit the window.
