


Ansys Rocky Virtual Desktop
Ansys Rocky is supported on Windows and Linux virtual desktops.
To prepare an Ansys Rocky virtual desktop, follow the instructions below. Note that some manual configuration is required once the virtual desktop is created to couple Rocky with Fluent (included in instructions).
To be able to add resources to a project space, you must be a tenant administrator or have Admin permission in the project space. To be able to use resources in a project space, you must have a basic set of permissions in the project space (View, Start, Connect, and Stop). For more information see Setting User Permissions in a Project Space in the Administration Guide.
On the project space page, select .
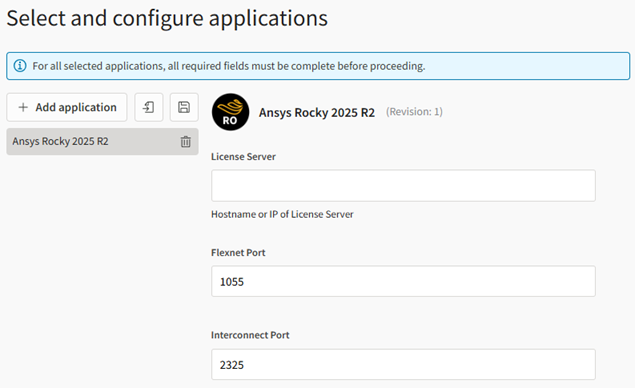
Step through the wizard using the following guidelines for your selections:
Operating system: Windows or Linux
If creating a Linux virtual desktop using the Rocky Linux by CIQ image, see What You Should Know About the Rocky Linux OS Image by CIQ in the Administration Guide.
Application: Ansys Rocky
If you are creating a Linux virtual desktop, you should add either KDE Desktop Environment or GNOME Desktop Latest Version to the list of applications to be installed.
For the Ansys Rocky application, specify the Interconnect Port number (if it is different than the default port number).
 Note: Ansys recommends that you create the virtual desktop without any applications, and then add the application after the virtual desktop has been created. See Adding Applications to a Virtual Desktop in the User's Guide. Sometimes, Windows updates are triggered on newly created virtual machines, causing application installation to fail.
Hardware: A VM size with a GPU is recommended:
- NCv3 series (based on NVIDIA V100)
- NCasT4v3 series (based on NVIDIA T4)
NVadsA10v5 series (based on NVIDIA A10G)
(only supported with GRID driver)
In the GPU driver options, GRID drivers are recommended for accelerated graphics. For GPU compute, both GRID and Tesla drivers are supported.
For information about GPU driver options, see NVIDIA GPU Driver Support.
When the resource is in the Running state and the Connect button is displayed, connect to the virtual desktop. See Launching a Virtual Desktop Session in the User's Guide.
To couple Fluent and Rocky, perform the configuration step that applies to your virtual desktop:
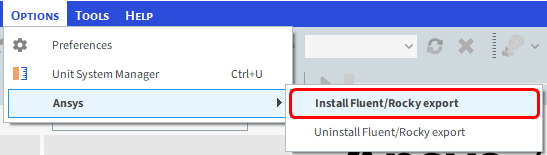
Windows virtual desktop:
From the Rocky program's Options menu, select
Linux virtual desktop:
Open a Terminal and run the following, replacing ### with the applicable version number (for example, 252 for 2025 R2):
sudo chown $USER:$USER /ansys_inc/v###/rocky/Rocky.desktop
sudo chown $USER:$USER /ansys_inc/v###/rocky/RockyScheduler.desktop
export ANSYS###_DIR=/ansys_inc/v###/ansys
Example for 2025 R2:
sudo chown $USER:$USER /ansys_inc/v252/rocky/Rocky.desktop
sudo chown $USER:$USER /ansys_inc/v252/rocky/RockyScheduler.desktop
export ANSYS252_DIR=/ansys_inc/v252/ansys
The first two lines enable the launch for both Rocky and Rocky Schedulers shortcuts. The third line sets the environment variable for Fluent coupling.
If you need to transfer files to the virtual desktop, see General Guidelines for Transferring Files in the User's Guide.
For information on using Rocky, refer to the Rocky documentation on the Ansys Help site.