


Creating a chart stage
Plot materials data using the Chart/Index Stage, and edit the axis settings of your new chart.
To create a new chart stage:
-
Under Selection Stages, click
 Chart/Index.
-
Set the Axis Settings:
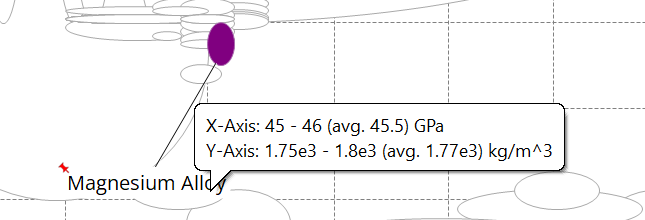
Option Description Axis Title By default, the Axis Title is the name of the selected attribute. You can edit this, if required. Absolute values / Relative values If a reference record has been set, you can select Absolute values to display values on the chart as absolute numerical values:
Alternatively, select Relative values to display values relative to the reference record, so that the chart is plotted with the reference record at (1,1).
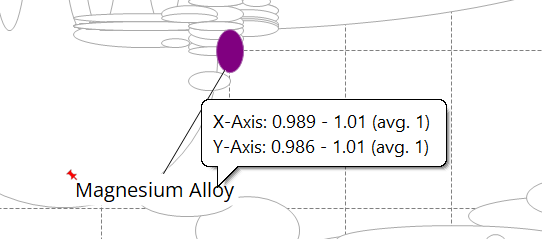
This allows easy comparison of other material records to the reference record.
Axis scale If the attribute to be plotted is numeric, you can set the axis scale type and range. Set the scale type to Logarithmic or Linear. - To let the range for the scale be calculated automatically, click Autoscale.
- To set the range for the scale manually, click Set and type in the minimum and maximum values.
Note: A warning will appear on a chart axis if a selected attribute contains negative values that cannot be plotted on a log scale.