


The definition of checklist templates is part of the general project property settings. Click on the entry "Properties" in the context menu of a project's top node and choose the category "Checklist templates" in the upcoming dialog to see the list of all available checklist templates for the current project.
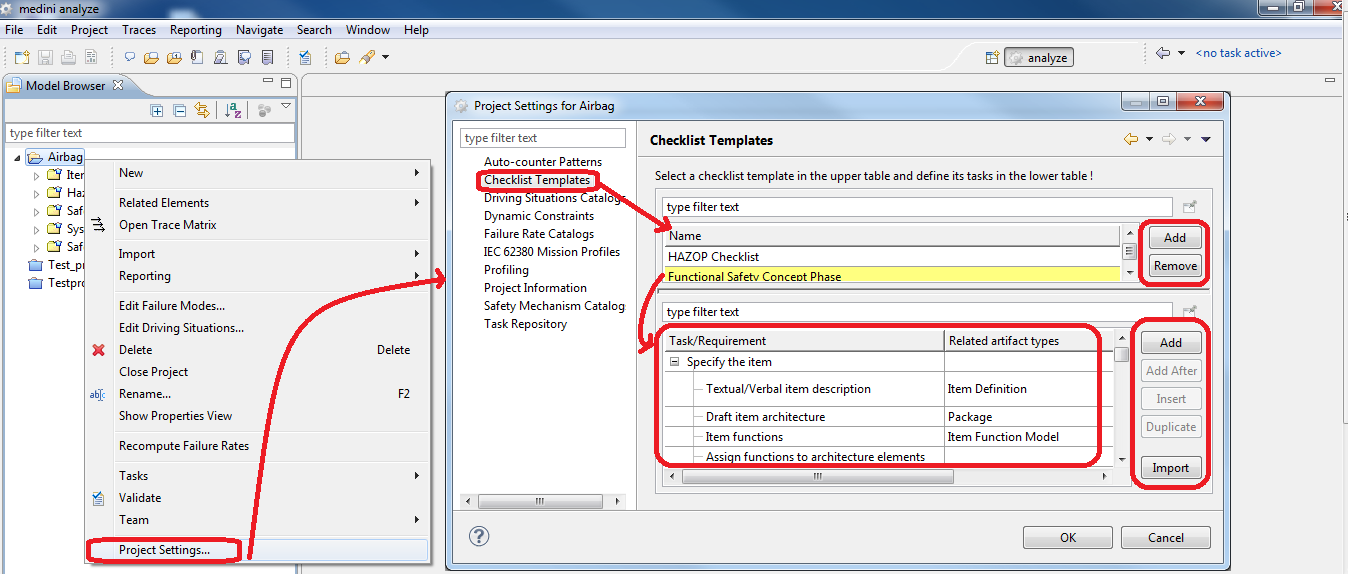
Use the "Add"- and "Remove"-buttons on the right side of the table on the top to create a new checklist template or to remove an existing one from the project. The selected template itself and its content will be shown in the lower table.
Each checklist template consists of a list of to-do-tasks or requirements. The following actions can be carried out by a user using the buttons on the right side of the lower table:
Creation of a new entry in the table using the "Add"- or "Add After"-button or by duplicating an existing entry
Creation of a new sub-entry for a selected entry using the "Insert"-button
The hierarchy of such sub entries will be visualized in the table
Deletion of the selected entry using the "Remove"-button.
Please note this will also remove all sub-entries of the selected entry.
Importing a checklist template in CSV/Excel-format using the "Import-CSV/Excel"-button (see Import of data in Excel/CSV-Format for more details)
Changing the order and/or hierarchy of entries using the arrow-buttons.
The entries in a checklist template consist of a description of the task or requirement and of the optional specification of the types of related artifacts. After creating a new entry in the table you can directly type in the description. When clicking into the corresponding cell in the "Related Artifact types" column, a new dialog opens. There you can select one or multiple artifact types which should be related to the current task resp. requirement. Close the dialog with "OK" and the chosen selection will be shown in the checklist template.